-
Docs
-
Bring Your Own LLM Model
By default, when asking a question to Navie, your code editor will interact with the AppMap hosted proxy for OpenAI. If you have a requirement to bring your own key or otherwise use your own OpenAI account you can specify your own OpenAI key; this will cause Navie to connect to OpenAI directly, without AppMap proxy acting as an intermediate.
- Navie AI Recommended Models
- Bring Your Own OpenAI API Key (BYOK)
- Bring Your Own Model (BYOM)
- Examples
Navie AI Recommended Models
AppMap Navie AI recommends avoiding models that do not support chat mode.

Bring Your Own OpenAI API Key (BYOK)
Navie AI uses the AppMap hosted proxy with an AppMap managed OpenAI API key. If you have requirements to use your existing OpenAI API key, you can configure that within AppMap. This will ensure all Navie requests will be interacting with your own OpenAI account.
Configuring Your OpenAI Key
In your code editor, open the Navie Chat window. If the model displays
(default), this means that Navie is configured to use the AppMap hosted OpenAI proxy. Click on the gear icon in the top of the Navie Chat window to change the model.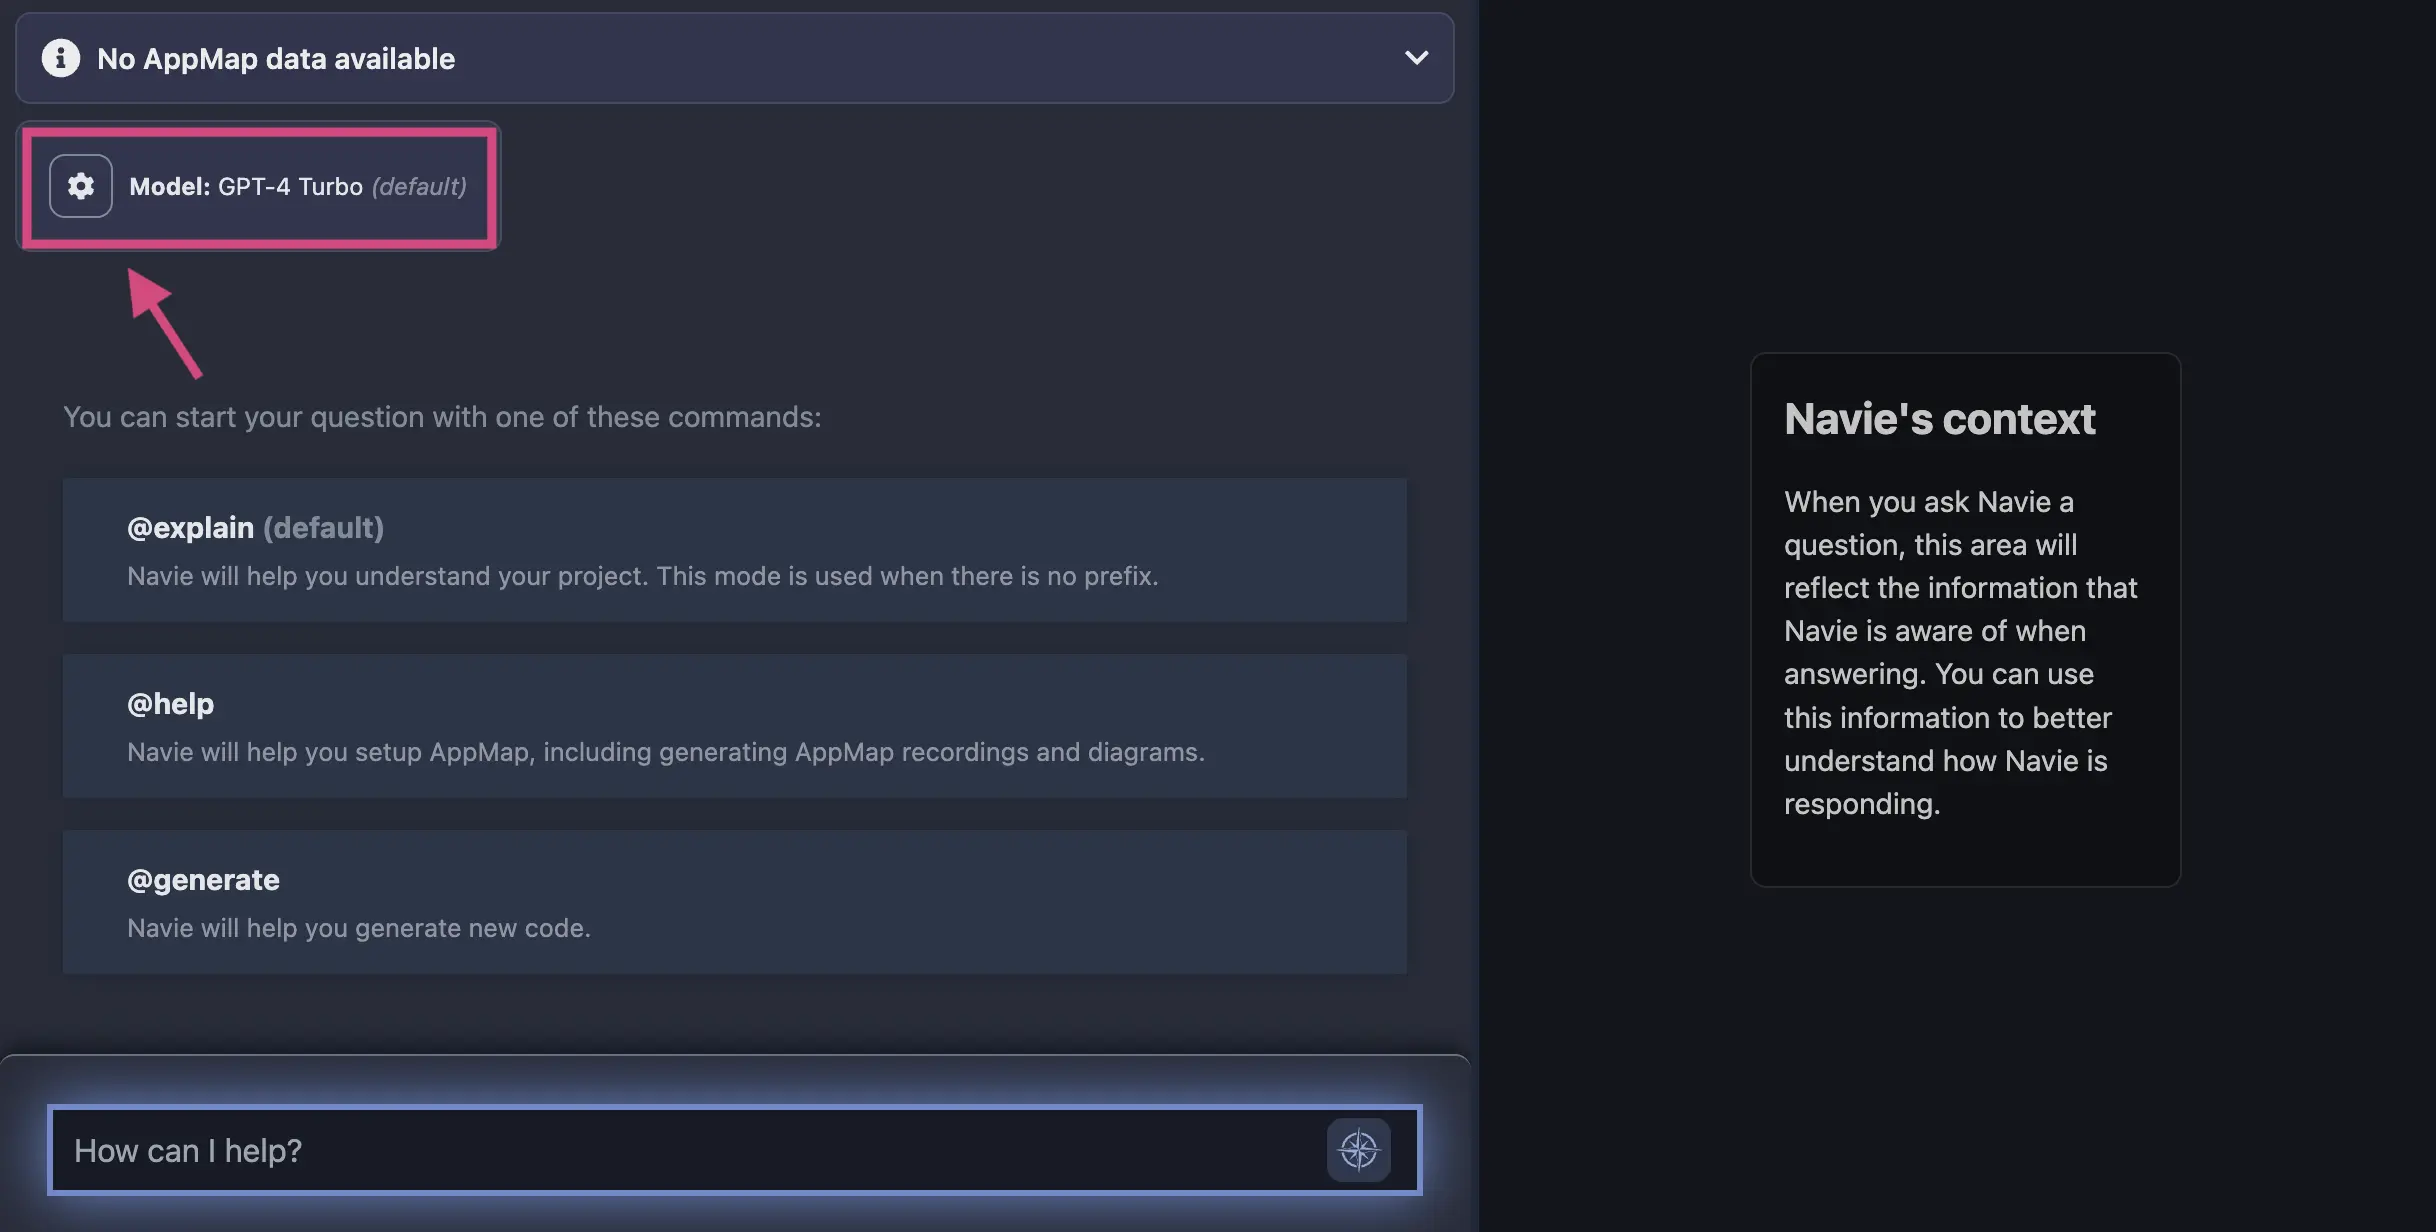
In the modal, select the option to
Use your own OpenAI API key
After you enter your OpenAI API Key in the menu option, hit
enterand your code editor will be prompted to reload.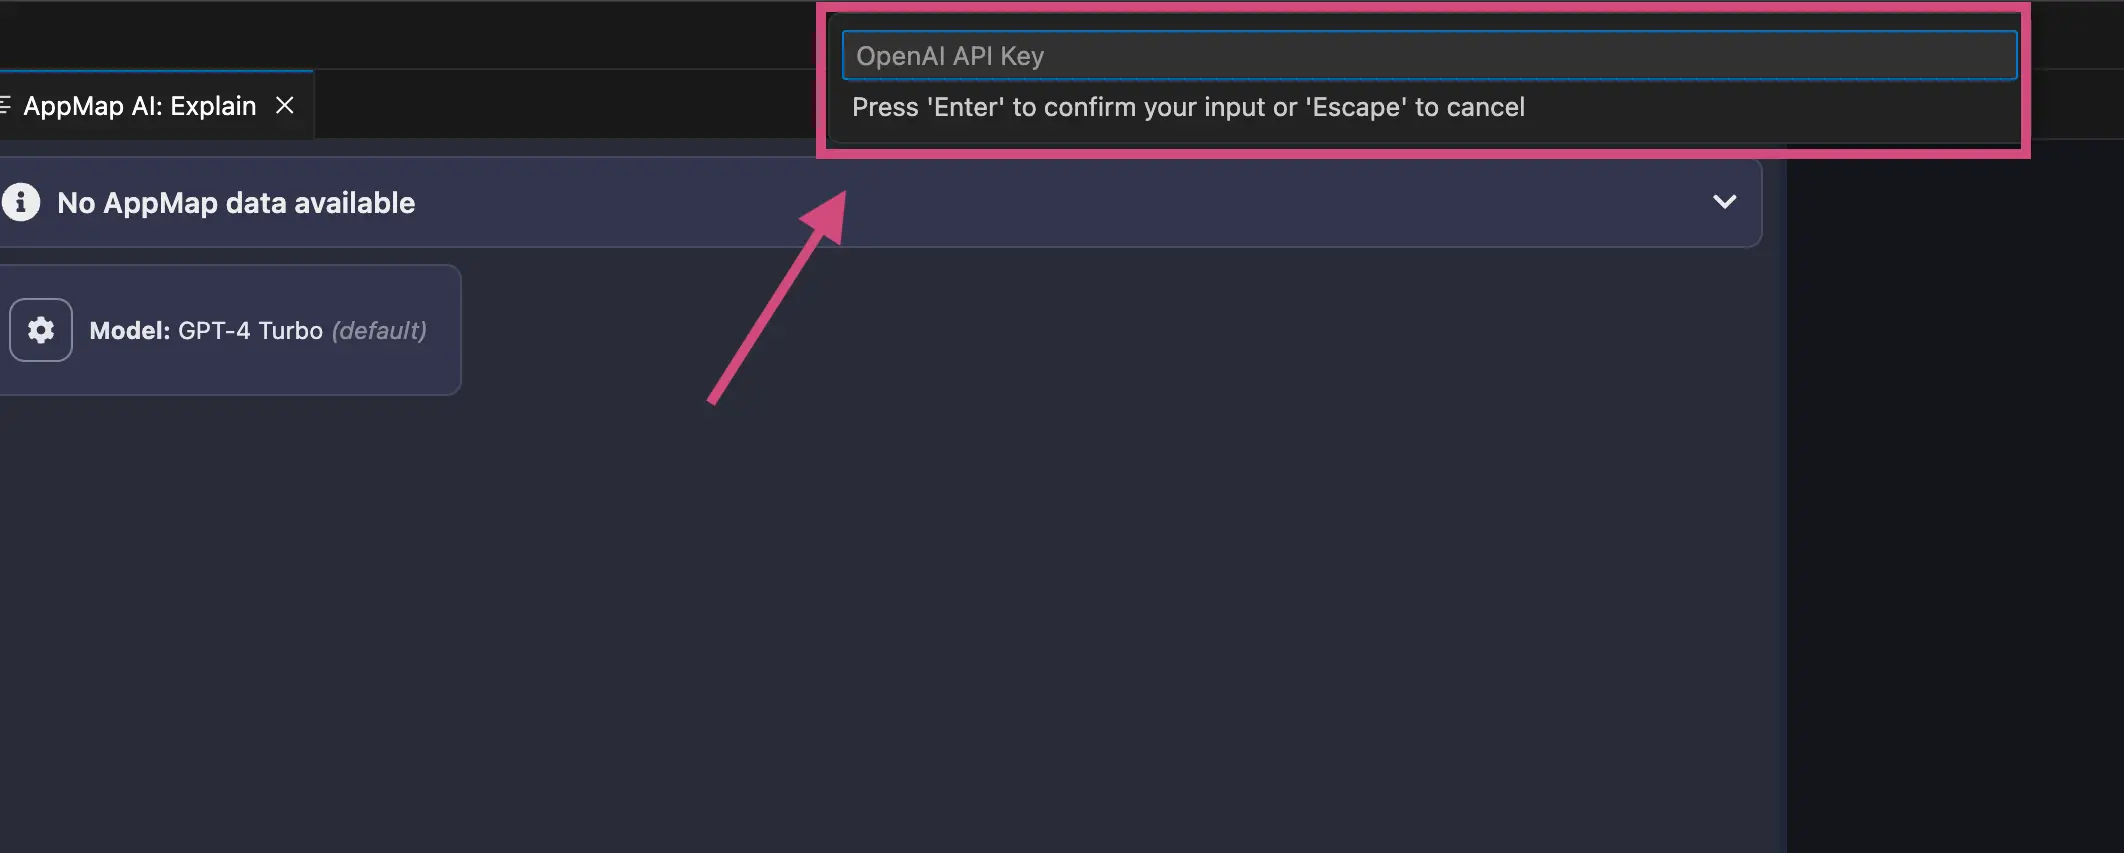
After your code editor reloads, you can confirm your requests are being routed to OpenAI directly in the Navie Chat window. It will list the model
OpenAIand the location, in this casevia OpenAI.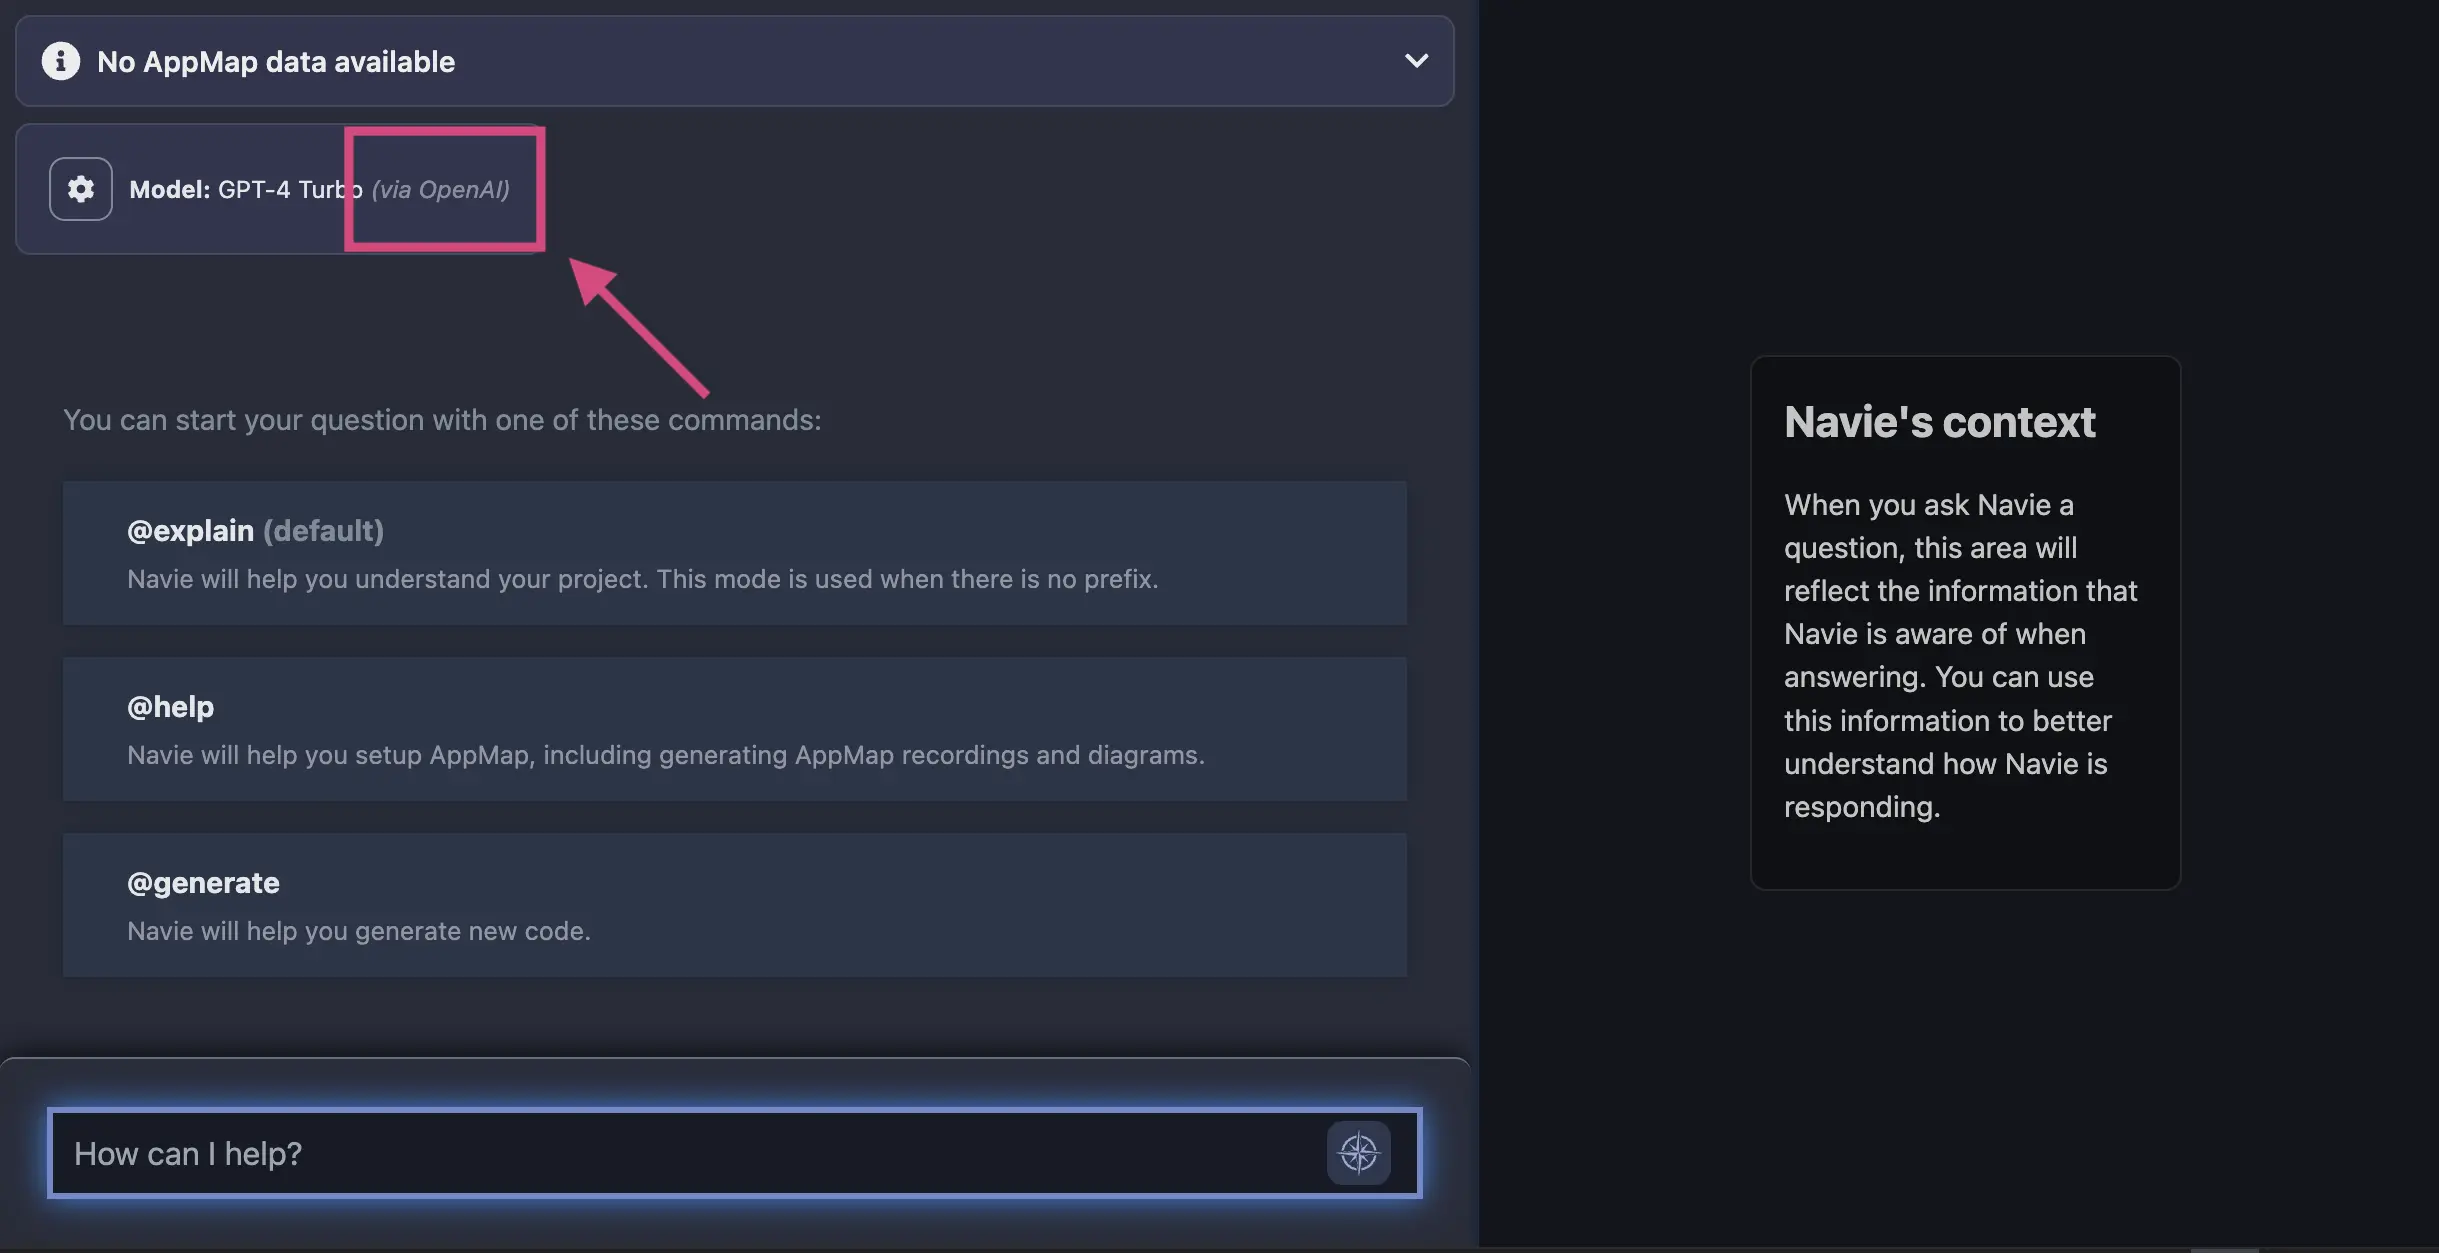
Reset Navie AI to use Default Navie Backend
At any time, you can unset your OpenAI API Key and revert usage back to using the AppMap hosted OpenAI proxy. Select the gear icon in the Navie Chat window and select
Use Navie Backendin the modal.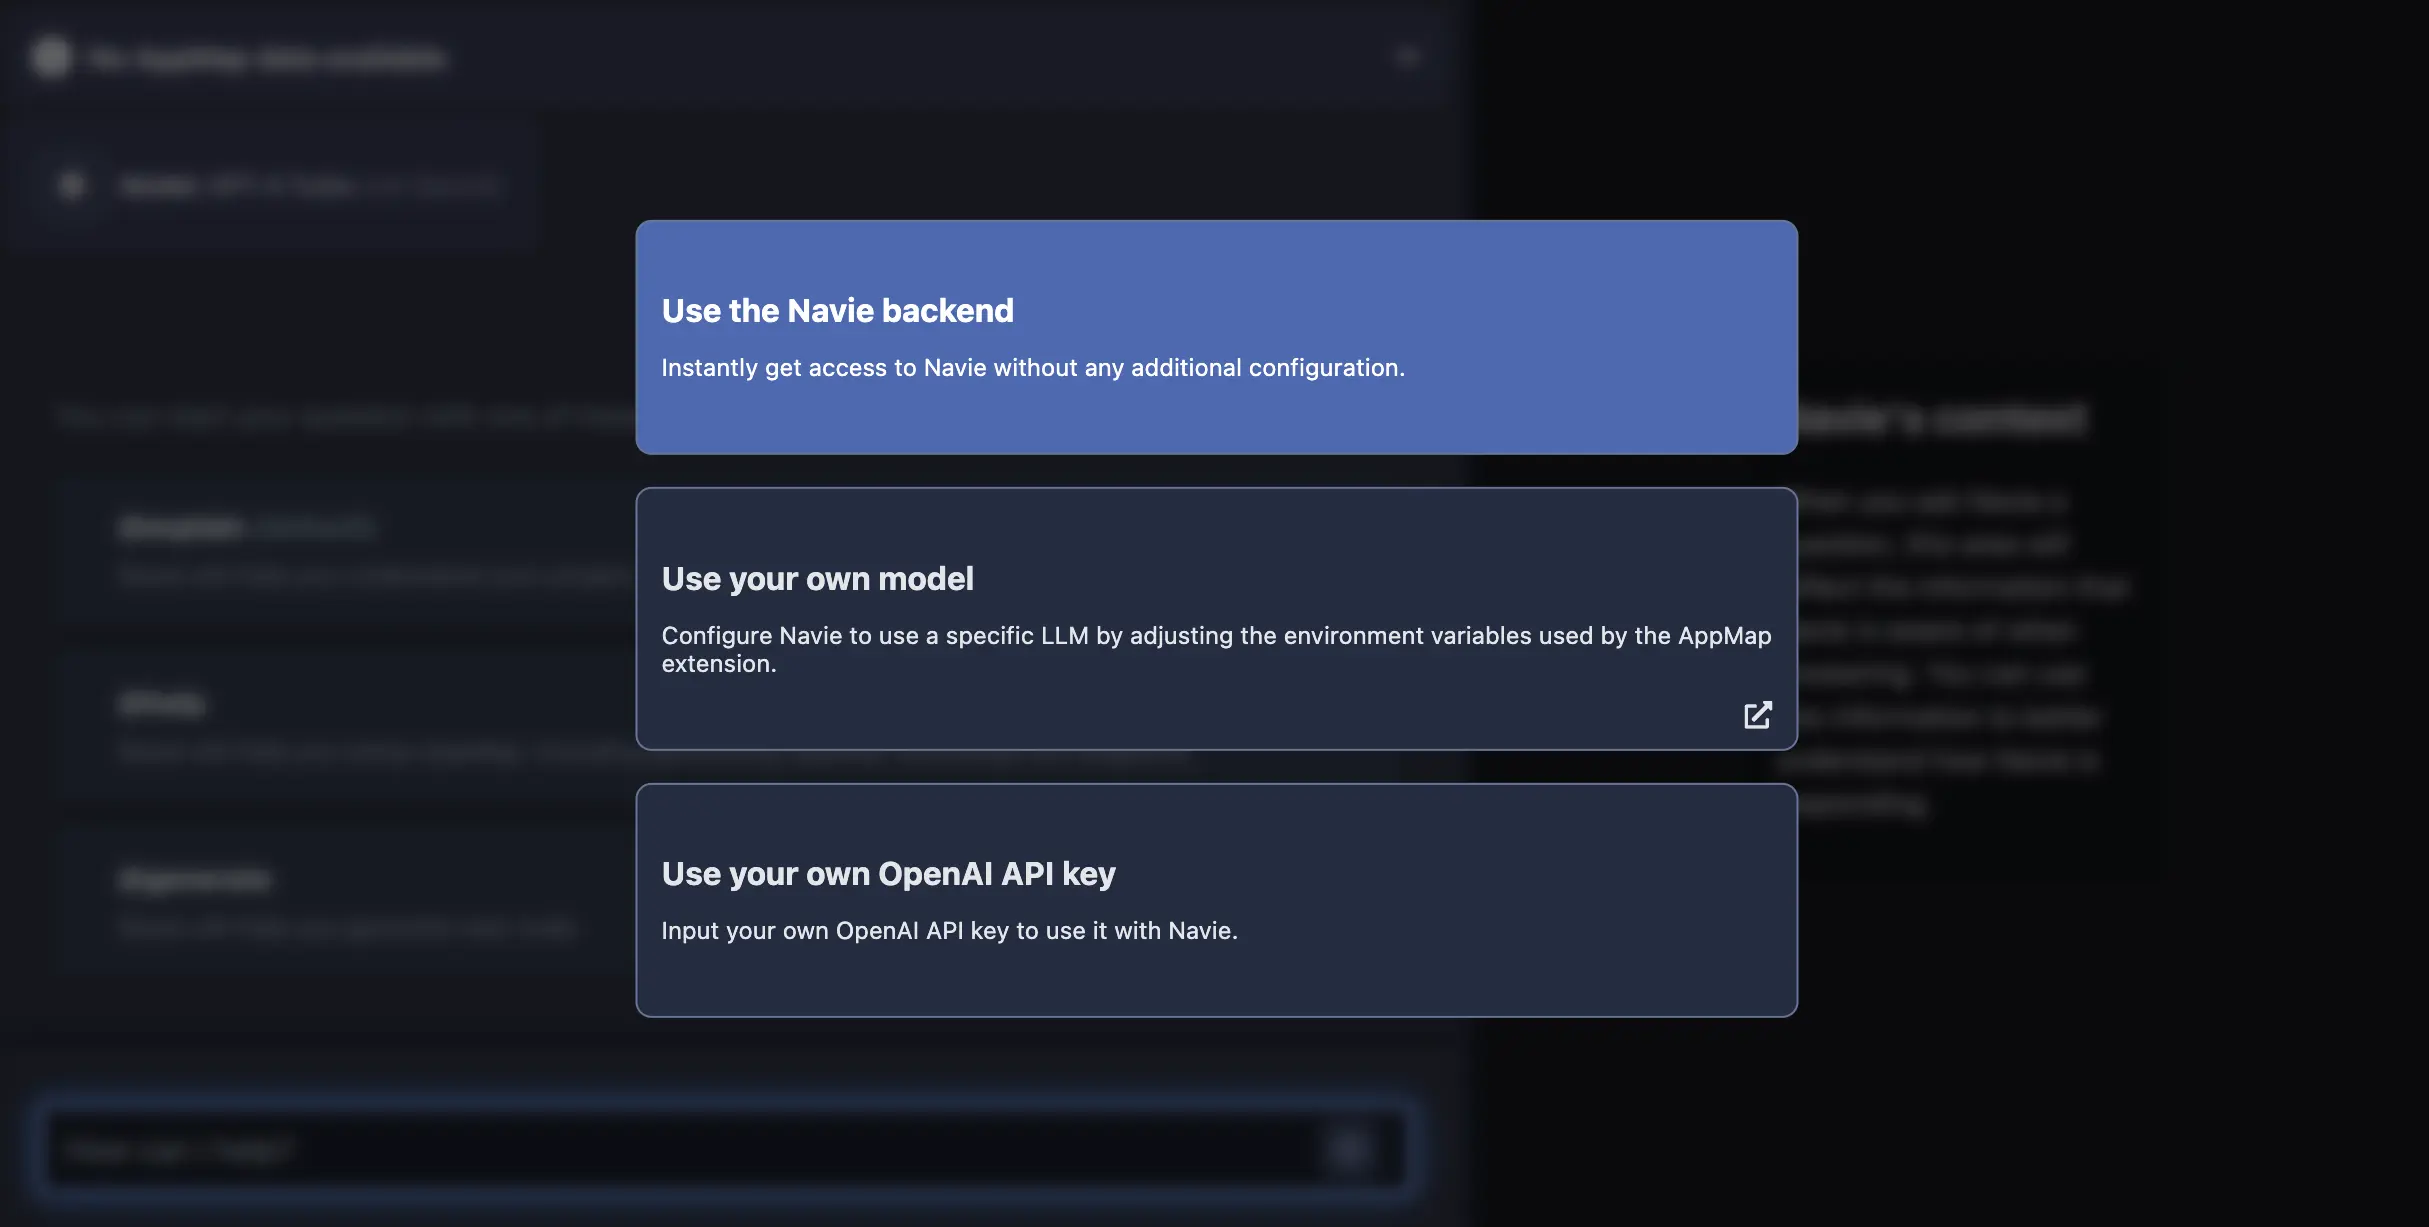
Bring Your Own Model (BYOM)
This feature is in early access. We currently recommend GPT4-Turbo from OpenAI via OpenAI or Microsoft Azure, and Mixtral-8x7B-Instruct-v0.1. Refer to the AppMap Recommended Models documentation for more info
Another option is to use a different LLM entirely; you can use any OpenAI-compatible model running either locally or remotely. When configured like this, as in the BYOK case, Navie won’t contact the AppMap hosted proxy and your conversations will stay private between you and the model.
Configuration
In order to configure Navie for your own LLM, certain environment variables need to be set for AppMap services.
You can use the following variables to direct Navie to use any LLM with an OpenAI-compatible API. If only the API key is set, Navie will connect to OpenAI.com by default.
-
OPENAI_API_KEY— API key to use with OpenAI API. -
OPENAI_BASE_URL— base URL for OpenAI API (defaults to the OpenAI.com endpoint). -
APPMAP_NAVIE_MODEL— name of the model to use (the default is GPT-4). -
APPMAP_NAVIE_TOKEN_LIMIT— maximum context size in tokens (default 8000).
For Azure OpenAI, you need to create a deployment and use these variables instead:
-
AZURE_OPENAI_API_KEY— API key to use with Azure OpenAI API. -
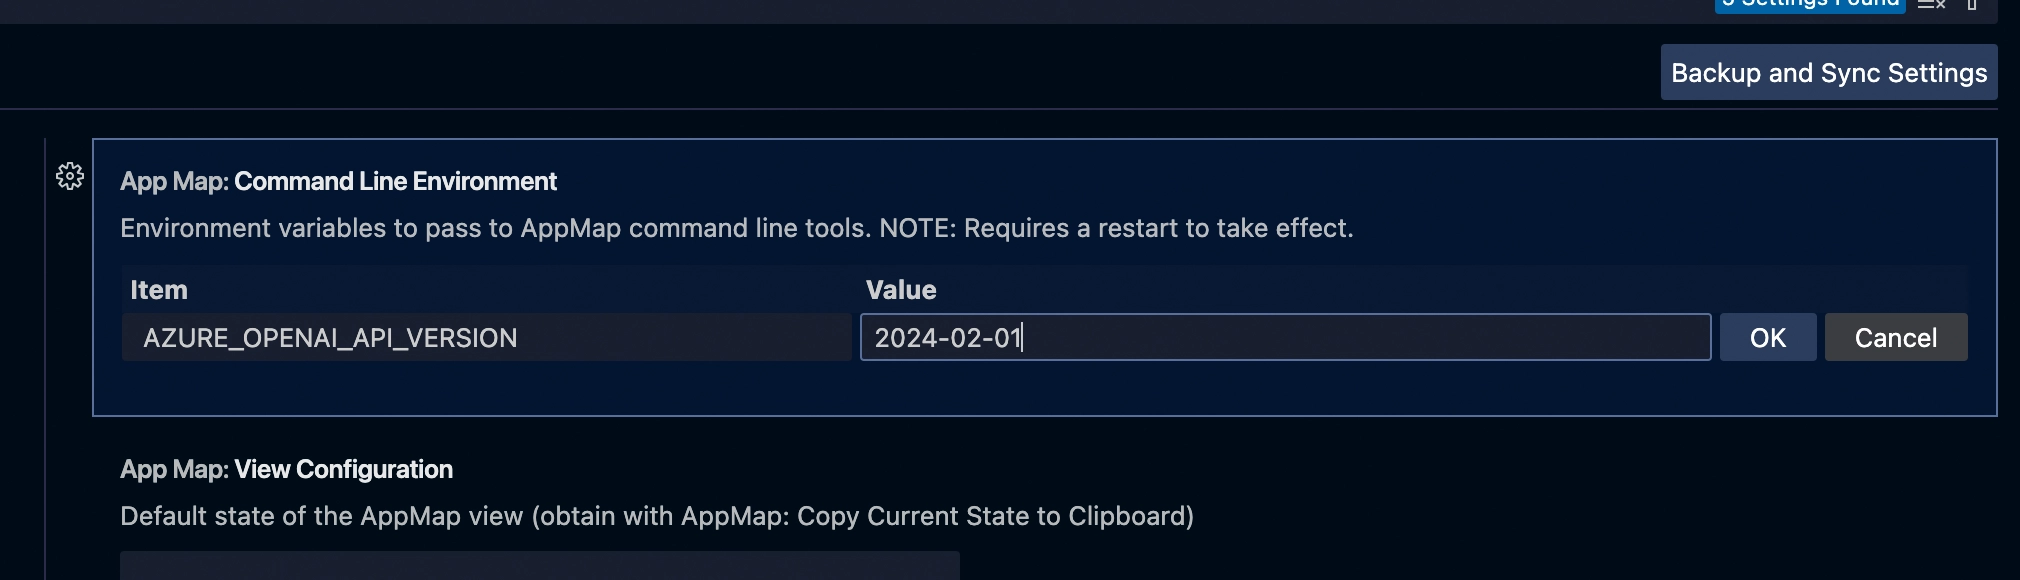
AZURE_OPENAI_API_VERSION— API version to use when communicating with Azure OpenAI, eg.2024-02-01 -
AZURE_OPENAI_API_INSTANCE_NAME— Azure OpenAI instance name (ie. the part of the URL beforeopenai.azure.com) -
AZURE_OPENAI_API_DEPLOYMENT_NAME— Azure OpenAI deployment name.
Configuring in JetBrains
Configuring in VS CodeConfiguring in JetBrains
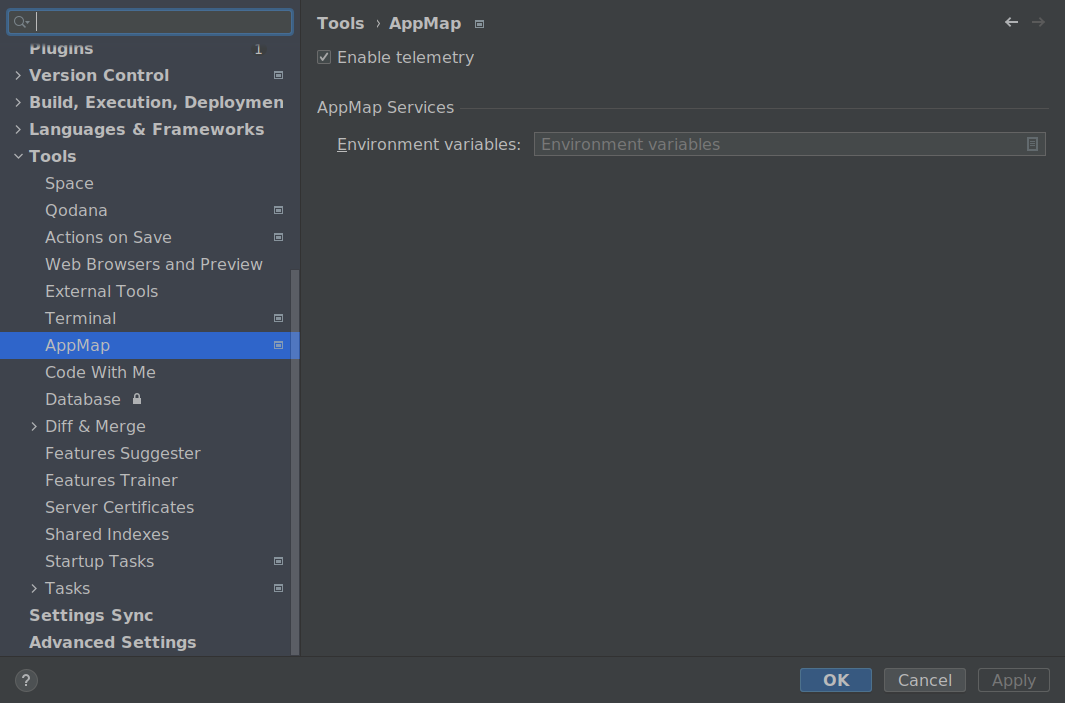
In JetBrains, go to settings.
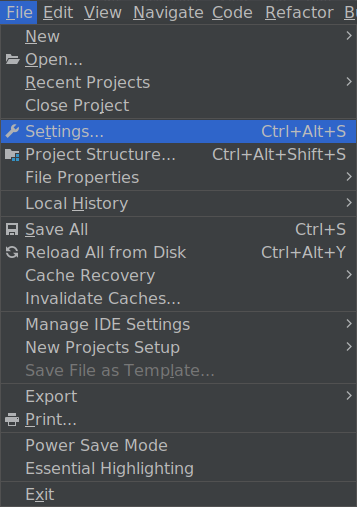
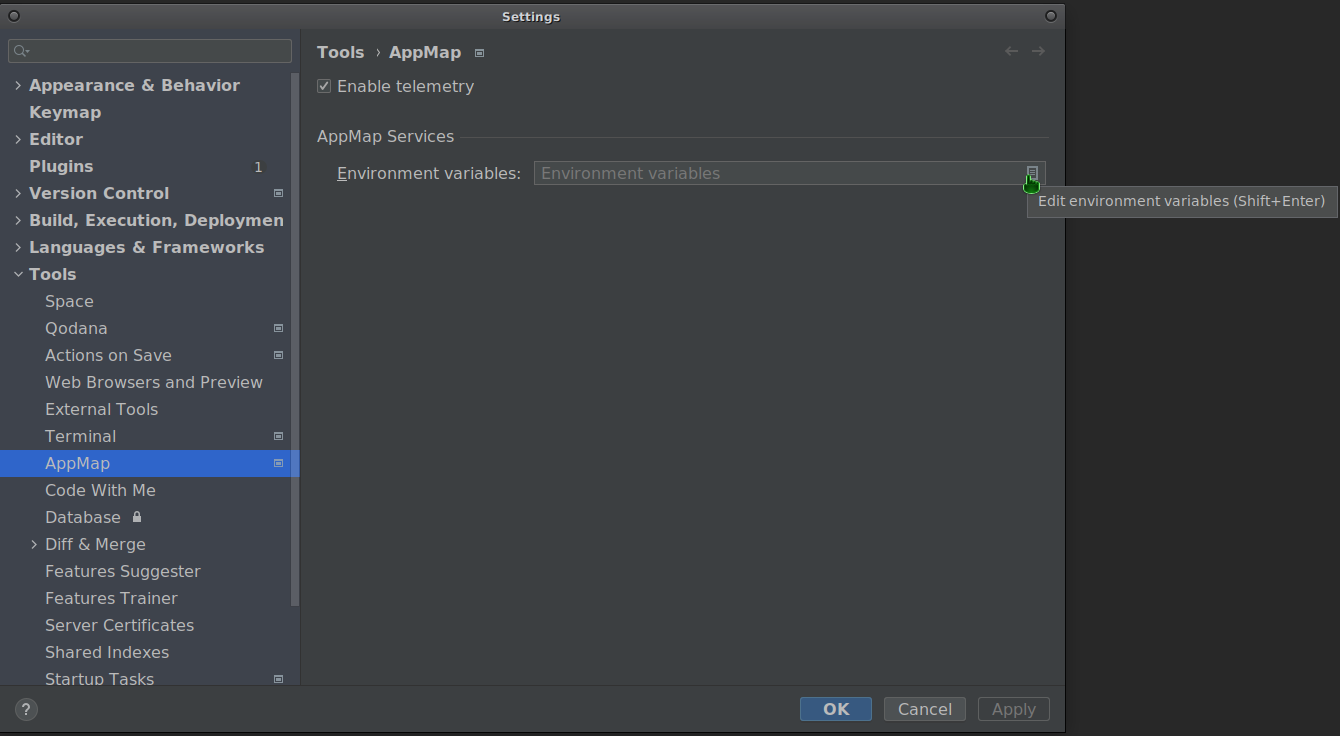
Go to Tools → AppMap.
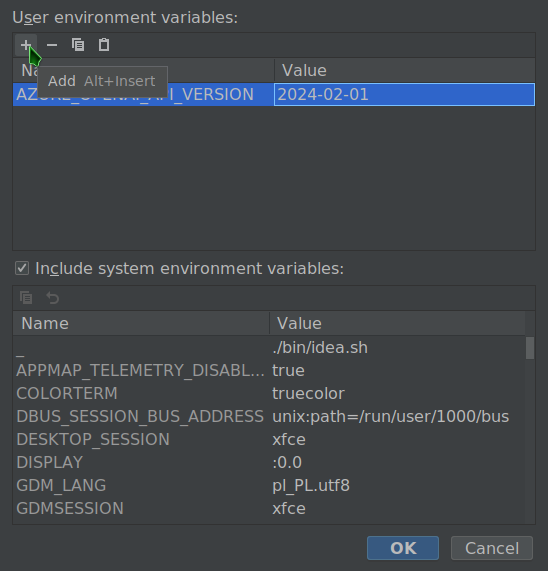
Enter the environment editor.
Use the editor to define the relevant environment variables according to the BYOM documentation.
Reload your IDE for the changes to take effect.
Configuring in VS Code
Editing AppMap services environment
Note: To store the API key securely with VS Code secret storage, follow the instructions below.
In VS Code, go to settings.
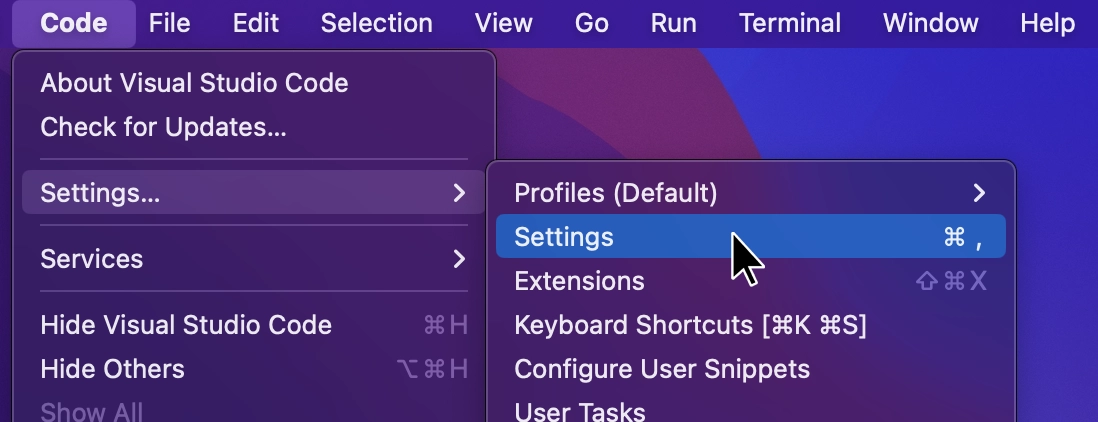
Search for “appmap environment” to reveal “AppMap: Command Line Environment” setting.
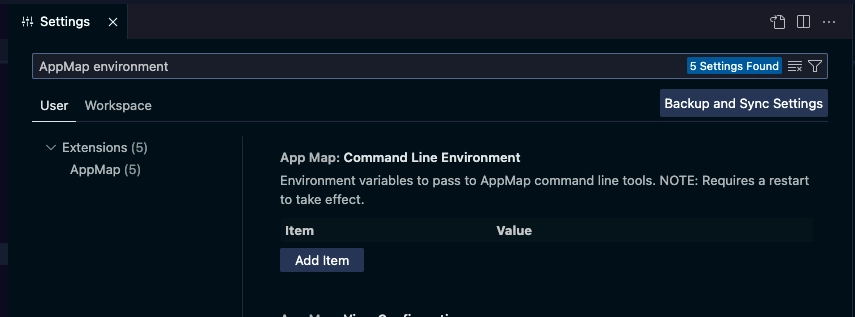
Use Add Item to define the relevant environment variables according to the BYOM documentation.
Reload your VS Code for the changes to take effect.
NOTE: Please follow the instructions below to set
OPENAI_API_KEYorAZURE_OPENAI_API_KEYsecurely.Add a new OpenAI Key
In VS Code, open the Command Palette.
You can use a hotkey to open the VS Code Command Palette
- Mac:
Cmd + Shift + P - Windows/Linux:
Ctrl + Shift + P
Or you can select
View->Command Palette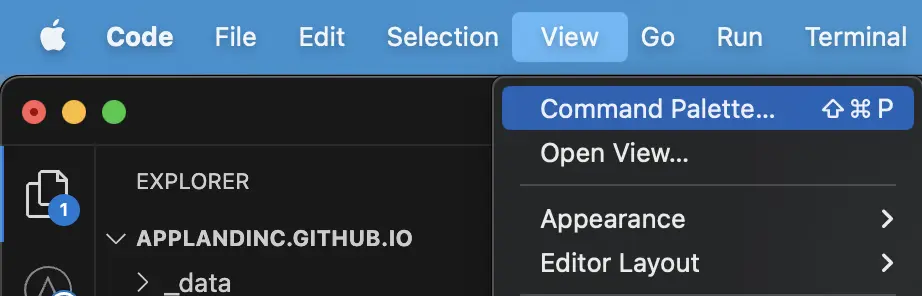
Search for
AppMap Set OpenAPI Key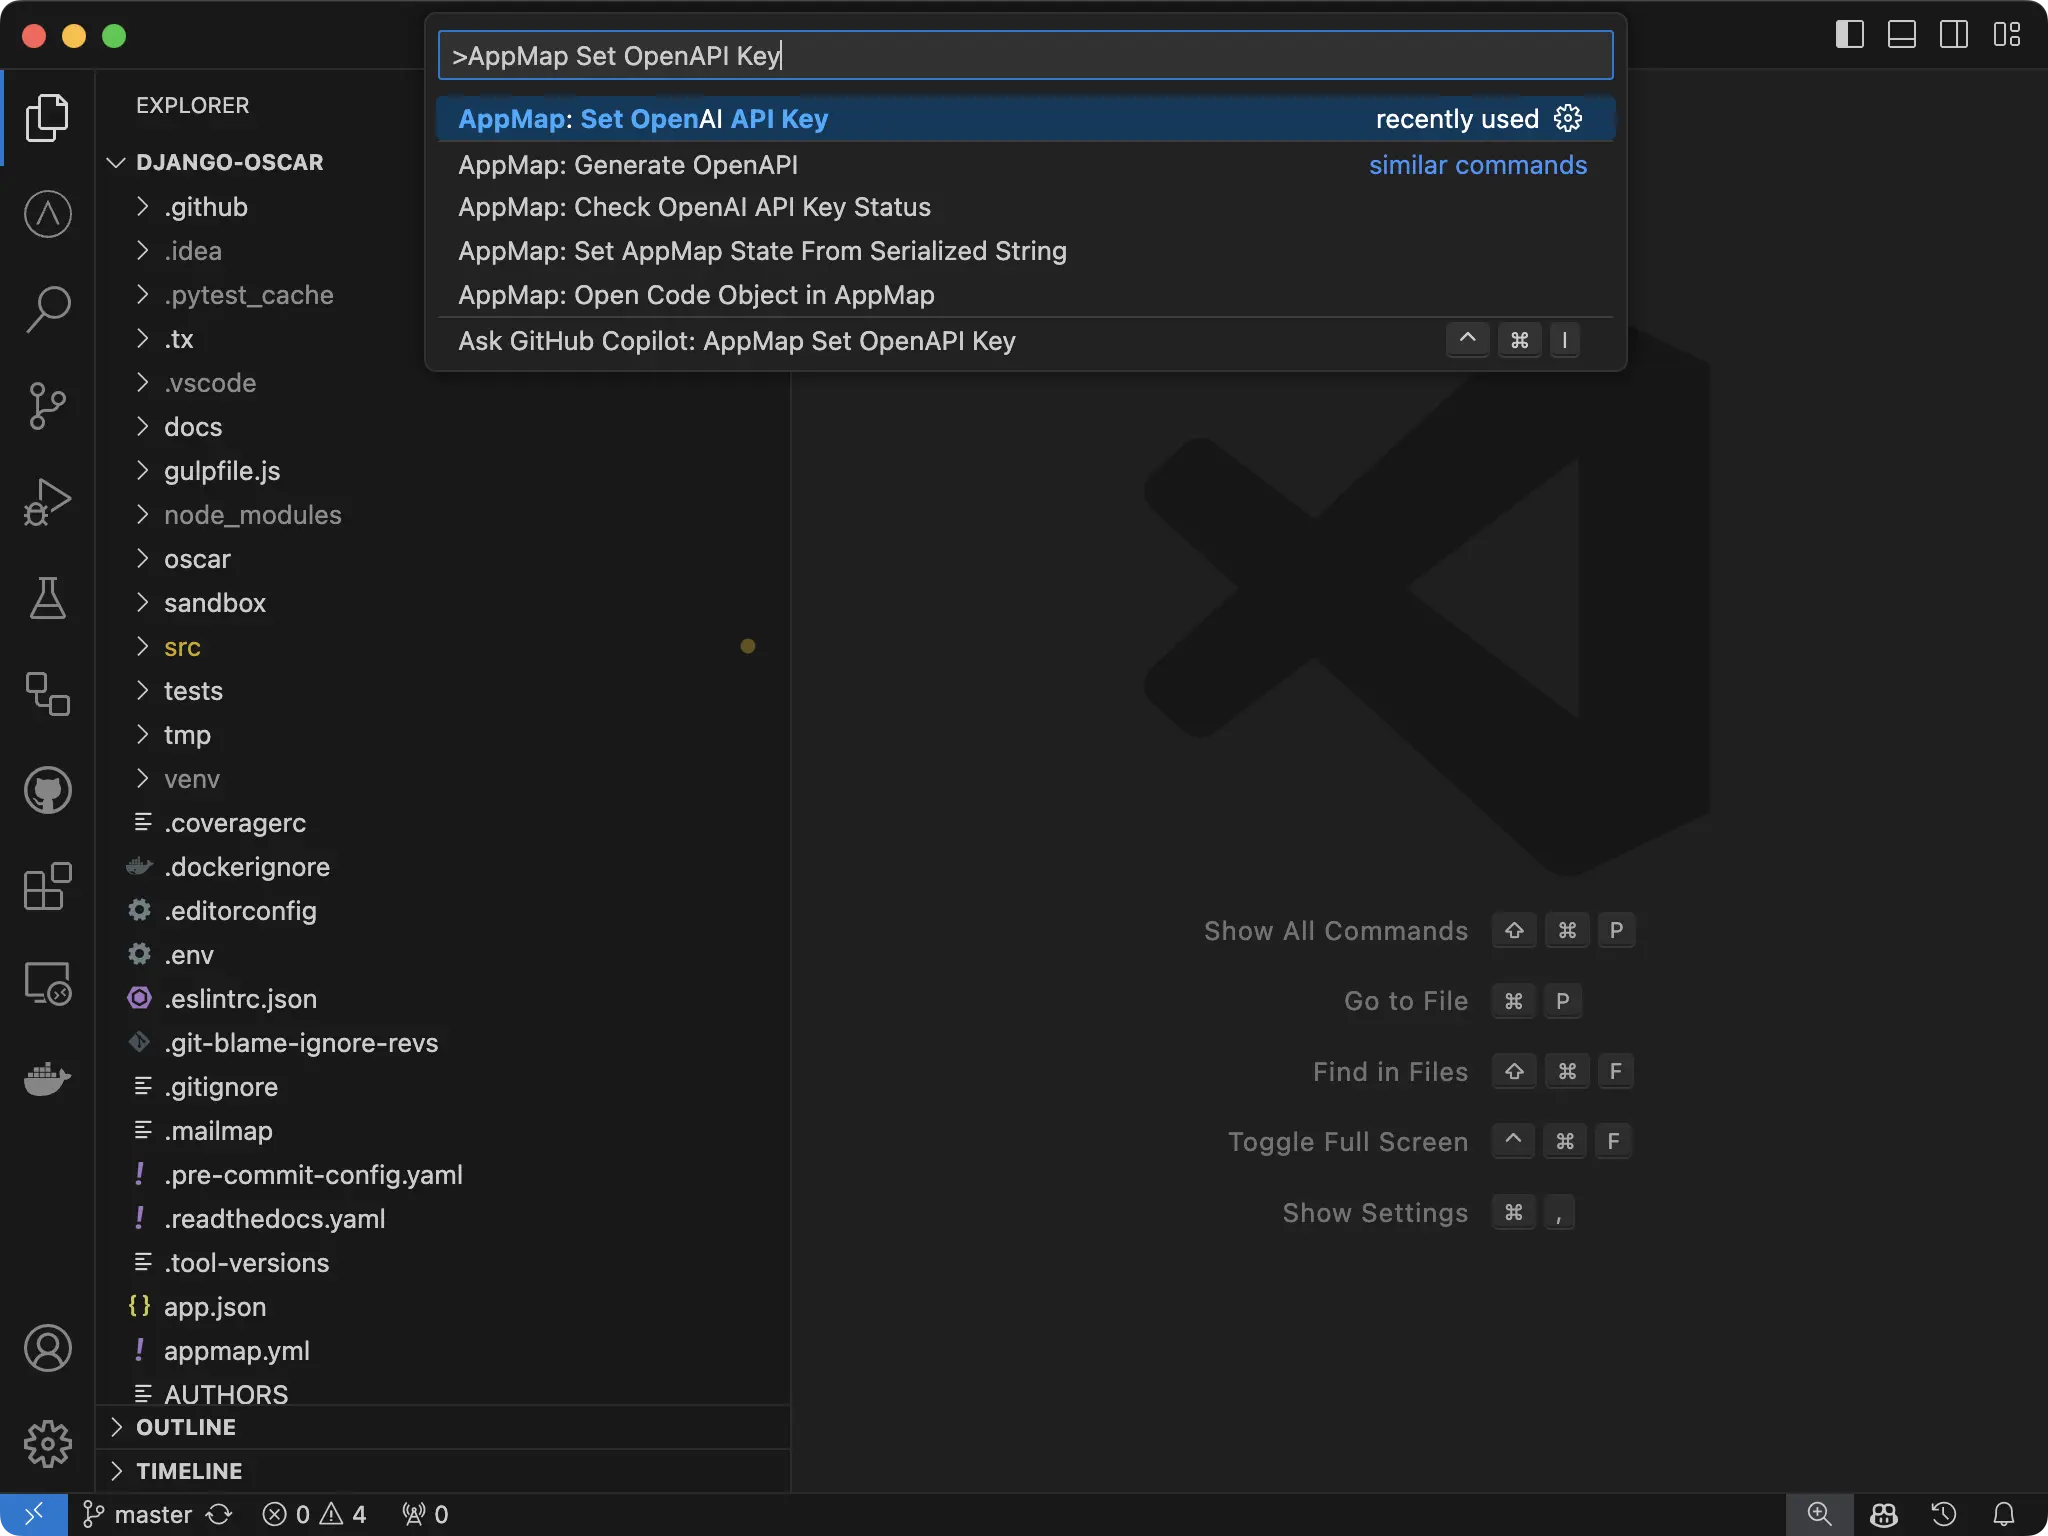
Paste your key into the new field and hit enter.
You’ll get a notification in VS Code that your key is set.
NOTE: You will need to reload your window for the setting to take effect. Use the Command Palette
Developer: Reload Window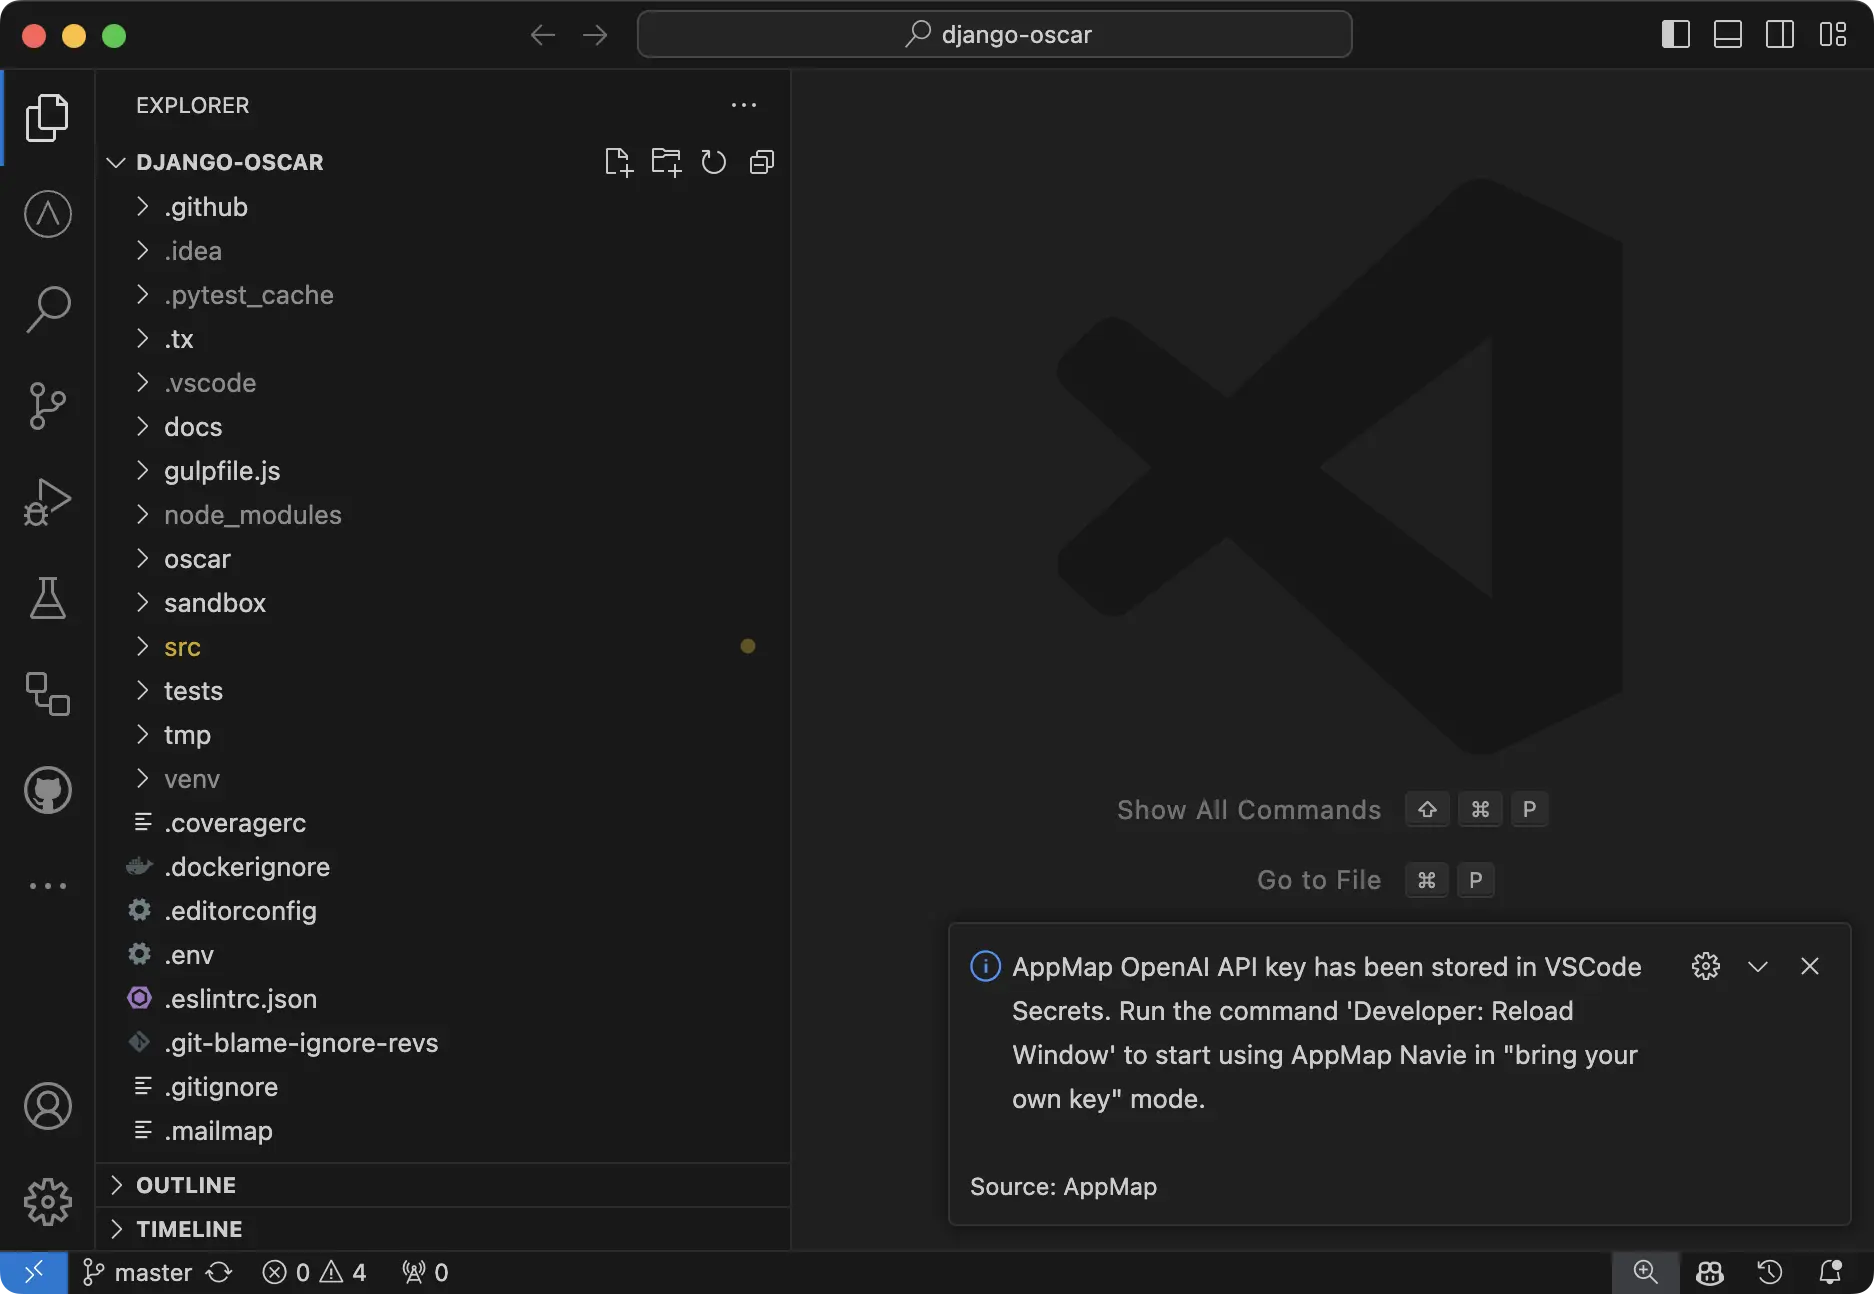
Delete a configured OpenAI Key
To delete your key, simply open the Command Palette
You can use a hotkey to open
- Mac:
Cmd + Shift + P - Windows/Linux:
Ctrl + Shift + P
Or you can select
View->Command PaletteSearch for
AppMap Set OpenAPI KeyAnd simply hit enter with the field blank. VS Code will notify you that the key has been unset.
NOTE: You will need to reload your window for the setting to take effect. Use the Command Palette
Developer: Reload Window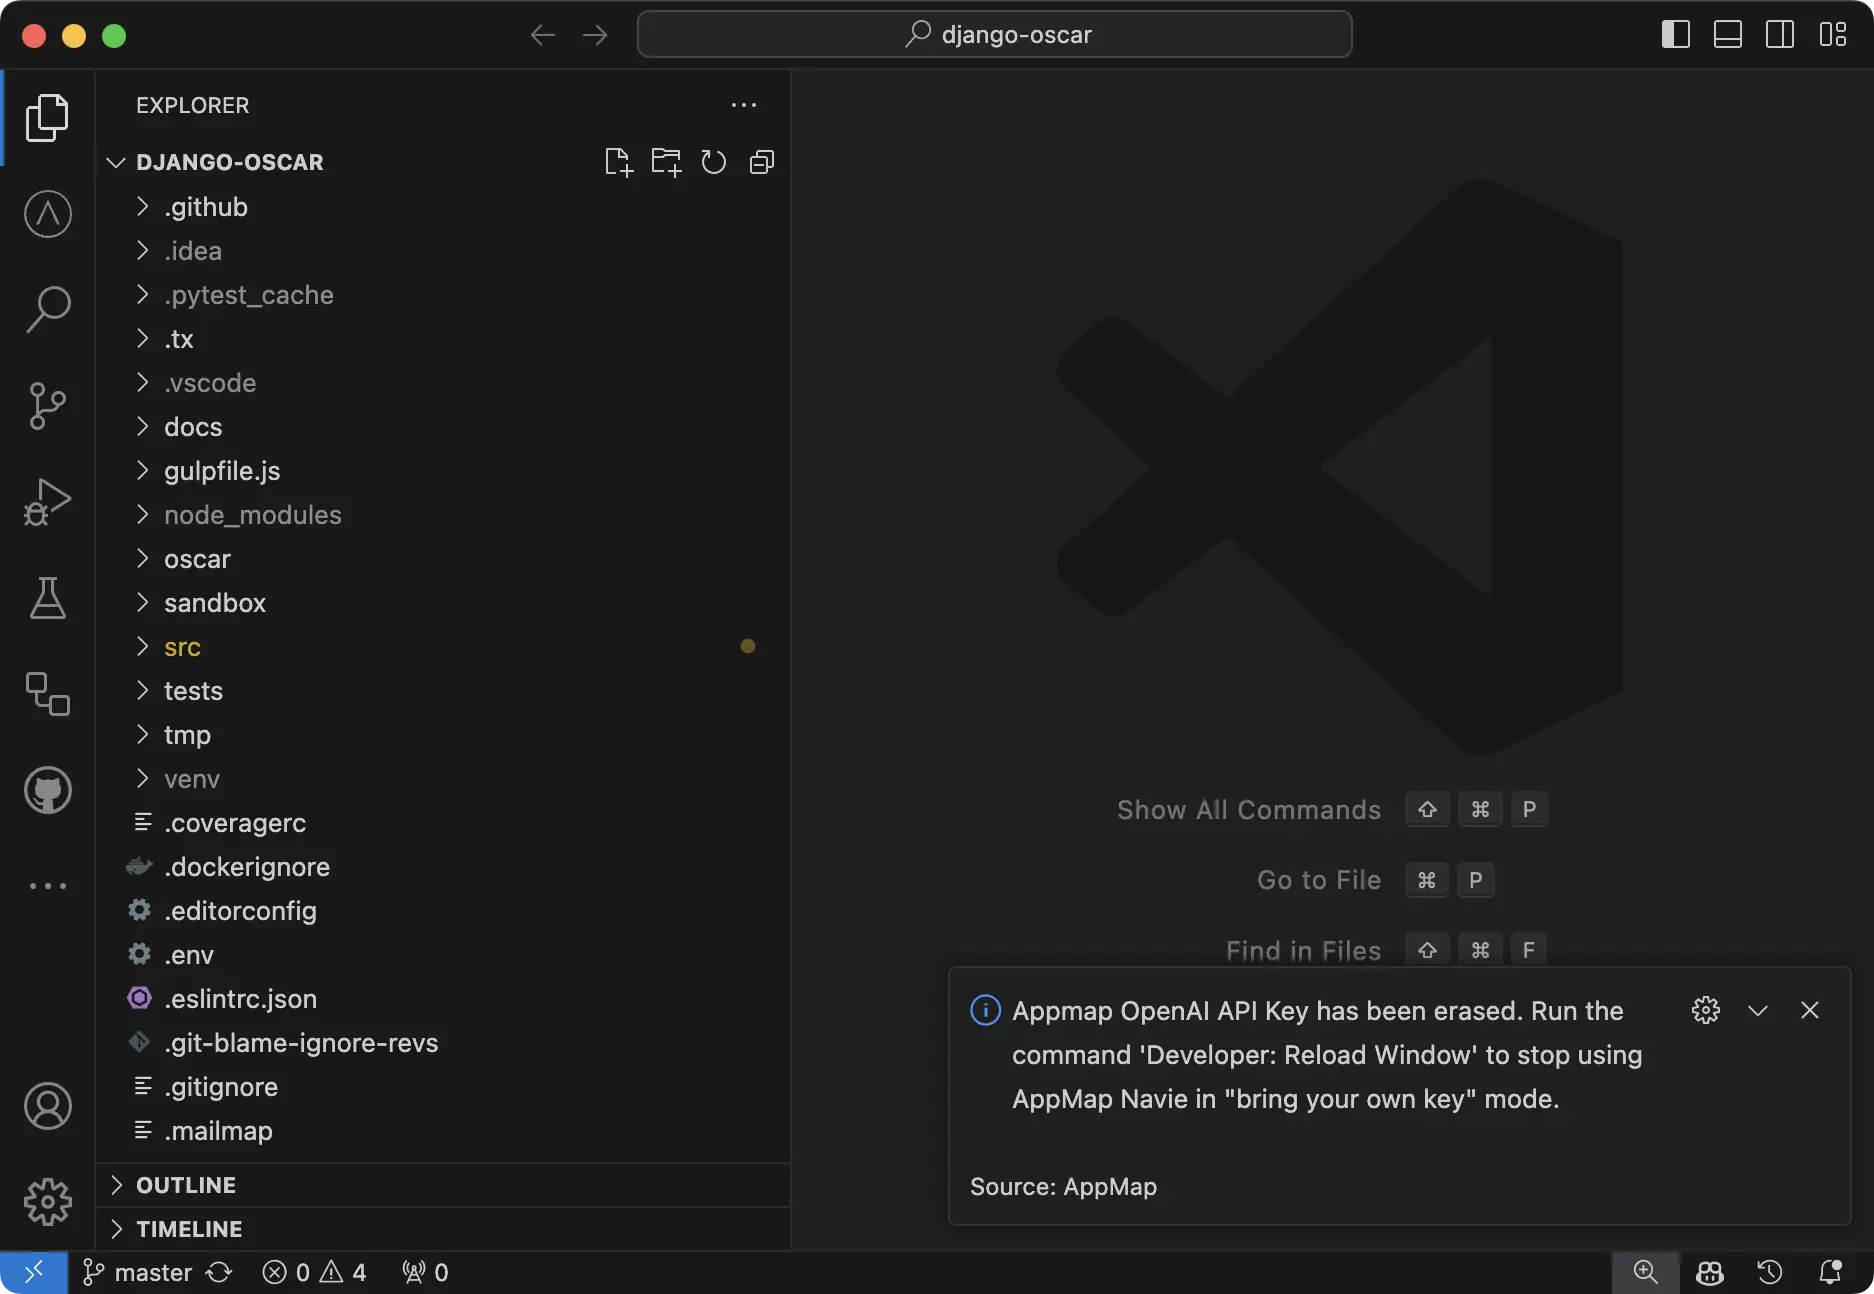
How is my API key saved securely?
For secure storage of API key secrets within AppMap, we use the default VS Code secret storage which leverages Electron’s safeStorage API to ensure the confidentiality of sensitive information. Upon encryption, secrets are stored within the user data directory in a SQLite database, alongside other VS Code state information. This encryption process involves generating a unique encryption key, which, on macOS, is securely stored within
Keychain Accessunder “Code Safe Storage” or “Code - Insiders Safe Storage,” depending on the version. This method provides a robust layer of protection, preventing unauthorized access by other applications or users with full disk access. The safeStorage API, accessible in the main process, supports operations such as checking encryption availability, encrypting and decrypting strings, and selecting storage backends on Linux. This approach ensures that your secrets are securely encrypted and stored, safeguarding them from potential threats while maintaining application integrity.Examples
OpenAI
Note: We recommend configuring your OpenAI key using the code editor extension. Follow the Bring Your Own Key docs for instructions.
Only
OPENAI_API_KEYneeds to be set, other settings can stay default:OPENAI_API_KEYsk-9spQsnE3X7myFHnjgNKKgIcGAdaIG78I3HZB4DFDWQGMAzure OpenAI
Assuming you created a
navieGPT-4 deployment oncontoso.openai.azure.comOpenAI instance:AZURE_OPENAI_API_KEYe50edc22e83f01802893d654c4268c4fAZURE_OPENAI_API_VERSION2024-02-01AZURE_OPENAI_API_INSTANCE_NAMEcontosoAZURE_OPENAI_API_DEPLOYMENT_NAMEnavieAnyScale Endpoints
AnyScale Endpoints allows querying a selection of open-source LLMs. After you create an account you can use it by setting:
OPENAI_API_KEYesecret_myxfwgl1iinbz9q5hkexemk8f4xhcou8OPENAI_BASE_URLhttps://api.endpoints.anyscale.com/v1APPMAP_NAVIE_MODELmistralai/Mixtral-8x7B-Instruct-v0.1Consult AnyScale documentation for model names. Note we recommend using Mixtral models with Navie.
Ollama
You can use Ollama to run Navie with local models; after you’ve successfully ran a model with
ollama runcommand, you can configure Navie to use it:OPENAI_API_KEYdummyOPENAI_BASE_URLhttp://127.0.0.1:11434/v1APPMAP_NAVIE_MODELmixtralNote: Even though it’s running locally a dummy placeholder API key is still required.
Thank you for your feedback!
