
In the tech industry, changing jobs feels inevitable. Whether moving on to advance your career or being caught up in an unfortunate layoff. But, eventually, just about everyone will find themselves staring at an unfamiliar code base at some point or time in their career.
Starting fresh can be both exciting and slightly unnerving. There’s often a feeling of: “Oh no, I don’t understand any of this” that we know will go away with time, but it can be daunting.
For me, even if I’ve worked in the language for several years or I am familiar with the framework, that uncertainty happens. And, the longer I work in the industry, the more I realize I’m not alone.
There are tons of articles and blogs out there that give steps for how to learn a new codebase quickly, but what if there was a way you could get an overview very quickly to see how things work together? Or a way to show how the features we were responsible for connect to the rest of the application?
In this article, I will show you an unconventional way to use AppMap, an incredible mapping tool. Rather than using it to map your application to refactor it or fix issues, we will use it to get familiar with a new codebase.
To follow along, the example project we are using can be found here.
Before we start, here’s a brief intro to AppMap.
What is AppMap?
AppMap is an open-source tool that automatically generates a visual representation of your code behavior. It allows you to see the relationships between different components, understand how they interact with each other, and identify potential issues.
How does it work?
AppMap works by analyzing your code as it runs. It records every method call and visually represents the code flow. This visualization can be used to identify specific areas of code that may need attention or to better understand how the code works.
How can I use it?
Using AppMap is easy. Download the AppMap agent and add it to your Java application. Once the agent is running, it will start recording method calls and generating the visual representation of your code. You can then use this visualization to explore your code base and better understand how it works.
Get started learning a new codebase
Let’s say we just started at a software company specializing in Veterinary Clinic software. Our software is a Java application that uses the Spring framework, and we are using IntelliJ IDEA for our development environment. We’ve been given access to the repo, have our first ticket, and we need to add a nickname attribute to a pet when it gets created. We have yet to learn what the codebase looks like or how the application works, so let’s get started.
To follow along, the example project we are using can be found here.
First, pull down the repo and open it inside your IDE. Then, install the AppMap plugin if you haven’t already. Here’s a quick how to to get you up to speed. Next, install the correct Java versions (I’m using v17), then we will map the application. AppMap’s integration with IntelliJ is thorough, and mapping an application is pretty straightforward.
To the tests
A mentor once told me: “If you don’t know what’s going on in a codebase, start with the tests. If there are no tests. Run.”
Starting with tests is a decent strategy and has worked out many times before, so let’s map some tests. In the IDE open:
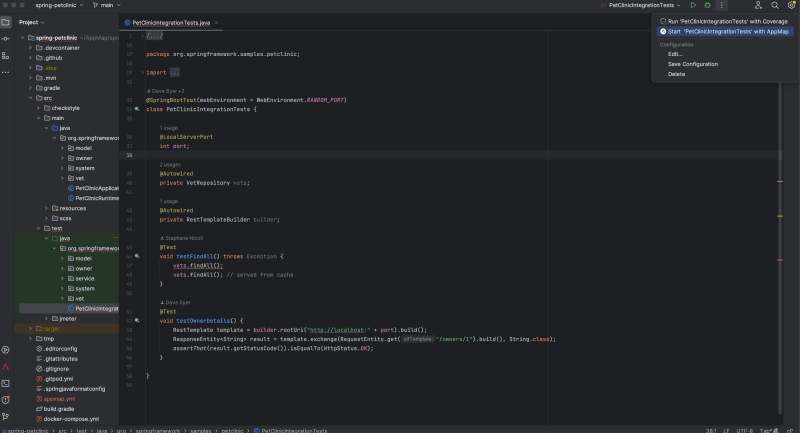
test > java > org.springframework.samples.petclinic > PetClinicIntegrationTests
Next, from the three dots menu in the upper right-hand corner near the run button, select Start PetClinicIntegrationTests with AppMap
Open the AppMap plugin by selecting the icon from the right-hand menu bar.

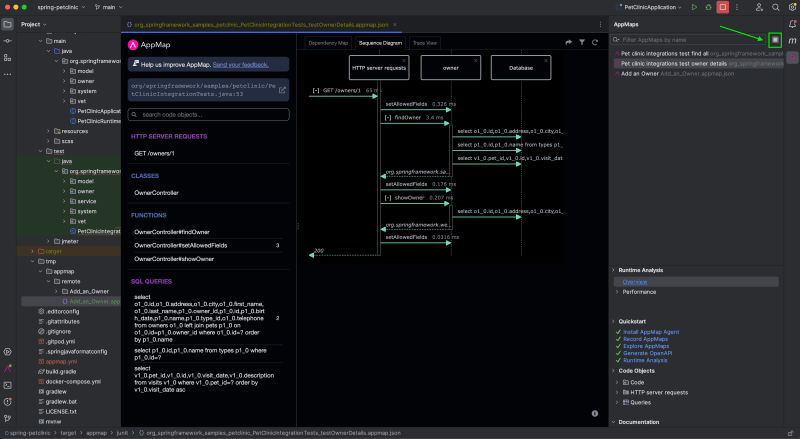
AppMap automatically generates maps for us. If you’re following along, you should see two tests. One is for a “find all” action, and one is for “owner details.” We can select either to view it. Let’s take a look at “owner details.”
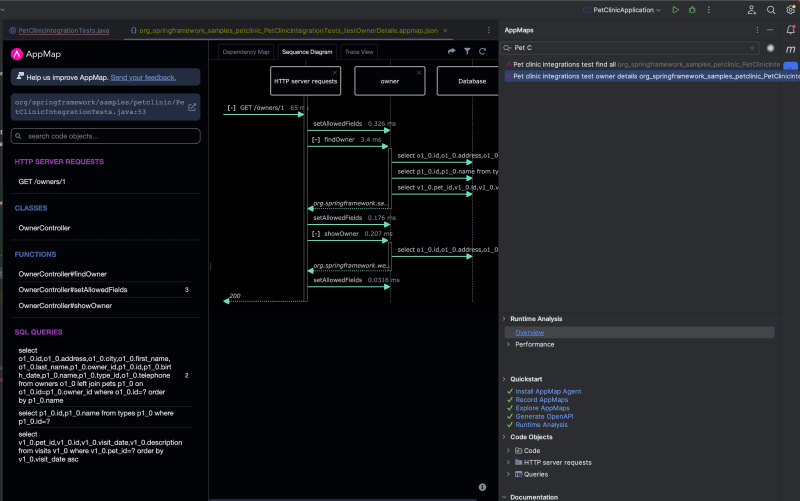
This map is great but we need to update the pet, not the owner which isn’t on the list. Let’s create another map and see if we can learn more about our application.
Recording application interactions
The best way to learn an application and how it works is to use it, so let’s actually use it. While we use the application, we will record what we do in the app with AppMap.
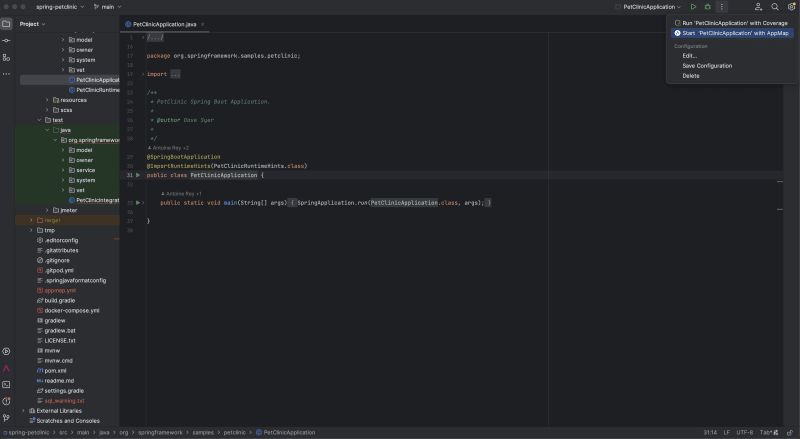
To do this, start the application with AppMap. In IntelliJ, open
src > main > java > org.springframework.samples.petclinic > PetClinicApplication
Next, we will start the application the same way we did when mapping tests, but this time select Start PetClinicAppliactaion with AppMap.
From the AppMap plugin menu, click the round gray record button in the upper right-hand corner.
A pop-up menu should appear, select the remote URL from the drop-down menu and click start recording.
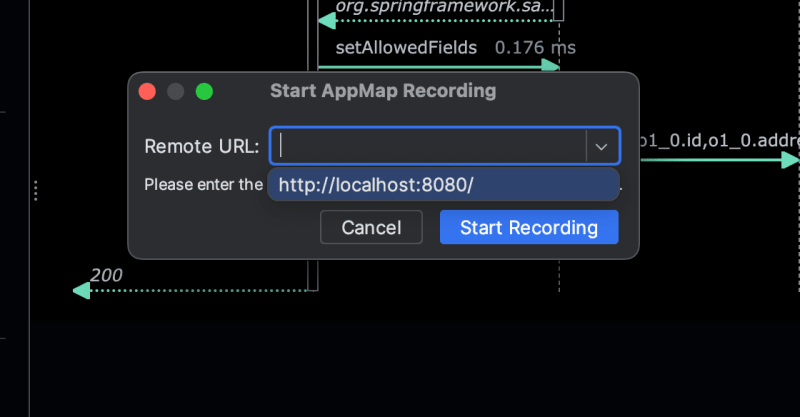
The pet clinic application should open a new tab in your browser with the application running; if it does not, open a browser and navigate to the remote URL you selected. If you’re following along, the remote URL is
http://localhost:8080/
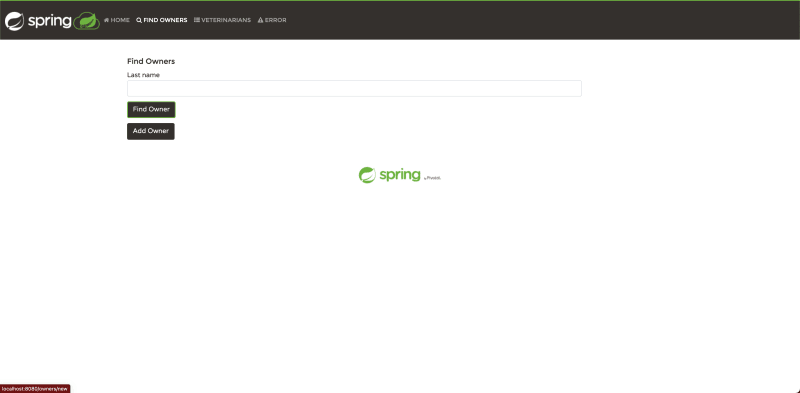
Now that the application is running, we can start using it. First, let’s add an owner. Select find owners and then click the “Add Owner” button.
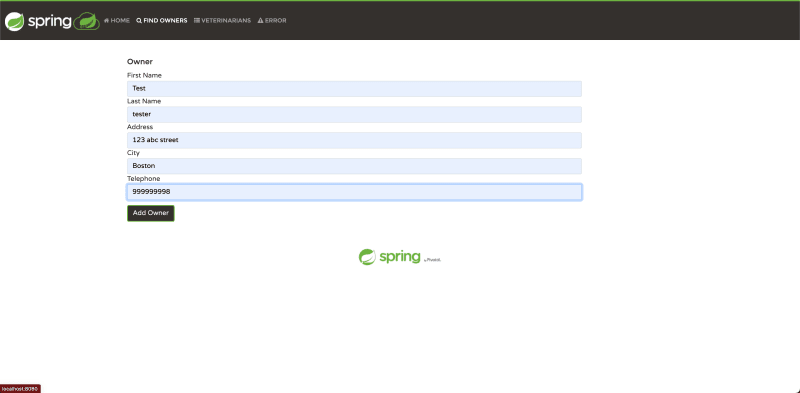
Fill out the form with whatever data you would like and add the owner.
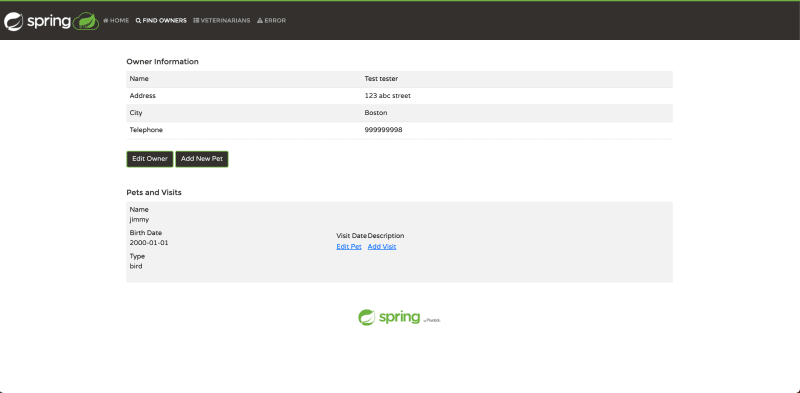
On the next screen, select “Add Pet” fill in the details, and add the pet.
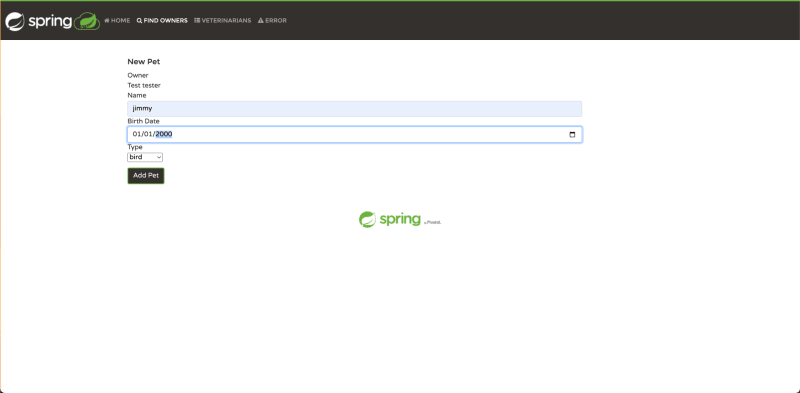
Once we have added a pet successfully, we will see this screen.
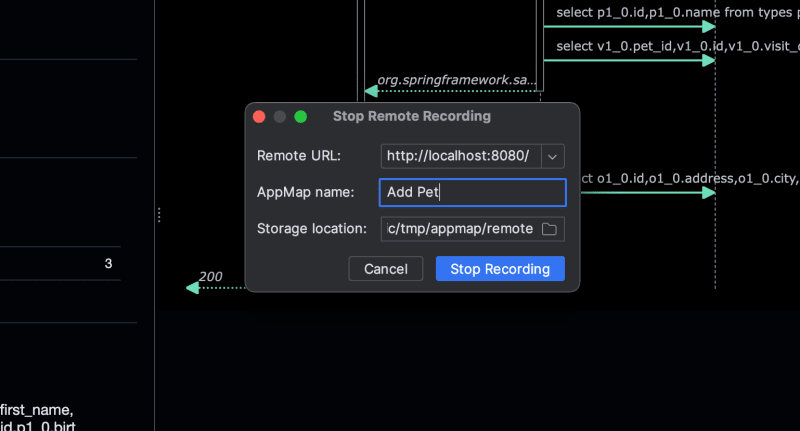
Let’s head back to our IDE and stop the recording by selecting the grey square button in the AppMap plugin menu.
A new pop-up should appear. Let’s name our map “add pet” and select stop recording.
Congrats, you just generated your first map.
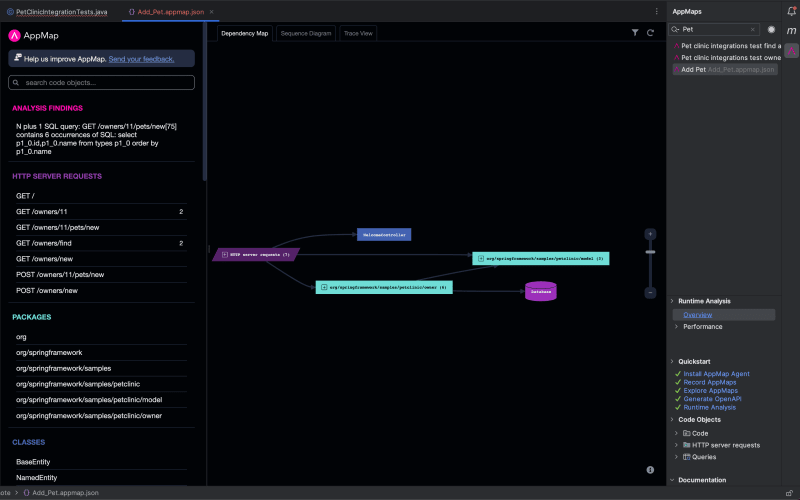
It takes a moment for AppMap to process, then once complete, you should see the new map open in your IDE. The map itself is stored locally in a tmp folder in the root directory of your project.
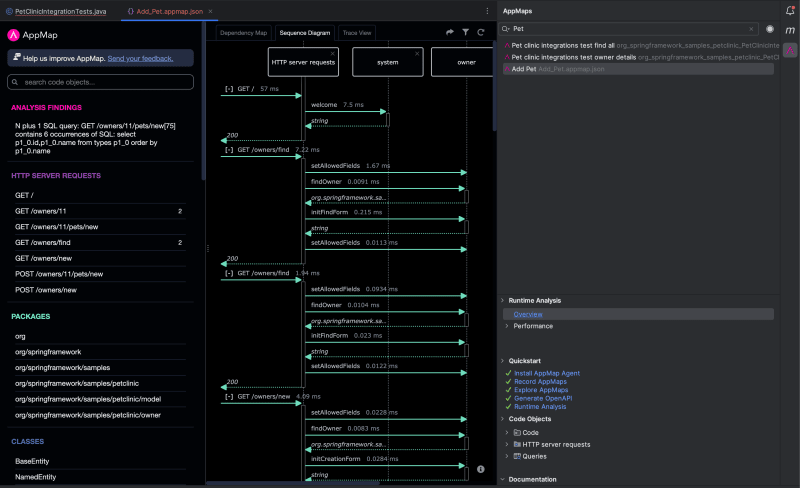
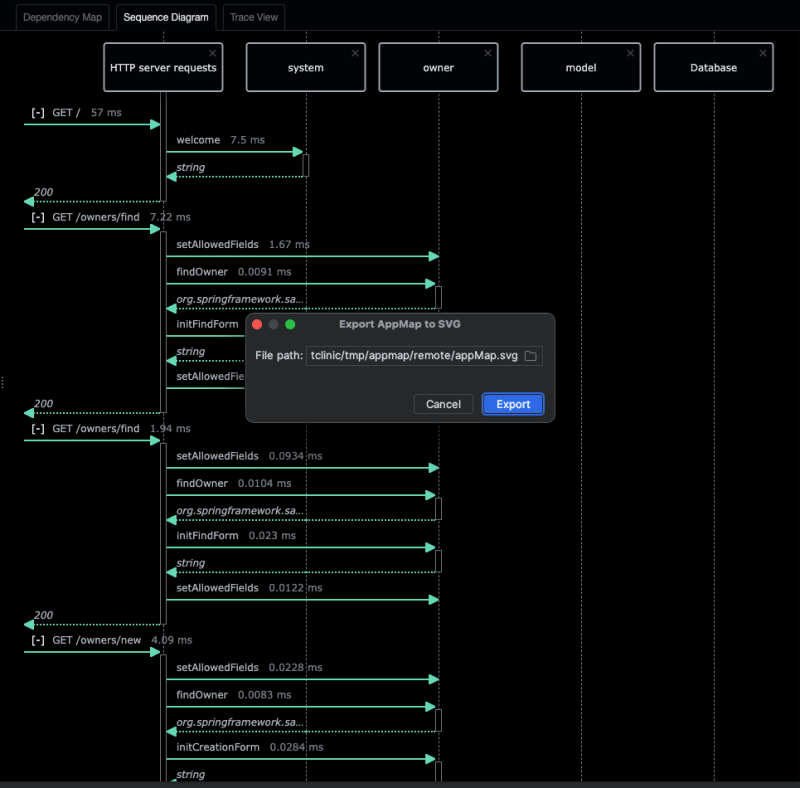
The default view is a sequence diagram of the entire process we just went through. The sequence diagram is the heart of an AppMap and tells you exactly what happened from start to finish. The sequence diagram view is one of the most useful views you can look at and it gives a ton of detail about the app. If you have never used one, take the time to learn about them and what they do.
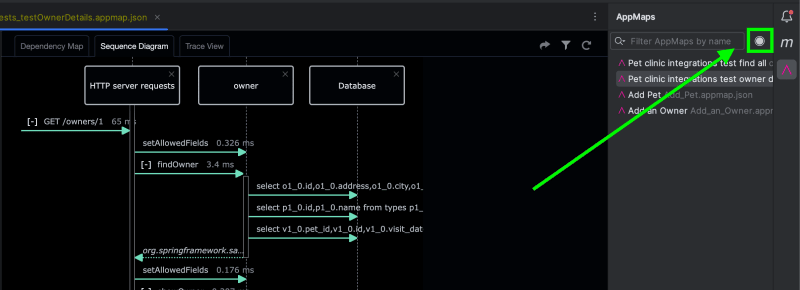
There are many ways to take advantage of this view in the future, but for this example, we are looking for a more general view of the application. There are two other map views you can look at that give more insight into what is happening in your application under the hood and how everything is connected. Each can be viewed by clicking the tabs at the top of the AppMap view. They are the trace view and dependency map.
Making updates with AppMap
These views are great, but if you can’t use them to your advantage, they are just cool pictures. With that in mind let’s use them. The real power of your maps comes from recording interactions and being able to follow connections from one part of your application to another.
First, open the dependency map and click the plus buttons to expand the colored boxes until you see the owner controller. When you click on the PetController, the left-side menu will update. This menu lists functions, inbound connections, queries, and the file path to the PetController. We can even see the creation form we need to change.
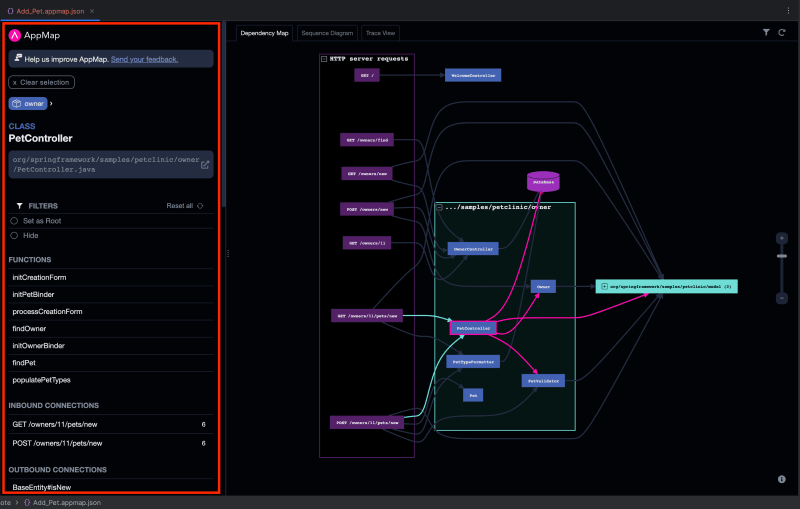
We can open the controller to change it right from here. We click the open in a new tab icon in the file path box, or we can click on the function we want to change, then the open icon and your controller will open. We can make any edits, commit, and push. Plus, we can export the sequence diagram of the new behavior as an SVG and attach it to our pull request for our team to check over which helps them understand my new code as well.
Now, we completed our first ticket without digging through hours of documentation and directories to find what you were looking for! We found the controller we needed to work on, understand how it works, understand what it’s connected to, and made a change. The more we view and study these maps, the better we will know how they work and are connected.
Summary
Starting a new job can be daunting, but with the help of AppMap, you can quickly get up to speed and easily navigate any new codebase.
Whether you’re a seasoned developer or just starting, AppMap is a valuable tool to have in your arsenal. Try it out today and see how it can help you become more productive and efficient in your new role.
Check out some other amazing things AppMap can do like OpenAPI documentation generation or runtime analysis on the AppMap Documentation. If you find something awesome or use it in an exciting way I’d love to hear about it. I always hang out in the AppMap community Slack and am stoked to hear people’s stories.