-
Docs
-
Reference
- AppMap for Visual Studio Code
- AppMap for JetBrains
- AppMap Agent for Ruby
- AppMap Agent for Python
- AppMap Agent for Java
- AppMap Agent for Node.js
- AppMap for Java - Maven Plugin
- AppMap for Java - Gradle Plugin
- AppMap Command line interface (CLI)
- Remote recording API
- AppMap MCP Server
- Analysis Labels
- Analysis Rules
- License Key Installation
- Subscription Management
- Community
AppMap Offline Install for Secure Environments
For best results, ensure you are downloading the latest versions of the AppMap software.
We recommend running at least the following versions.
Version Number VS Code Extension >= 0.130.0JetBrains Extension >= 0.74.1AppMap Binary >= 3.168.1(Optional) Java Jar >= 1.27.1- Assumptions
- Download Steps
- Installation Steps
- (Optional) Java Application Install Details
- Post-Installation Configuration
- Troubleshooting
- Support
Assumptions
Access to the following domains for downloading the AppMap application assets manually.
-
https://github.com/
- For downloading the VS Code or JetBrains extension files
- For downloading the AppMap application binaries
-
https://getappmap.com
- To authenticate your VS Code installation
- NOTE: This is only necessary if you don’t have AppMap provided license keys.
Download Steps
Download the AppMap VS Code Plugin (VSIX)
If you are a JetBrains User, go to the download documentation for the JetBrains plugin.
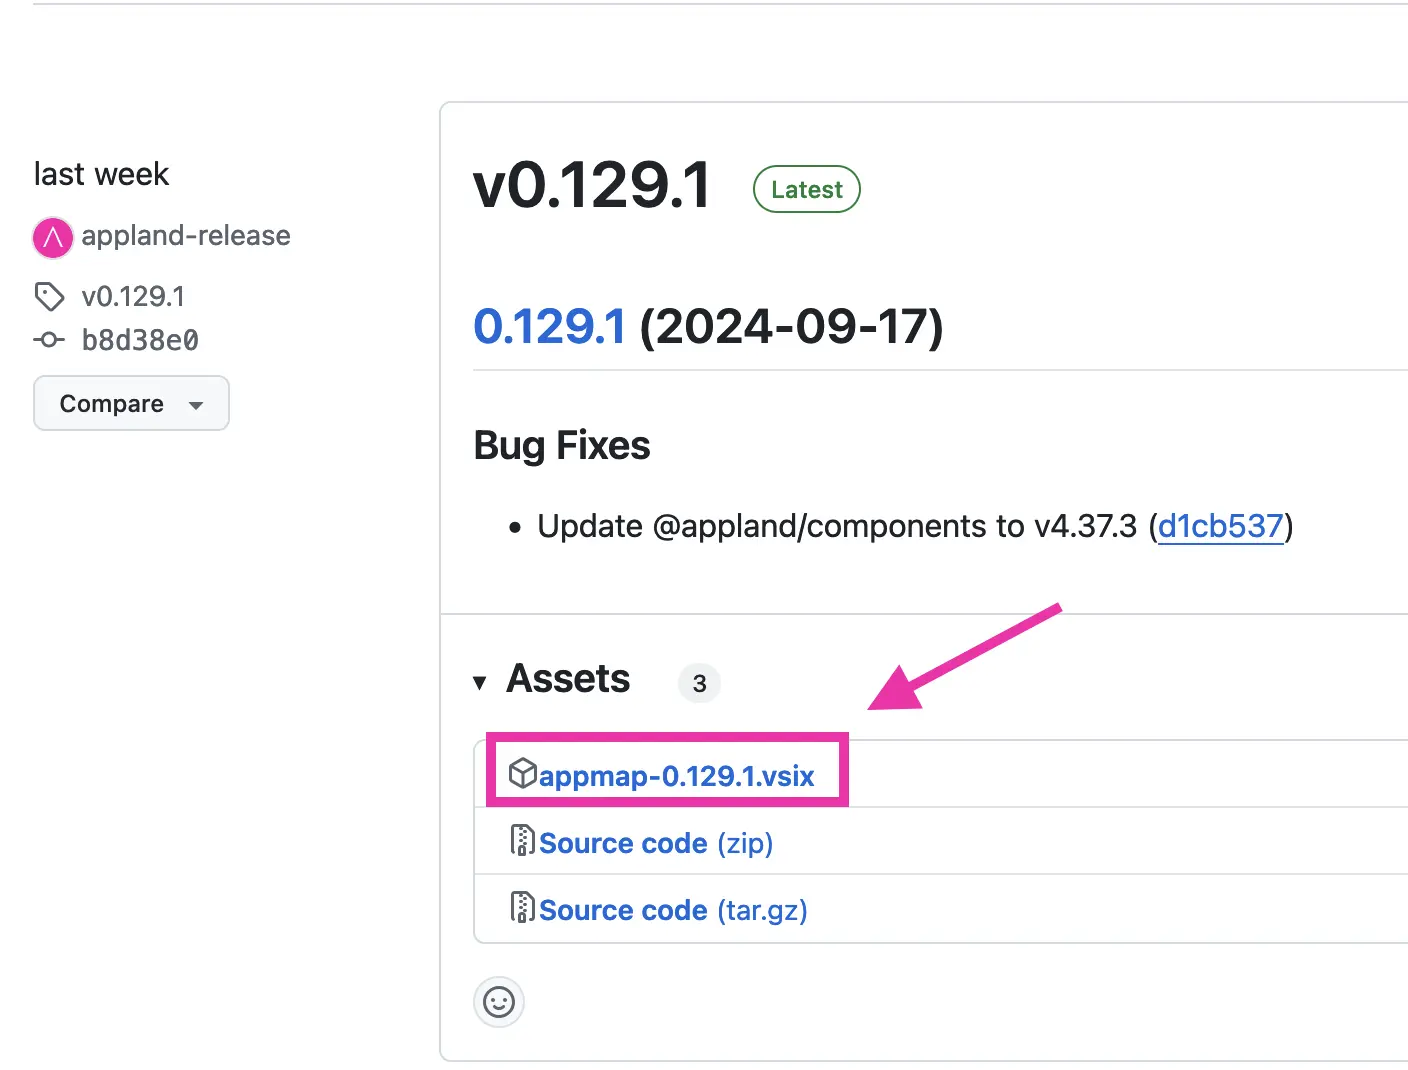
Navigate to the the AppMap VS Code GitHub latest releases page:
This URL will take you to the most recently released version of the extension.
Alternatively, you can navigate to the main releases page to install any specific version of the extension.
Click on the VSIX file to save the file to your local machine.
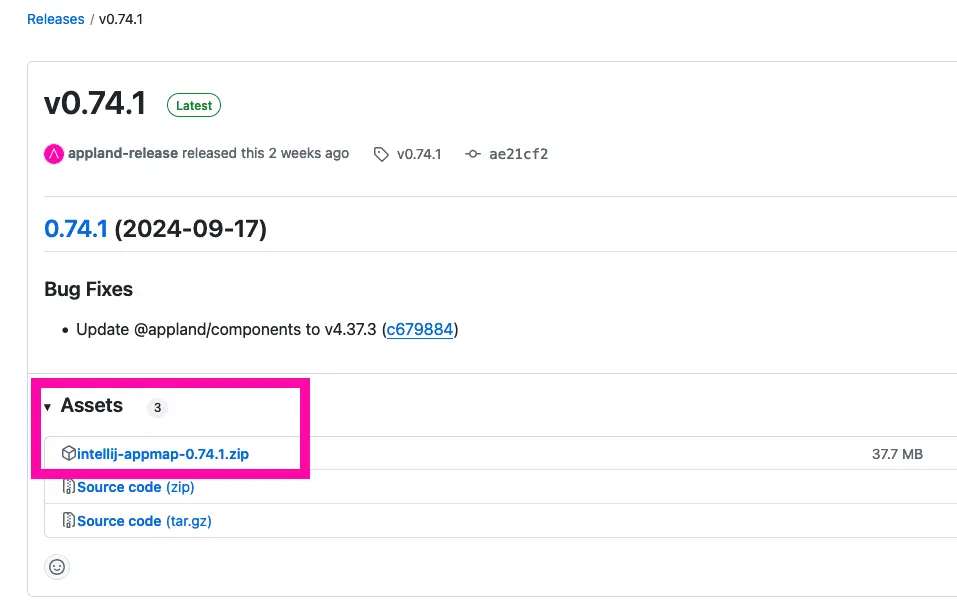
Download the AppMap JetBrains Plugin (zip)
Alternatively if you are a JetBrains user, navigate to the AppMap GitHub repository for the JetBrains/IntelliJ plugin latest releases page.
Download the zip file and save locally.
Download the AppMap Application Binaries
Navigate to the AppMap application binaries release page.
Search within the page for a release with the name “@appland/appmap”.
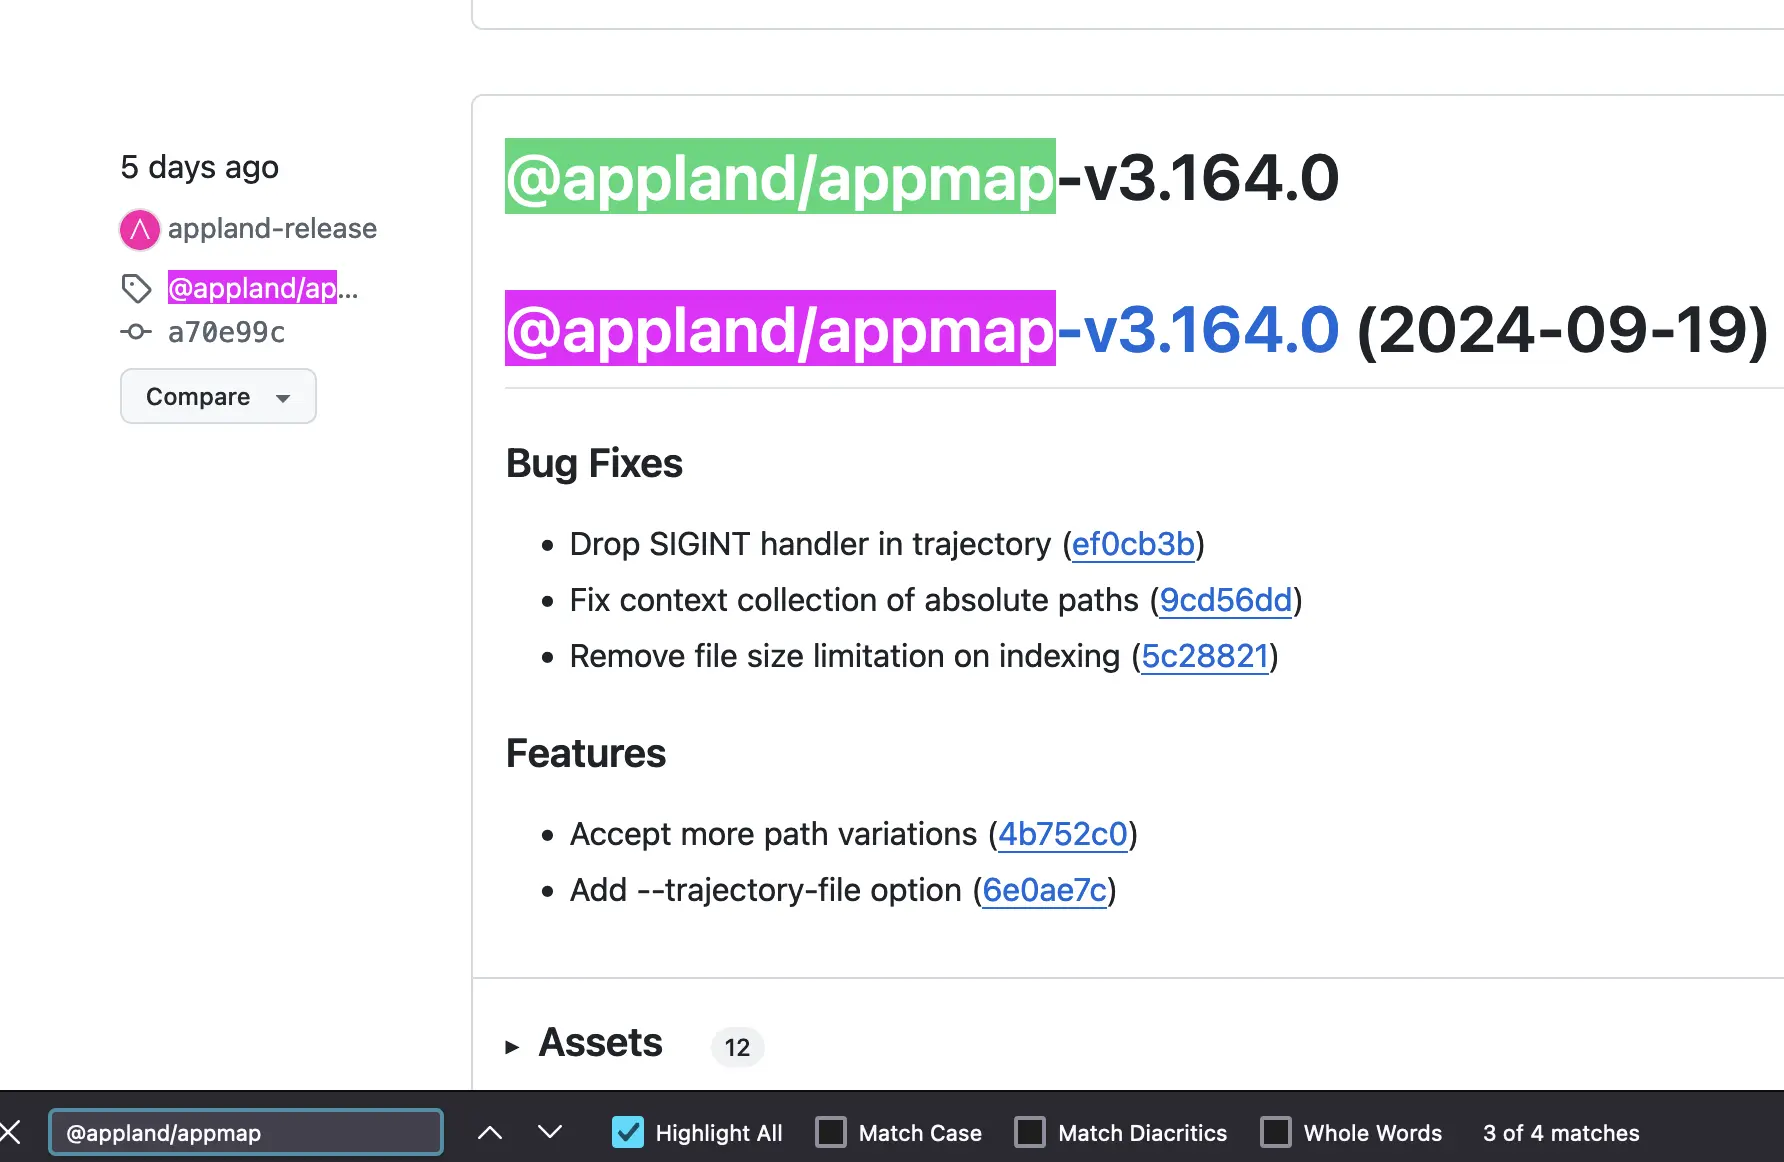 NOTE: You may need to navigate to page 2 depending on the number of released AppMap binaries.
Click on the “Assets” button to expand all the available AppMap binaries.

Download the binary that is specific to your computers’ operating system and architecture. Optionally download the sha256 file as well if you wish to validate the files’ integrity on your local machine.
Installation Steps
Install the AppMap VS Code Plugin (VSIX)
Open VS Code, and then open the Command Palette: Mac:
Command + Shift + PWindows:Control + Shift + PAfter opening the Command Palette, search for “install from VSIX”
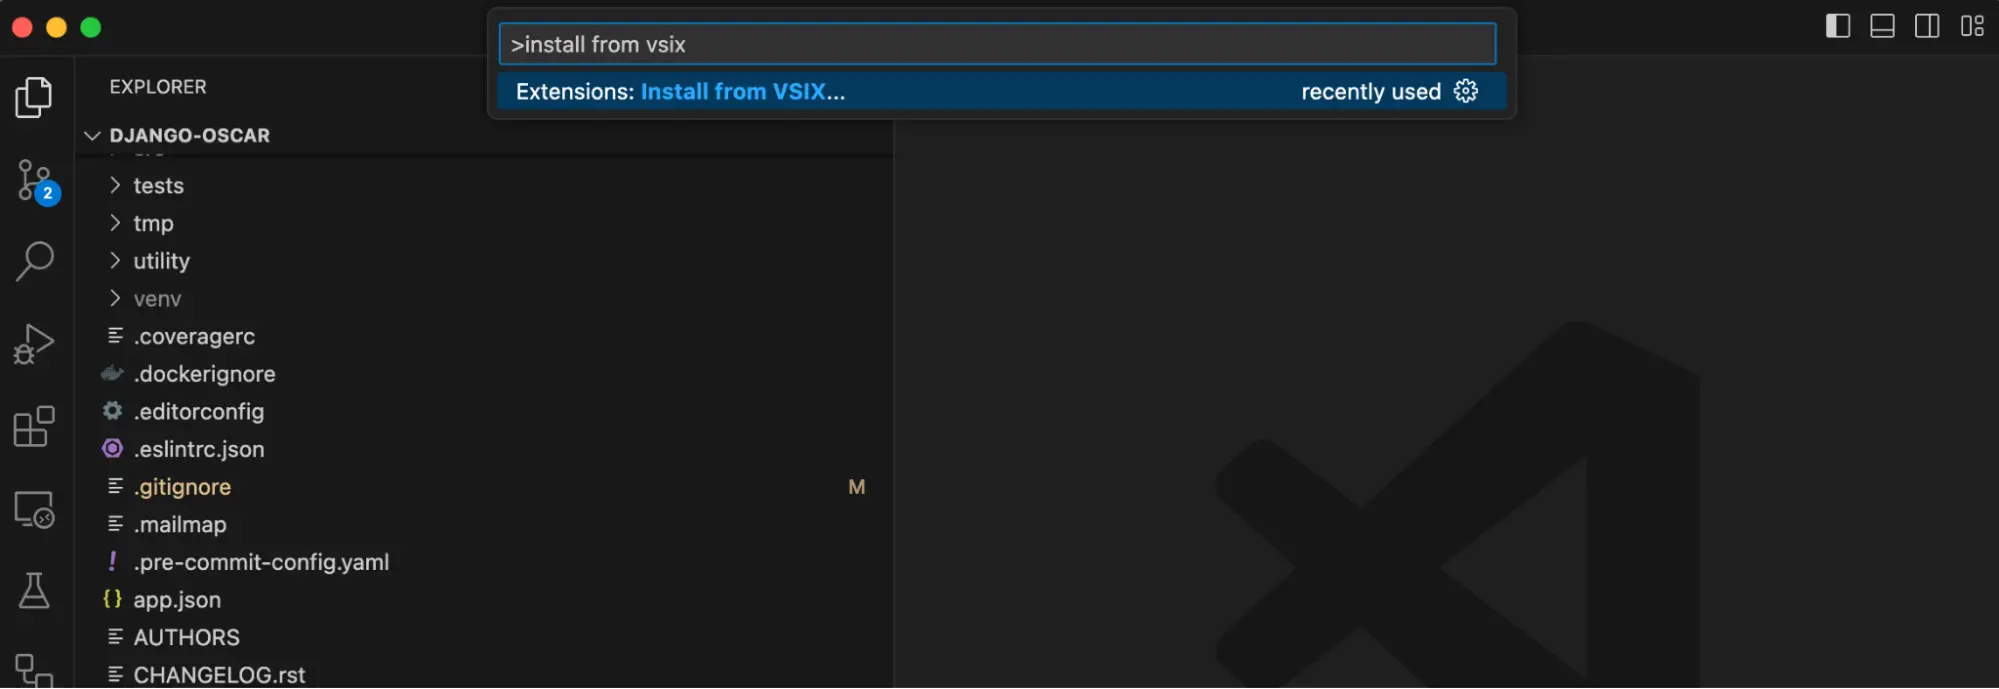
In the following window, locate the VSIX you downloaded previously and select that for installation.
Shift Bullet Points NOTE: If VS Code is able to connect to the following domains, AppMap binary asset download will complete successfully.- objects.githubusercontent.com
- *.github.com
Install the AppMap Plugin for JetBrains (zip)
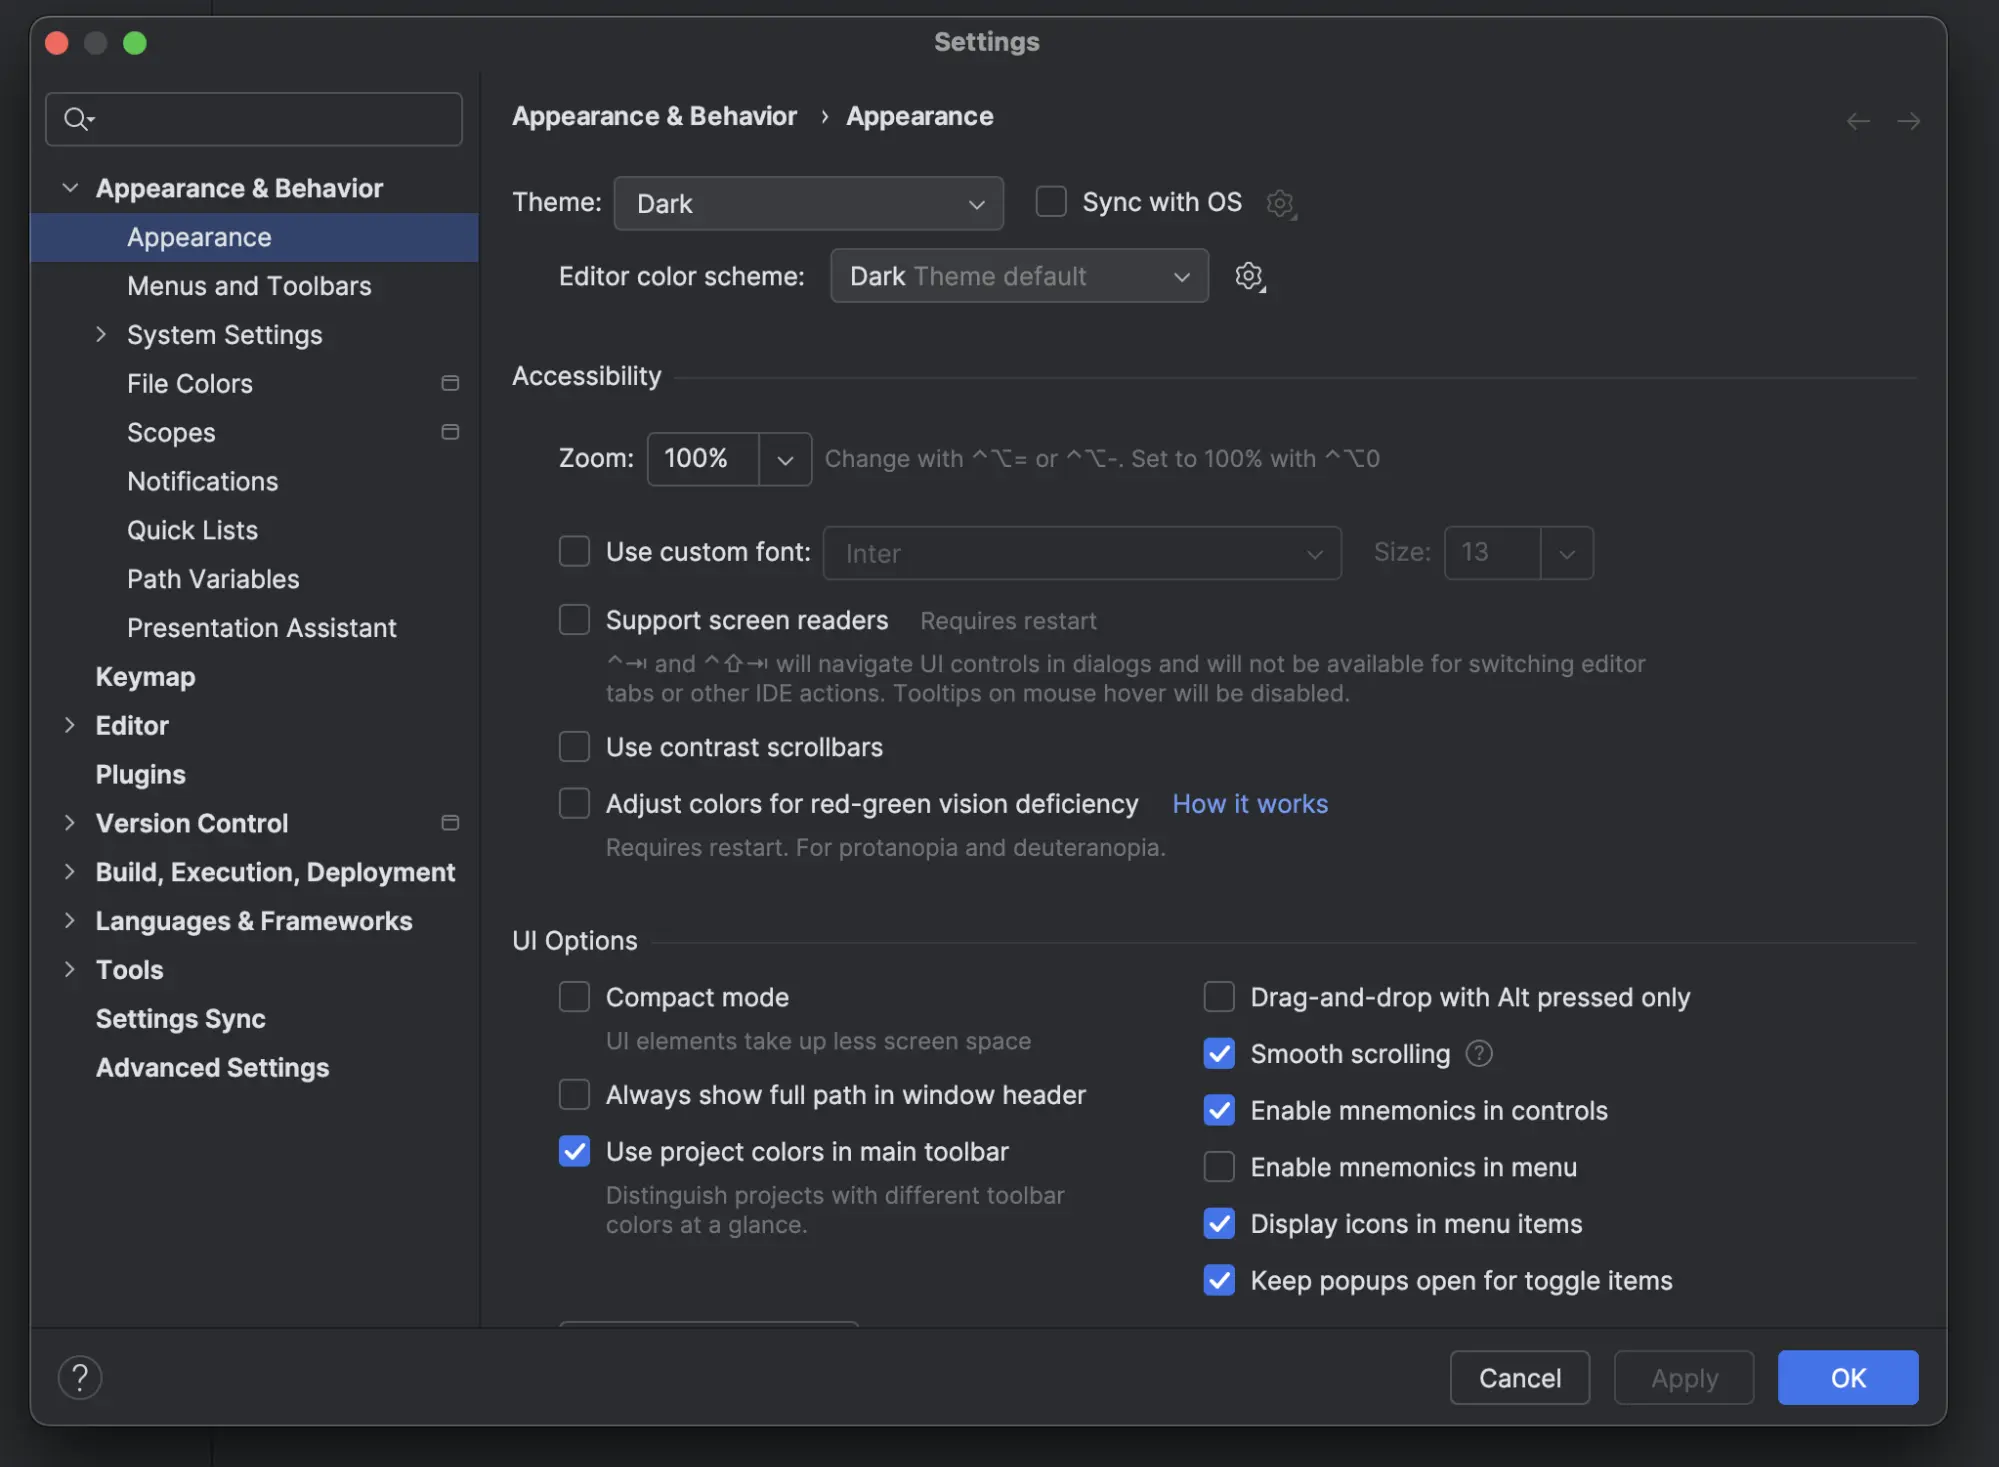
Open your JetBrains editor, and open the “Settings” page.
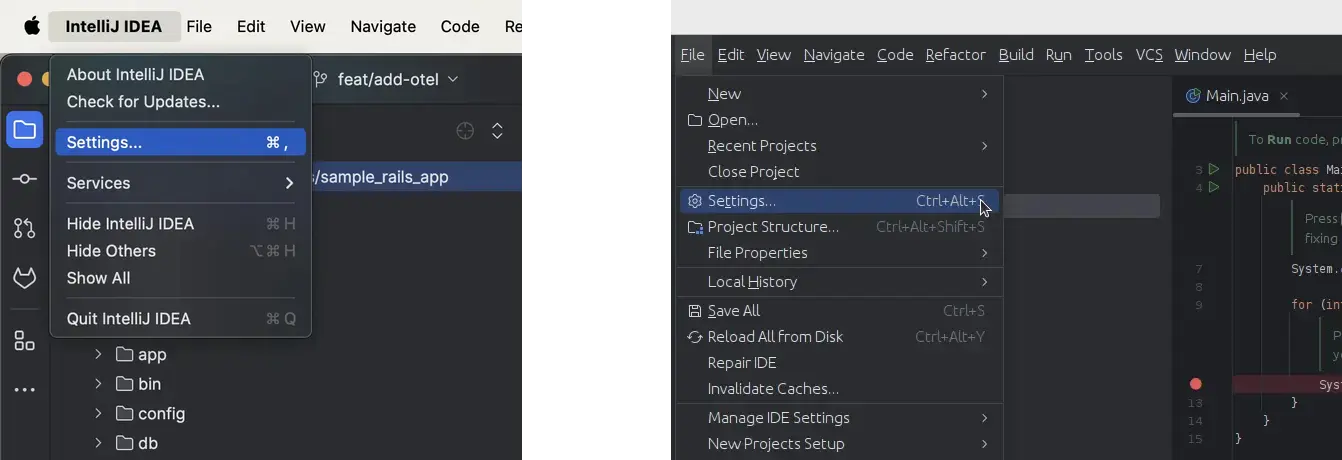
The settings page should look similar to below.
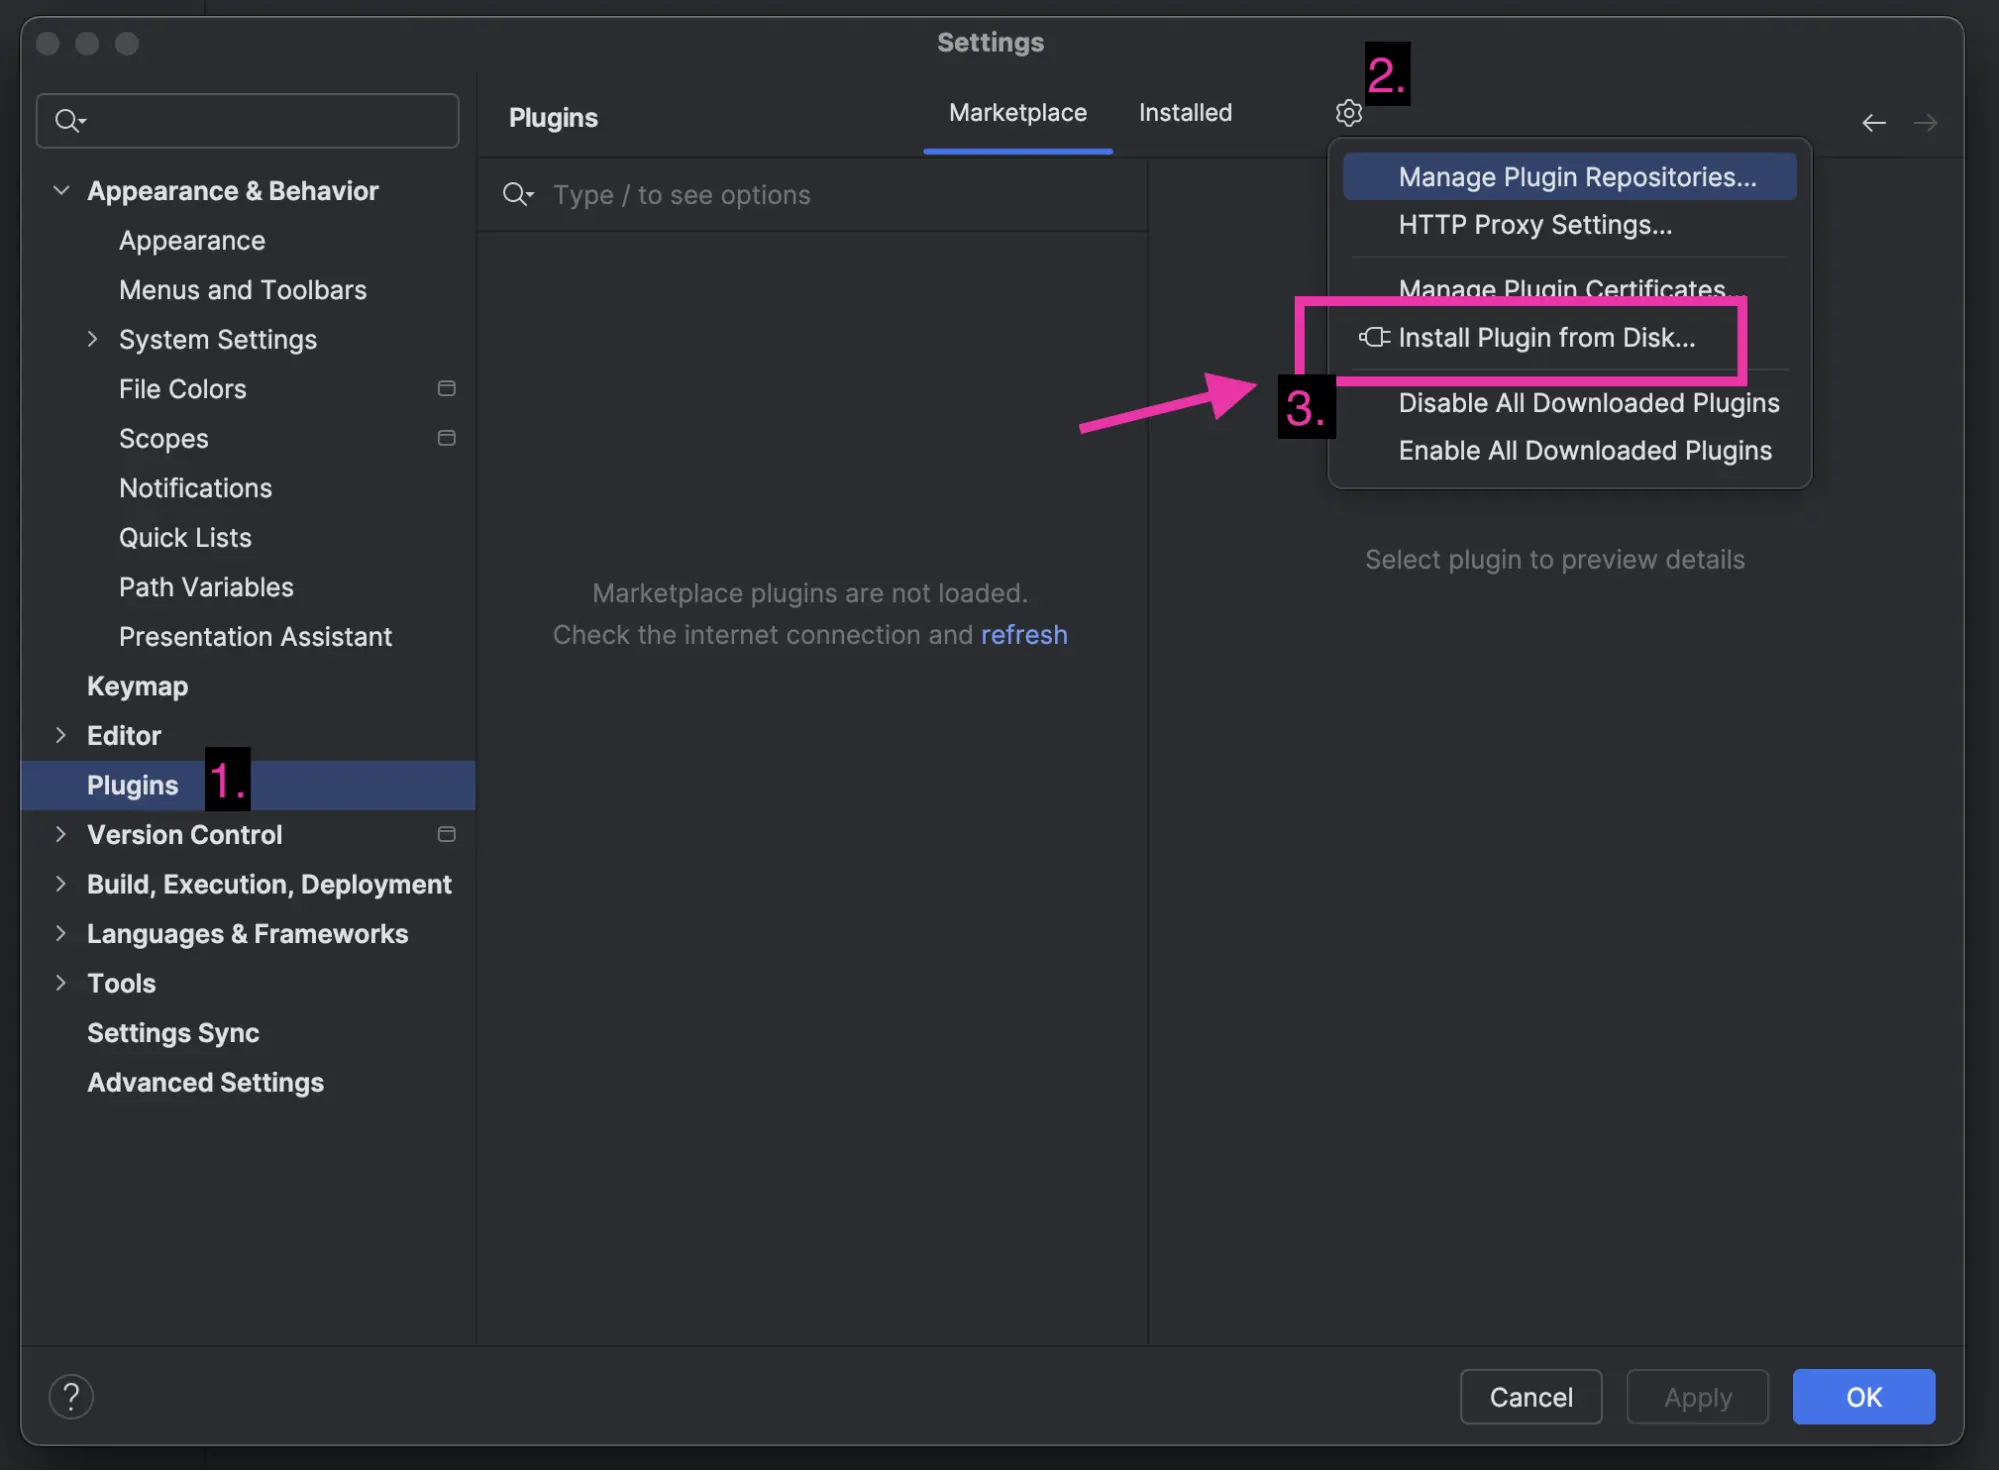
Search for, or select the “Plugins” option, then select the gear icon and choose “Install Plugin from Disk”
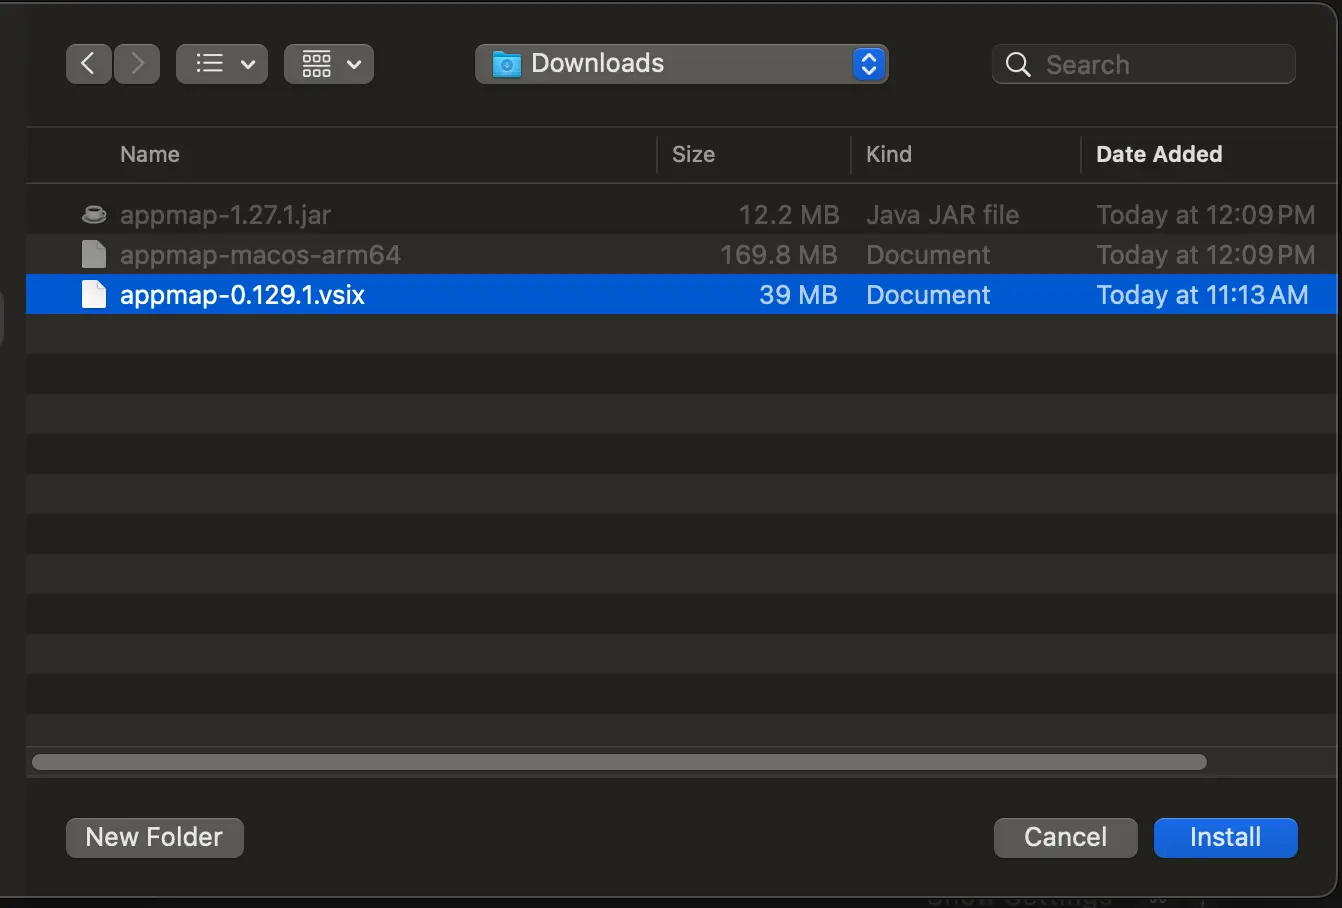
Select the path to the zip file you downloaded in the previous section.
After selecting the AppMap zip file, click “Accept” for the “Third-Party Plugins Notice”
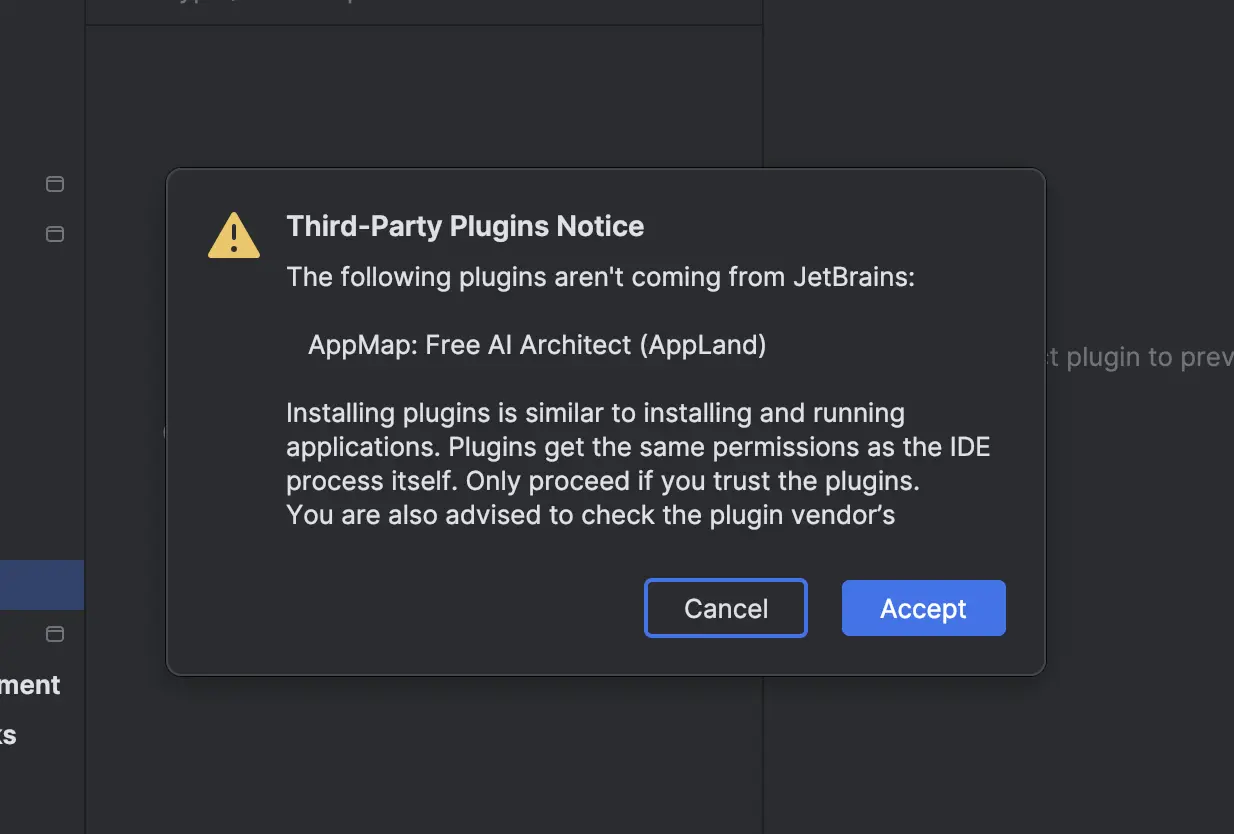 Note: After clicking “Accept” to the JetBrains plugin notice you may need to go back to the previous “Install Plugin from Disk” step and repeat to install the plugin.
When the plugin is successfully installed, you will see it in the settings page plugin list.
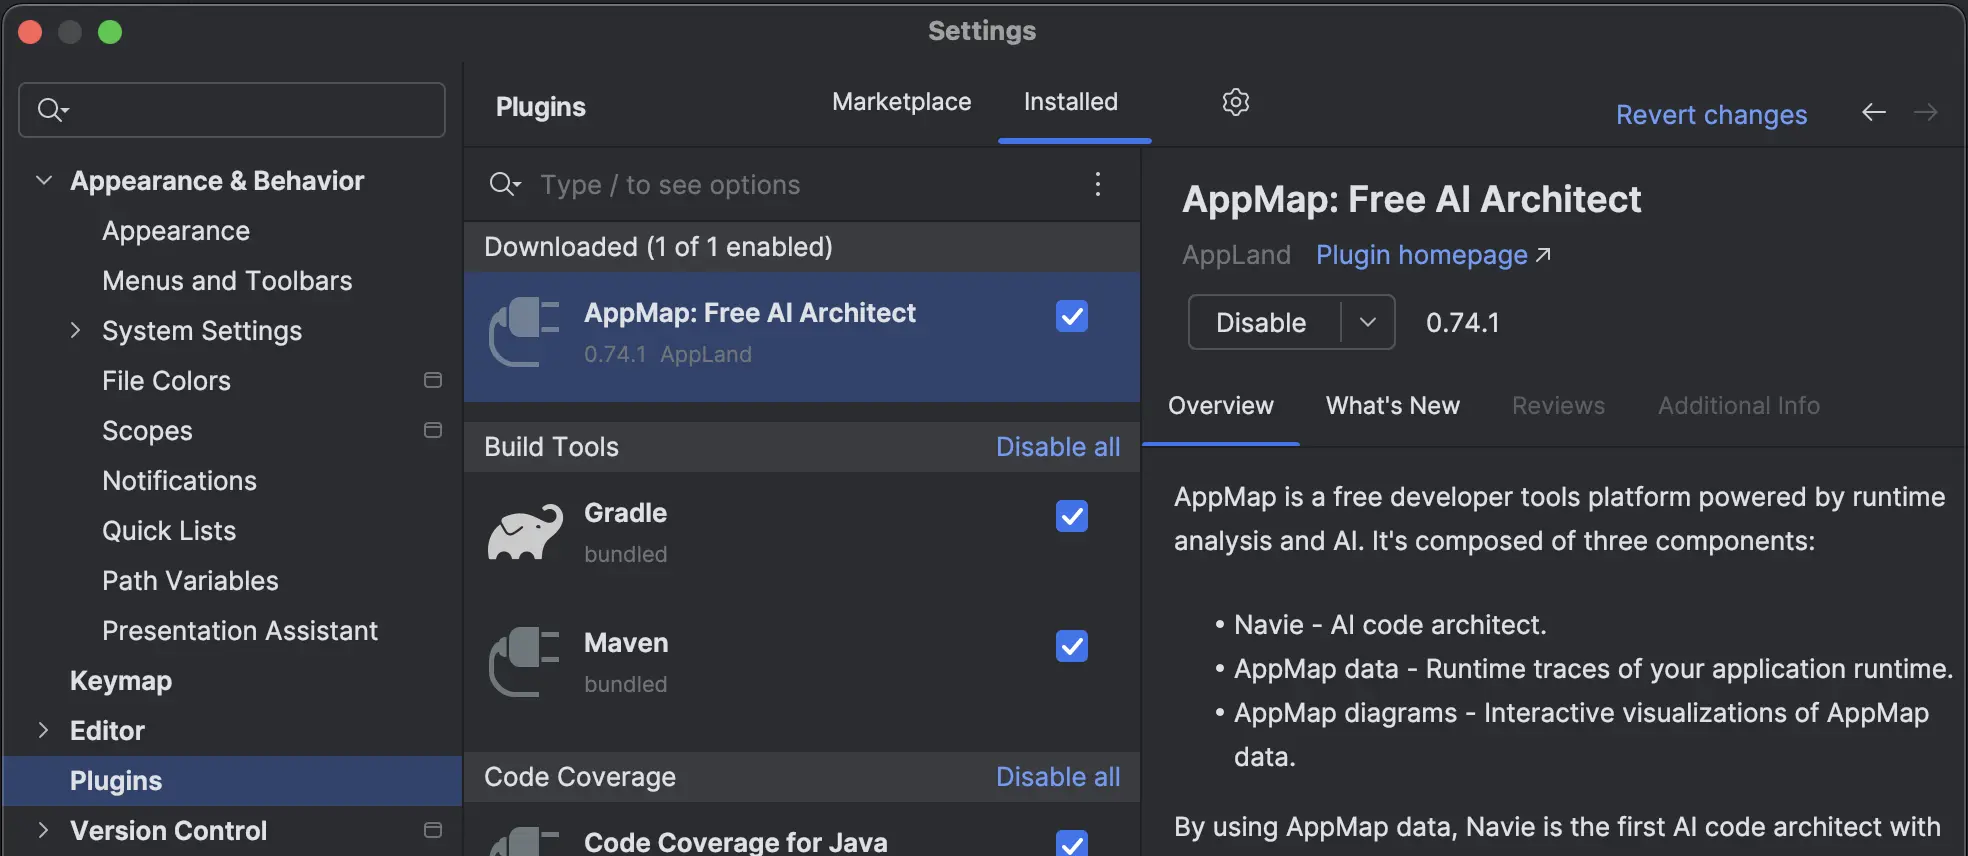
If you don’t see it in the list, search for AppMap in the search box to confirm the installation is complete.

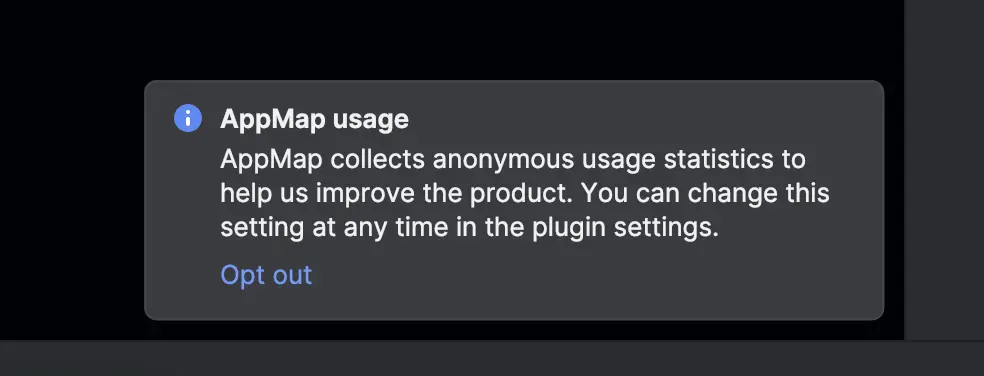
After closing the settings page, the AppMap plugin will open.
AppMap collects anonymous usage stats to improve the product, in the pop up on the bottom of the screen, choose to “Opt out” or simply close the popup to keep these anonymous product analytics enabled.
Shift Bullet Points NOTE: If VS Code is able to connect to the following domains, AppMap binary asset download will complete successfully.- objects.githubusercontent.com
- *.github.com
- registry.npmjs.org
Install the AppMap Application Binaries for VS Code
Copy the binary you downloaded in the previous step to the following location.
On Mac and Linux
$HOME/.appmap/bin/appmapThe file needs to be made executable. You can run the following command.
chmod +x $HOME/.appmap/bin/appmapOn Windows
%USERPROFILE%\.appmap\bin\appmap.exeInstall the AppMap Application Binaries for JetBrains
Copy the binary you downloaded in the previous step and to the following location.
On Mac
$HOME/Library/Caches/JetBrains/appland-plugin/appmap/<version>/appmap-macos-arm64Create the subdirectories if they don’t already exist.
For example:
$HOME/Library/Caches/JetBrains/appland-plugin/appmap/3.164.0/appmap-macos-arm64The file needs to be made executable. You can run the following command.
chmod +x $HOME/Library/Caches/JetBrains/appland-plugin/appmap/3.164.0/appmap-macos-arm64On Linux
$HOME/.cache/JetBrains/appland-plugin/appmap/<version>/appmap-linux-arm64Create the subdirectories if they don’t already exist.
For example:
$HOME/.cache/JetBrains/appland-plugin/appmap/3.164.0/appmap-linux-arm64The file needs to be made executable. You can run the following command
chmod +x $HOME/.cache/JetBrains/appland-plugin/appmap/3.164.0/appmap-linux-arm64On Windows
%LocalAppData%\JetBrains\appland-plugin\appmap\<version>\appmap-win-x64.exeOr the fully expanded path on windows.
C:\Users\<YourUsername>\AppData\Local\JetBrains\appland-plugin\appmap\<version>\appmap-win-x64.exeCreate the subdirectories if they don’t already exist.
For Example:
C:\Users\BobSmith\AppData\Local\JetBrains\appland-plugin\appmap\3.164.0\appmap-win-x64.exe(Optional) Java Application Install Details
If you plan on using Navie with a Java application, follow the steps below to add the AppMap jar file to your local system to enable recording of AppMap data.
Download the AppMap Java Jar file
NOTE: The VSIX will be bundled with the latest java jar file from the same release, but this is not guaranteed to be the same as the most recently released version. The steps below will ensure you can download the latest release if your machine is unable to manually update.To record Java applications, you’ll need to download the AppMap Java Jar file for the code editor extension to use.
Navigate to the AppMap Java releases page for the latest releases of this project.In the Assets section, download the
appmap-<version>.jarfile and optionally the .asc file if you would like to validate the file integrity on your local machine.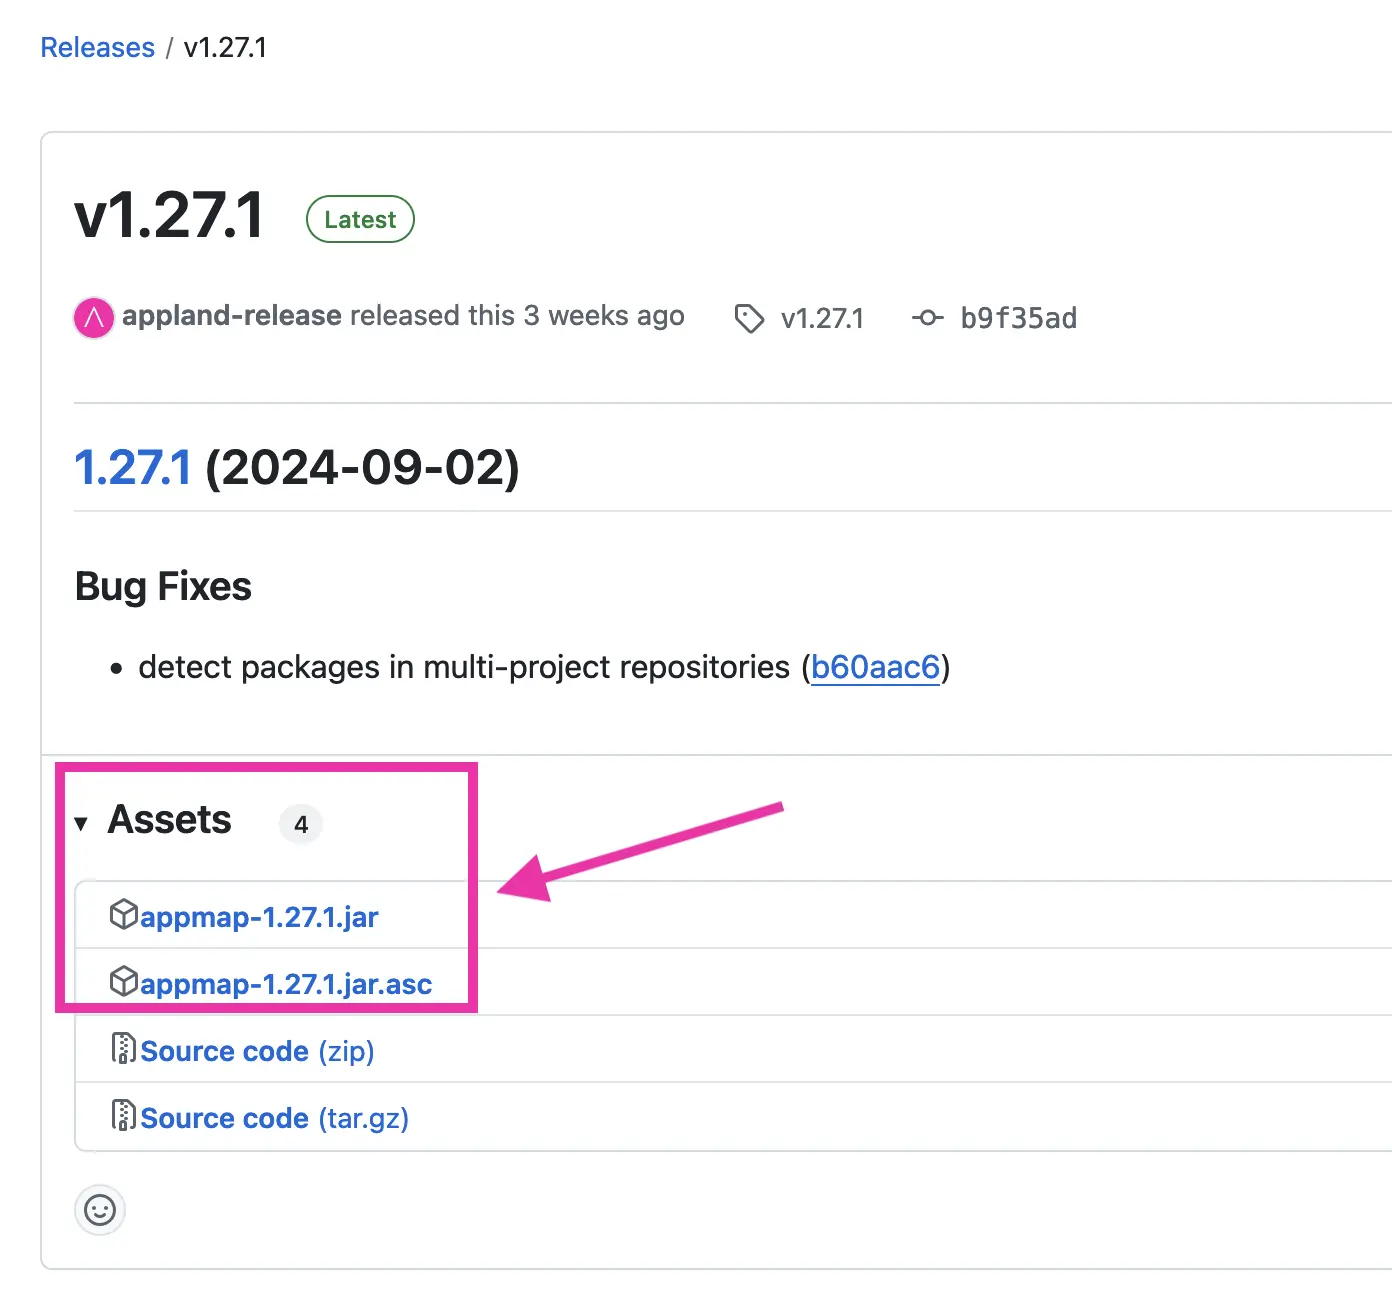
Install the AppMap Java Jar file
Copy the
appmap-<version>.jardownloaded in the previous step to the following location. Ensure the file is renamed toappmap.jarOn Mac and Linux
$HOME/.appmap/lib/java/appmap.jarWhen recording your Java application, you will pass this file location to the JVM running your application like:
-javaagent:~/.appmap/lib/java/appmap.jarOn Windows
%USERPROFILE%\.appmap\lib\java\appmap.jarWhen recording your Java application, you will pass this file location to the JVM running your application like:
-javaagent:%USERPROFILE%\.appmap\lib\java\appmap.jarPost-Installation Configuration
Configure the LLM Provider
After completing the install steps, you can now configure the LLM provider you wish to use with Navie.
Open a Navie Chat
After configuring your chosen LLM provider, follow the getting started instructions to open a new Navie chat window.
If the AppMap binaries are installed and executable, you should see a new Navie chat window open successfully.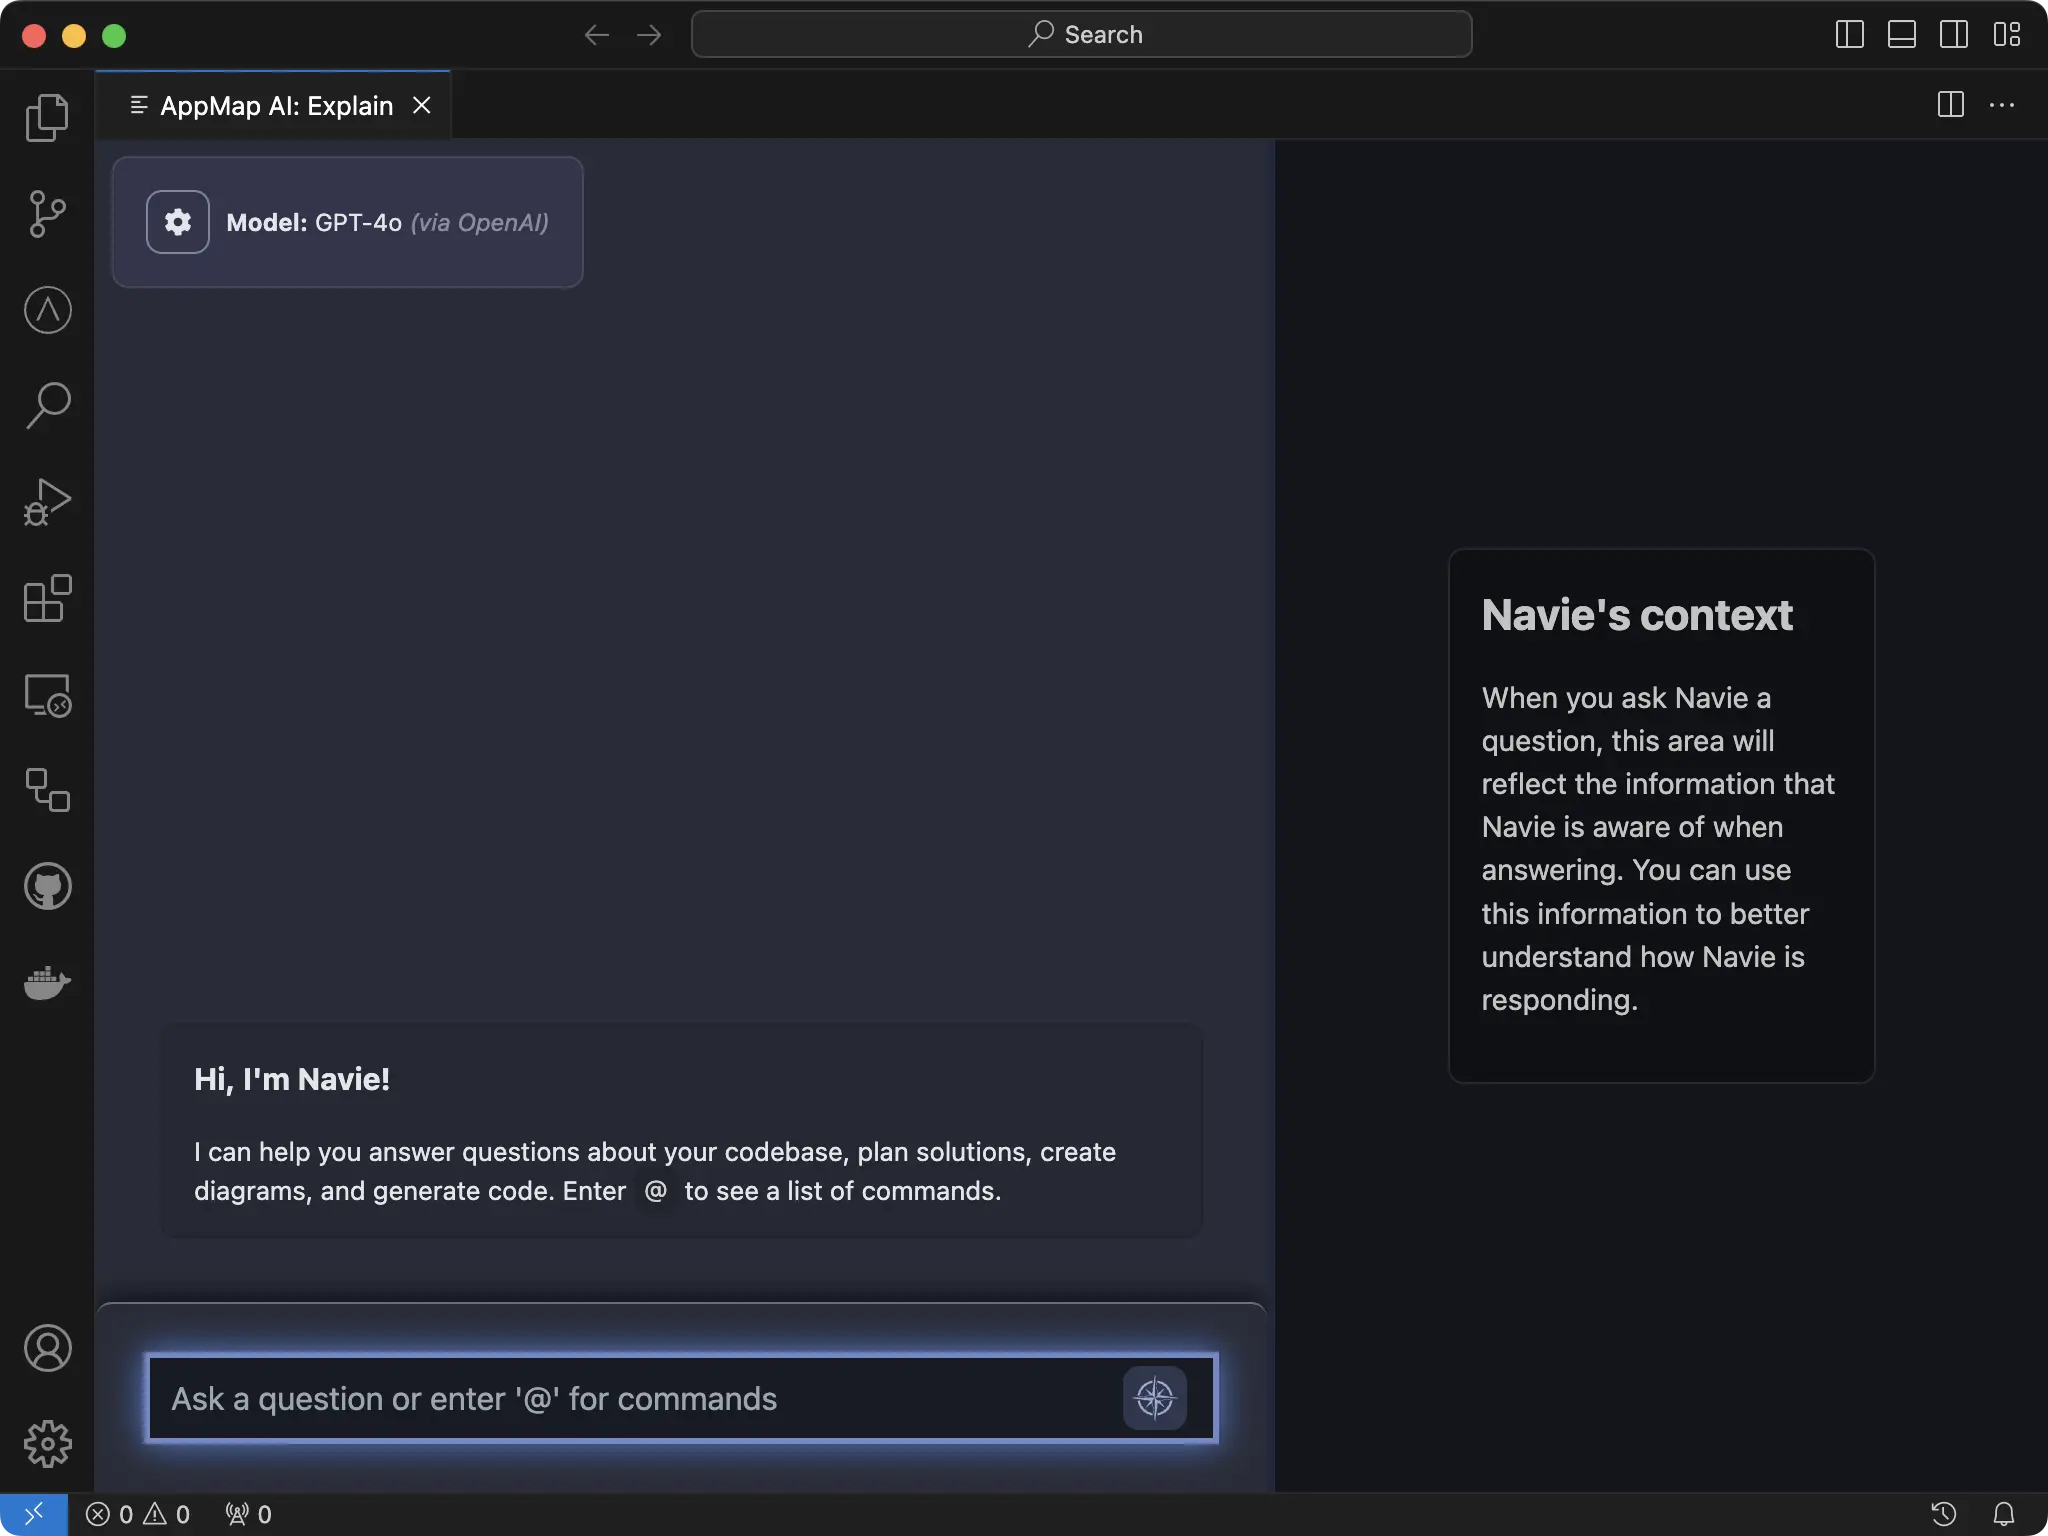
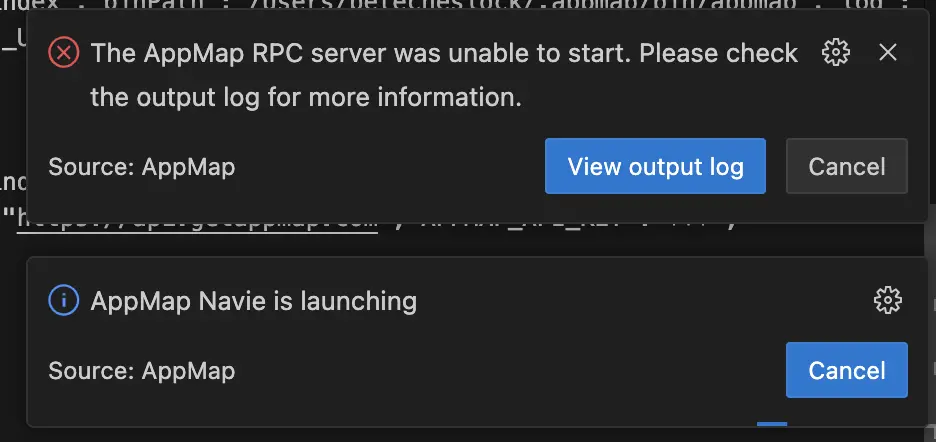
If the binaries are not installed in the correct location, or are not executable, the AppMap Navie RPC service will be unable to start. In the event that happens, you can click “View output log” (on VS Code) to get more information about the failure. Alternatively, you can navigate to the Navie logs for more information.
(Optional) Record a Java Application
To test your Java Jar file is in the right location and working correctly, simply record a java application using the Java command flag.
Refer to the AppMap Agent for Java documentation for more information about using the AppMap Jar for recording Java applications.
$ java -javaagent:$HOME/.appmap/lib/java/appmap.jar -jar target/*.jarTroubleshooting
Accessing Navie Logs
Visual Studio Code
You can access the Navie logs in VS Code by opening the
Outputtab and selectingAppMap Servicesfrom the list of available output logs.To open the Output window, on the menu bar, choose View > Output, or in Windows press
Ctrl+Shift+Uor in Mac useShift+Command+U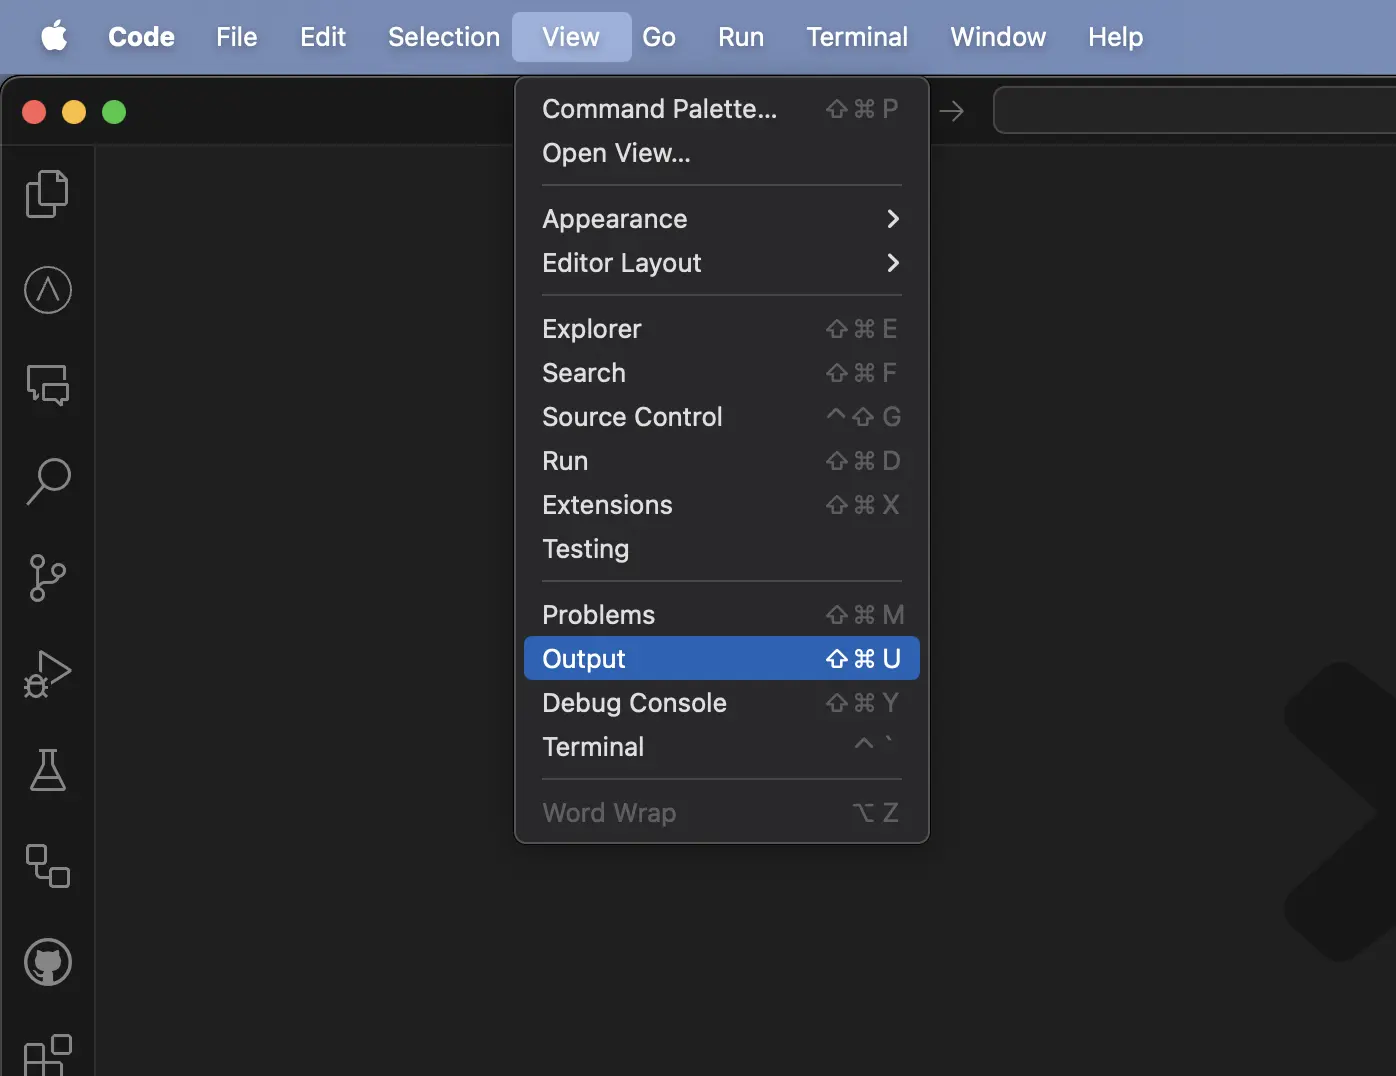
When reviewing logs, pay attention to startup errors that might indicate:
- System compatibility issues (e.g., GLIBC version requirements on Linux)
- Permission problems (especially on Windows)
- Temporary directory access restrictions
For detailed information about common error patterns and their solutions, see our VS Code troubleshooting guide.
Click on the output log dropdown in the right corner to view a list of all the available output logs.
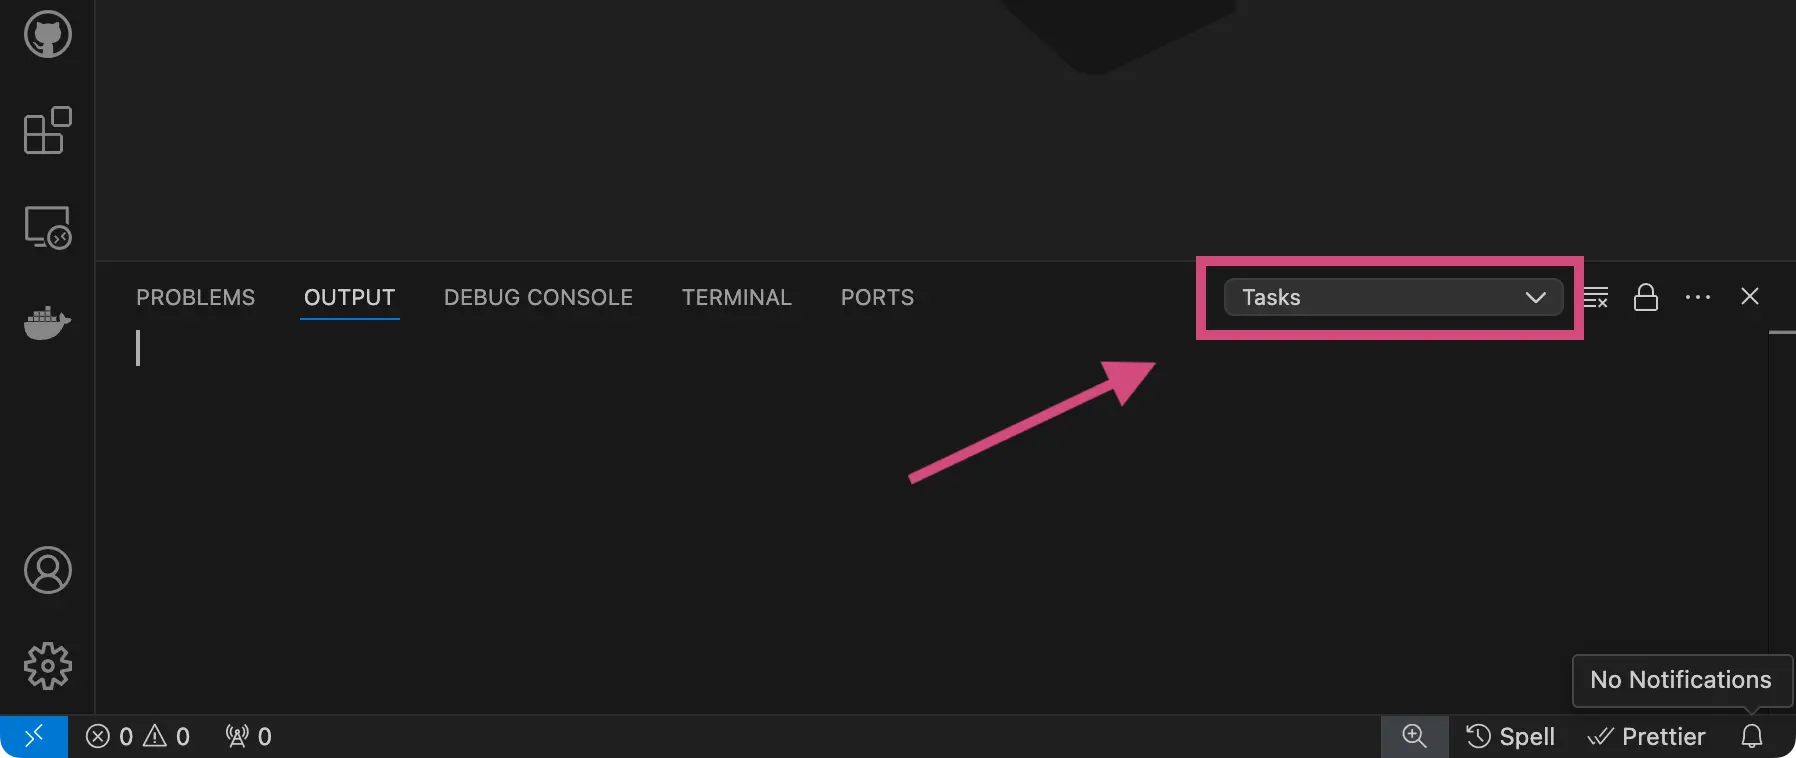
Select on the
AppMap: Serviceslog to view the logs from Navie.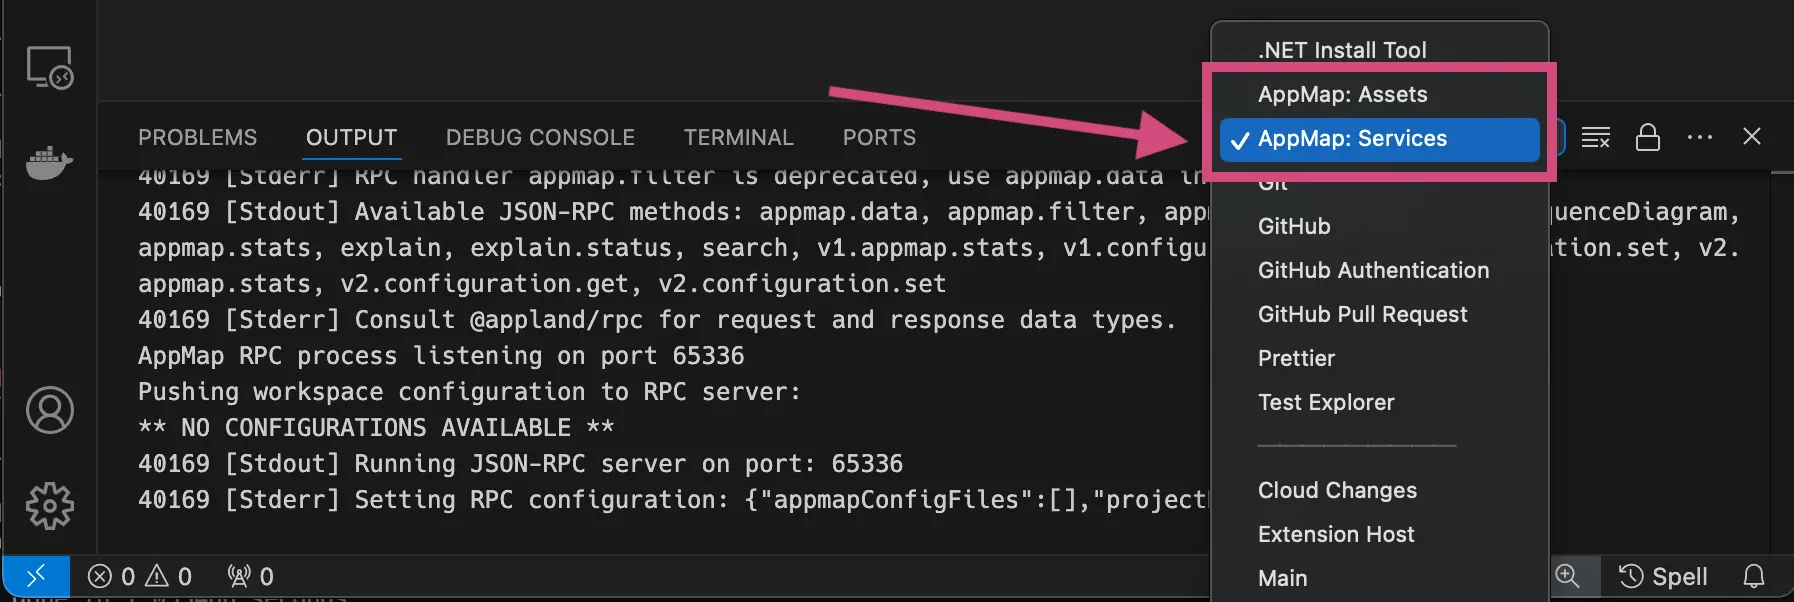
JetBrains
You can enable debug logging of Navie in your JetBrains code editor by first opening
Help>Diagnostic Tools>Debug Log Settings.
In the
Custom Debug Log Configurationenterapplandto enable DEBUG level logging for the AppMap plugin.
Next, open
Help>Show Log...will open the IDE log file.
Support
If you encounter startup issues with the VS Code extension, first check our troubleshooting guide for solutions to common problems like:
- Linux GLIBC version compatibility requirements
- Windows temporary directory permissions
- Extension startup failures
If you’re still experiencing issues with your offline installation of AppMap Navie, please open a new support request by emailing [email protected]
Include the following information in your support request:
- Any error messages from the VS Code Output panel (AppMap: Services channel)
- Your operating system version and details:
- For Linux: output of
ldd --version - For Windows: OS build number and whether VS Code is running as administrator
- For Linux: output of
- Company Name
- Code editor name and version (e.g. VS Code or JetBrains)
- AppMap binary version
- Detailed log information available from your Navie logs
Thank you for your feedback!
