-
Docs
-
Choose Your LLM Provider
When you ask Navie AI a question, it will connect to the LLM provider of your choice.
LLM Provider
- GitHub Copilot Language Model
- OpenAI
- Anthropic (Claude)
- Google Gemini
- Azure OpenAI
- AnyScale Endpoints
- Fireworks AI
- Ollama
- LM Studio
GitHub Copilot Language Model
With VS Code version 1.91 or later and an active GitHub Copilot subscription, GitHub Copilot is the default LLM provider for Navie. This allows you to leverage the powerful runtime powered Navie AI Architect with your existing Copilot subscription. This is the recommended option for users in corporate environments where Copilot is the only approved and supported language model.
Requirements (VSCode)
The following items are required to use the GitHub Copilot Language Model with Navie in VSCode:
- VS Code Version
1.91or greater - AppMap Extension version
v0.123.0or greater - GitHub Copilot extension installed and activated
Requirements (JetBrains)
The following items are required to use the GitHub Copilot Language Model with Navie in JetBrains IDEs:
- JetBrains IDE version
2023.1or greater - AppMap Plugin version
v0.76.0or greater - GitHub Copilot plugin installed and activated
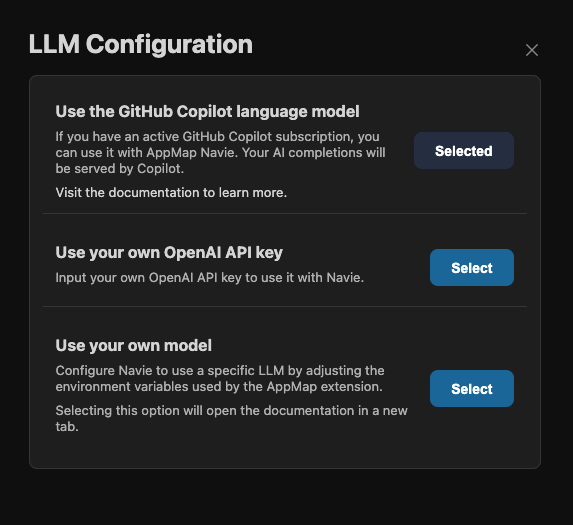
Choosing the GitHib Copilot LLM Provider
NOTE: Copilot is the default LLM provider. This guide is provided primarily for situtations in which you've switched off Copilot and want to switch back.NOTE: If you have setOPENAI_API_KEYor another LLM API key environment variable, it will override the settings chosen from the code editor extension. Unset LLM API key environment variables before changing your Navie LLM configuration in the code editor.Open a new Navie chat, then use the gear icon or the “change the lanugage model provider” link to open the LLM configuration dialog.
Select “GitHub Copilot”:
OpenAI
Note: We recommend configuring your OpenAI key using the code editor extension. The configuration options below are for advanced users.
Only
OPENAI_API_KEYneeds to be set, other settings can stay default:OPENAI_API_KEYsk-9spQsnE3X7myFHnjgNKKgIcGAdaIG78I3HZB4DFDWQGMWhen using your own OpenAI API key, you can also modify the OpenAI model for Navie to use. For example if you wanted to use
gpt-3.5or use an preview model likegpt-4-vision-preview.APPMAP_NAVIE_MODELgpt-4-vision-previewYou can use your own LLM provider API key, and configure that within AppMap. This will ensure all Navie requests will be interacting with your LLM provider of choice.
Configuring Your OpenAI Key
In your code editor, open the Navie Chat window. If the model displays
(default), this means that Navie is configured to use the AppMap hosted OpenAI proxy. Click on the gear icon in the top of the Navie Chat window to change the model.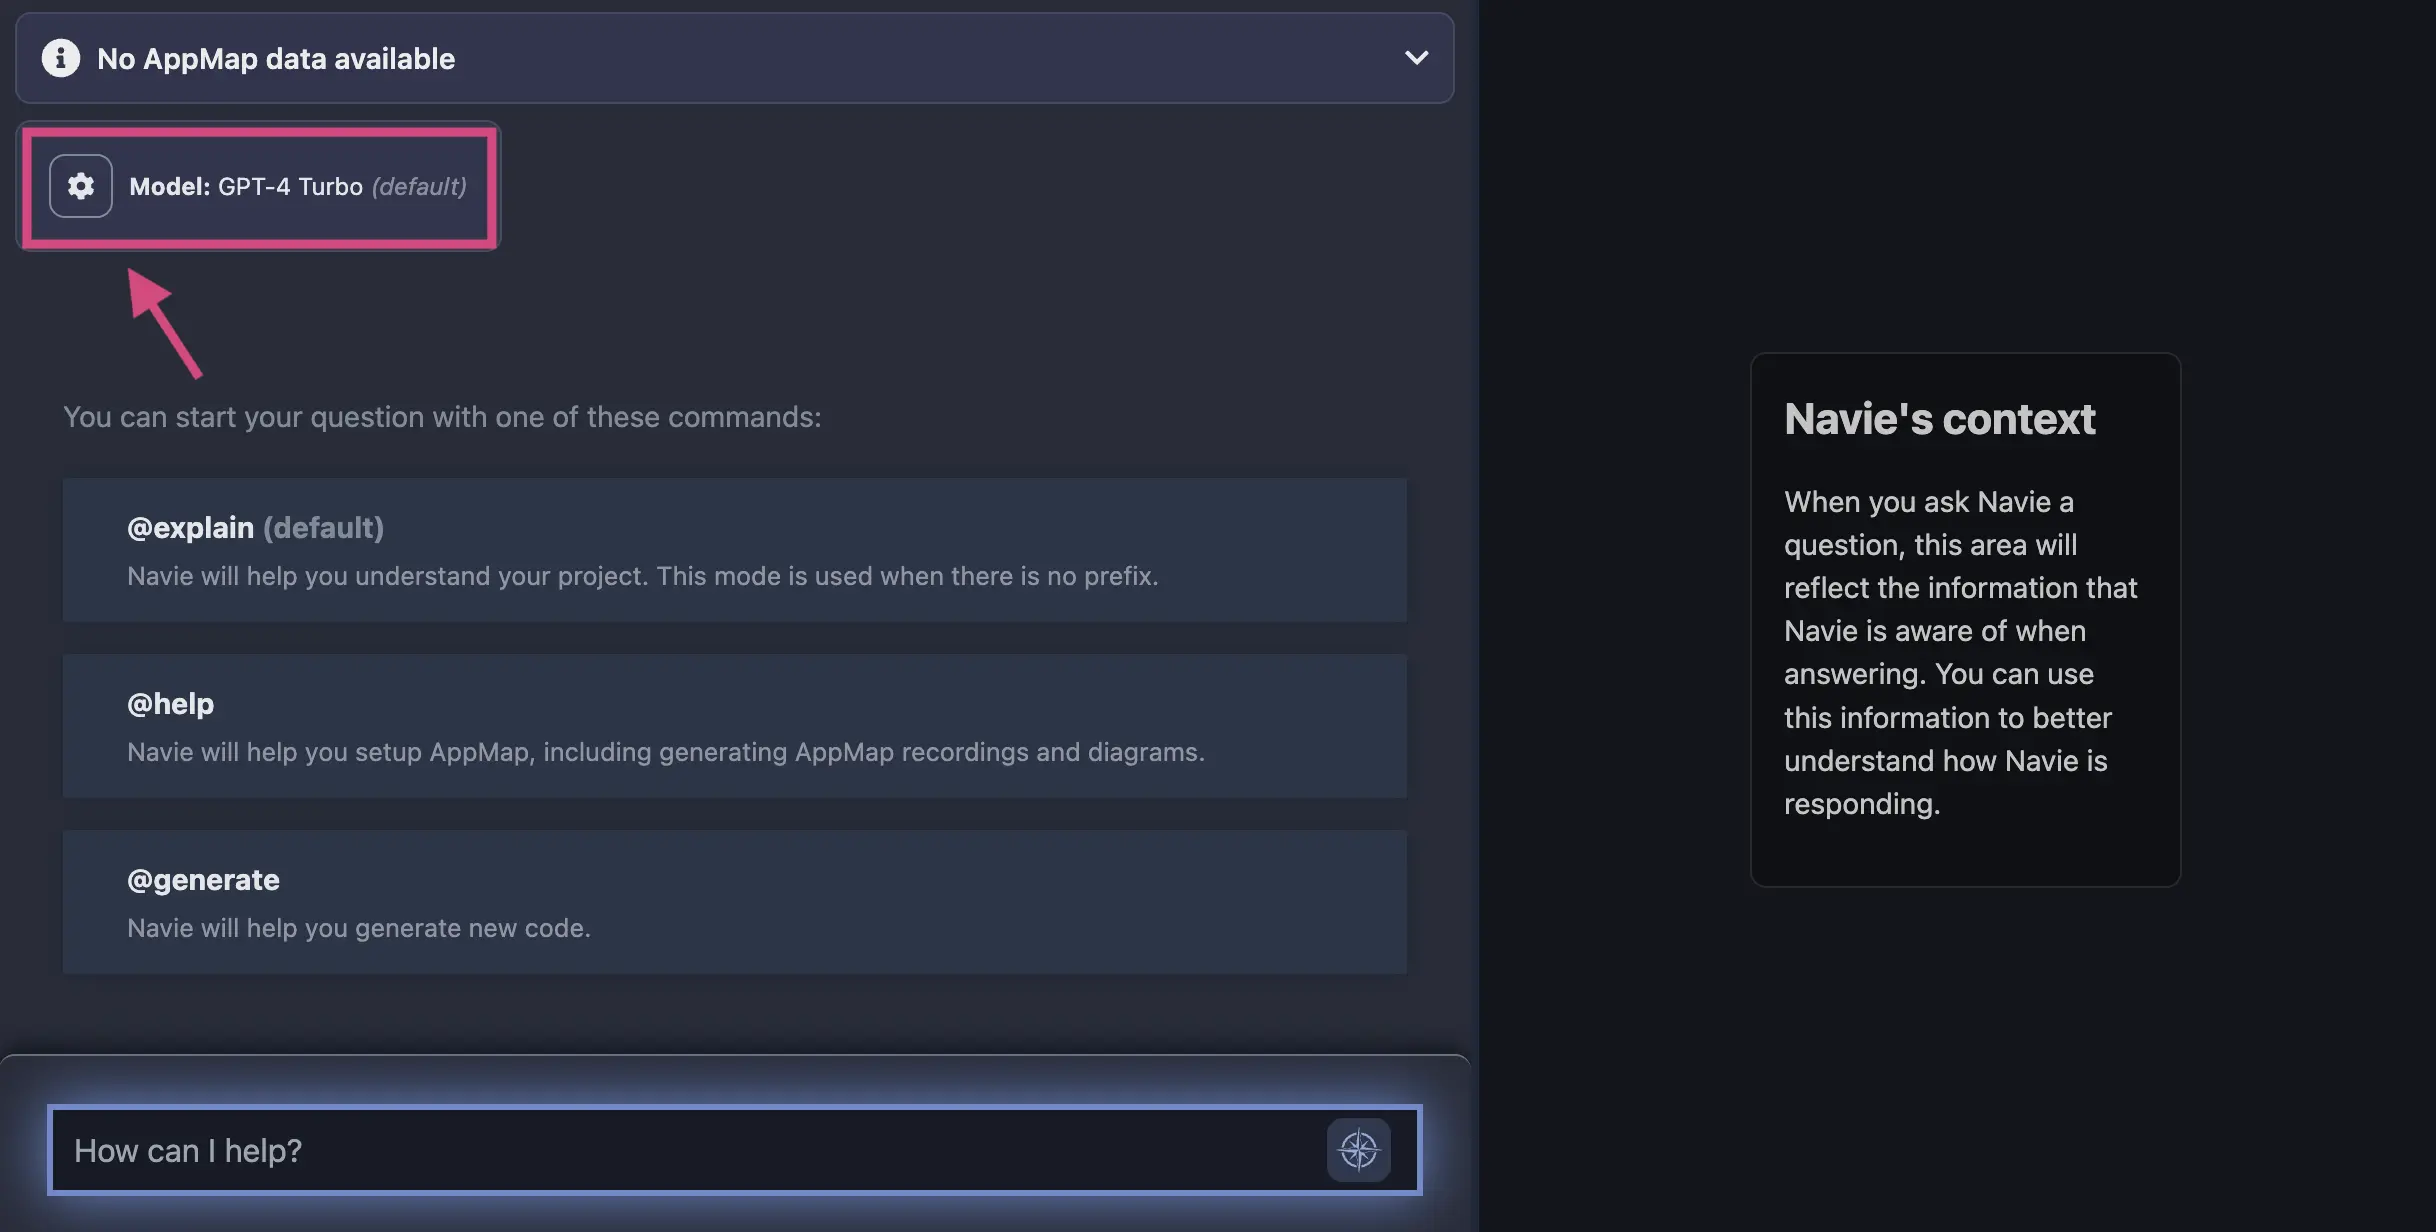
In the modal, select the option to
Use your own OpenAI API key
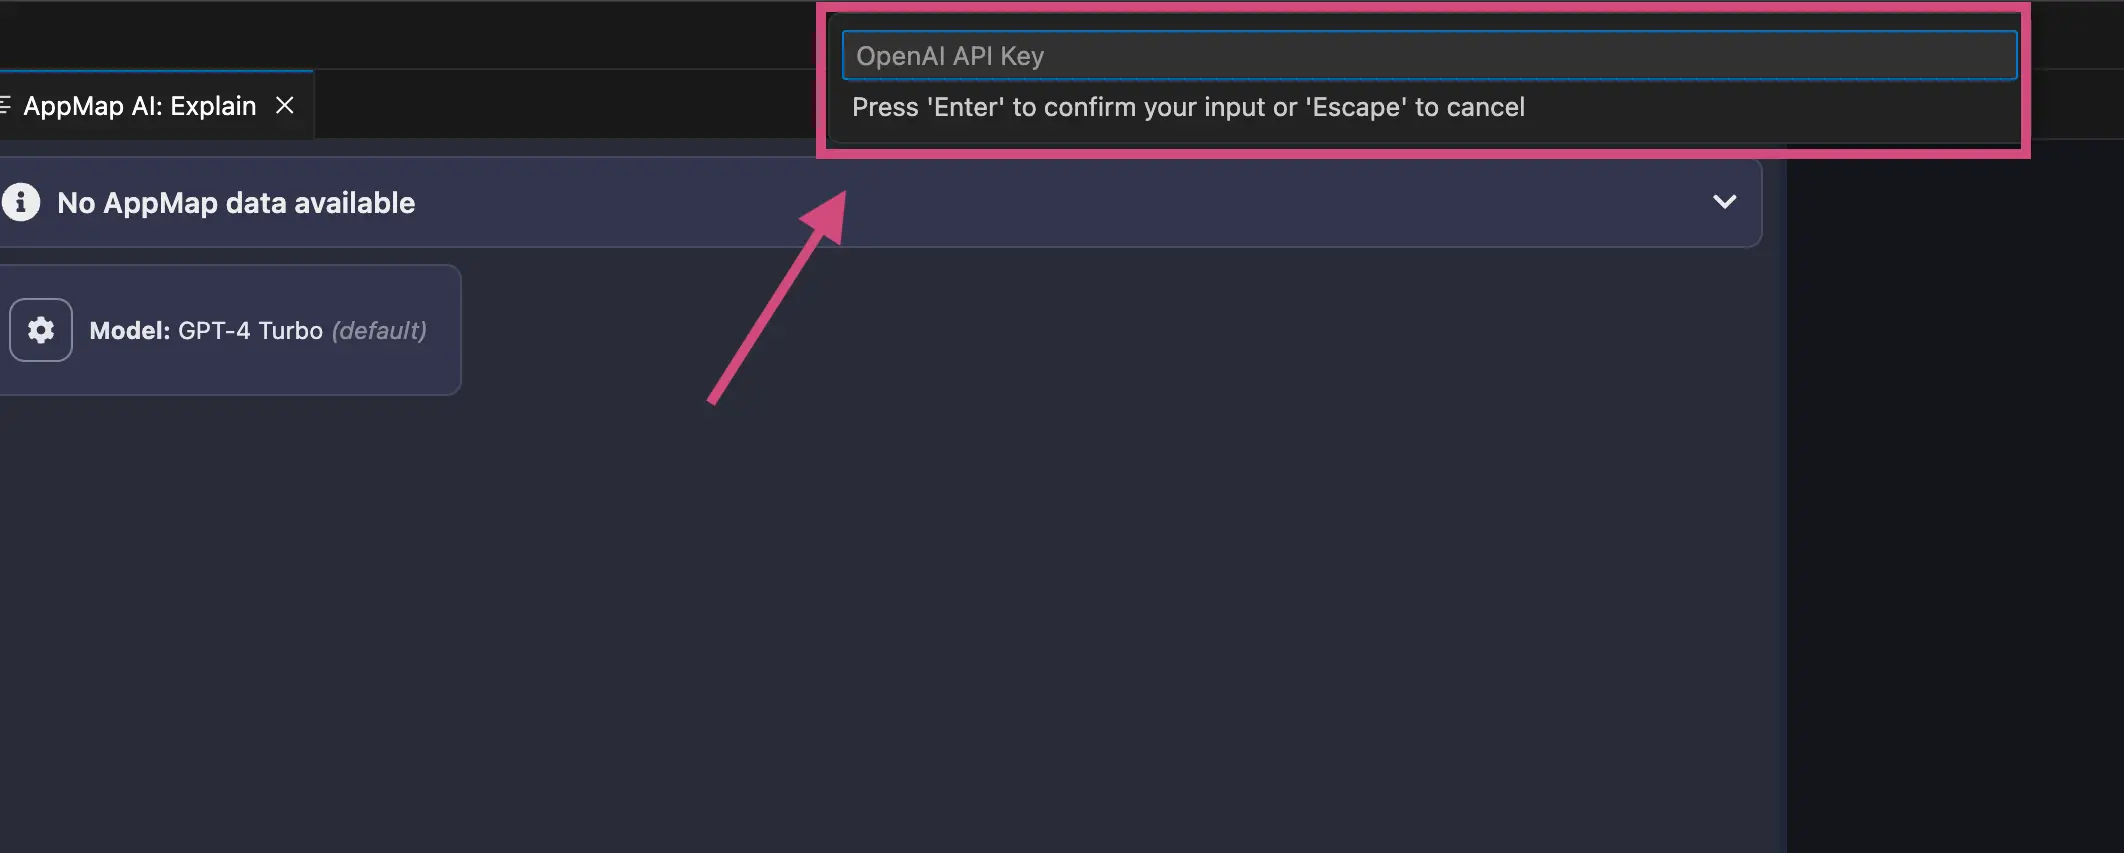
After you enter your OpenAI API Key in the menu option, hit
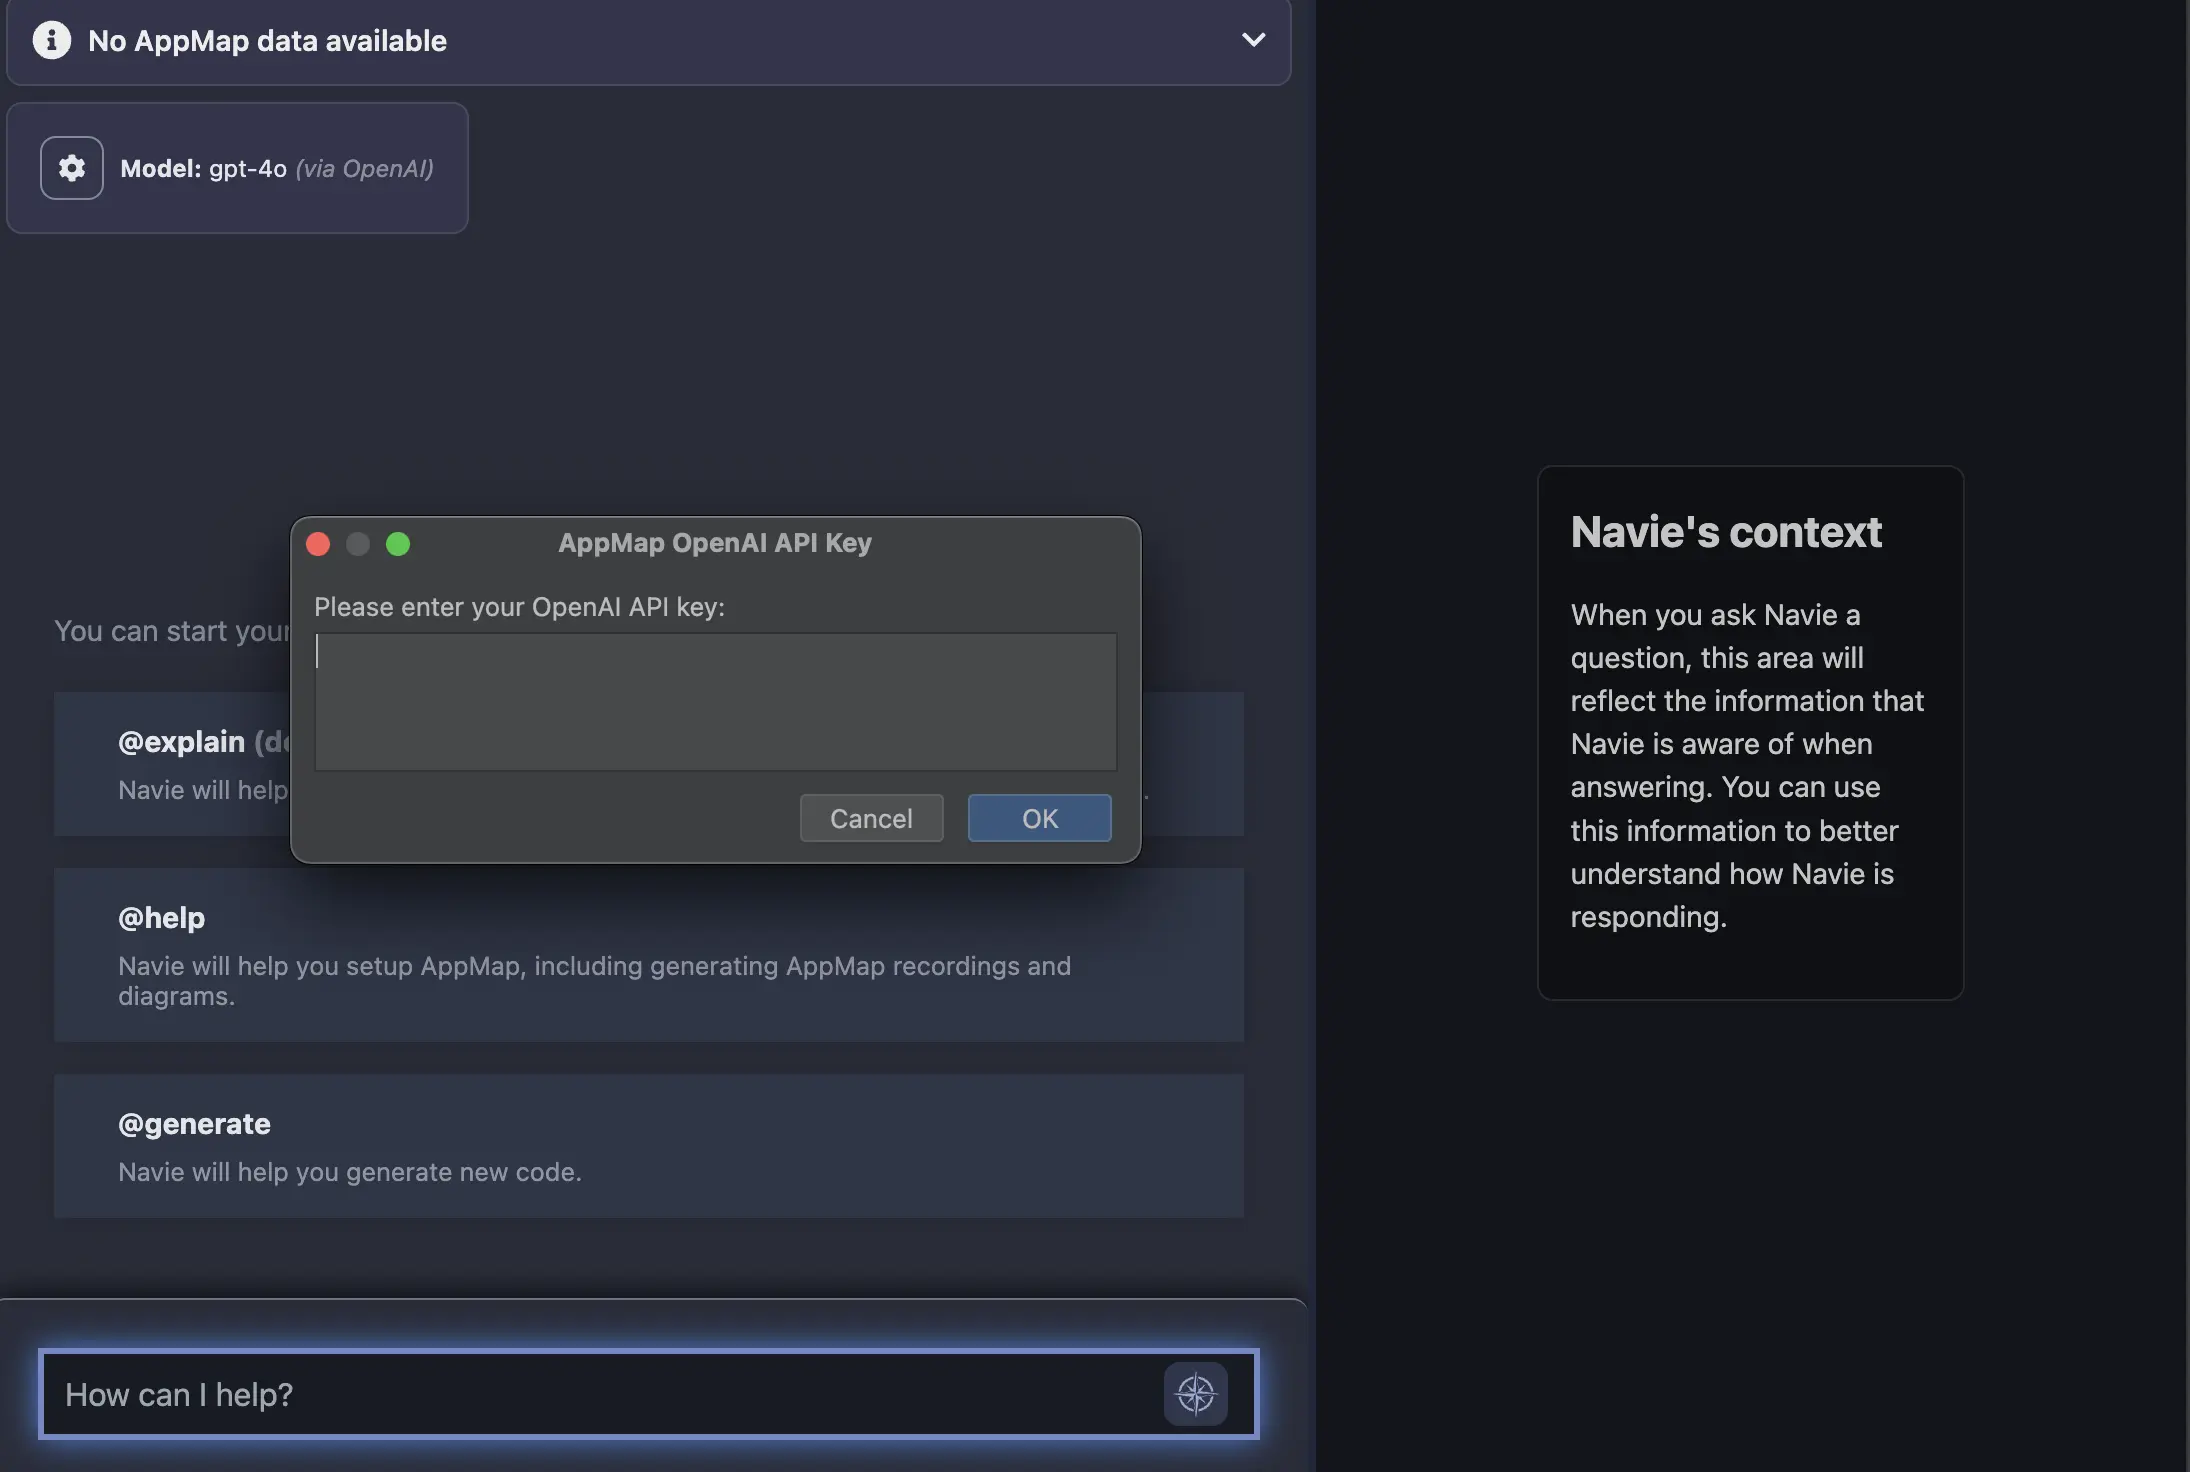
enterand your code editor will be prompted to reload.In VS Code:
In JetBrains:
NOTE: You can also use an environment variable to store your API key as an environment variable instead of using the
gearicon in the Navie chat window.After your code editor reloads, you can confirm your requests are being routed to OpenAI directly in the Navie Chat window. It will list the model
OpenAIand the location, in this casevia OpenAI.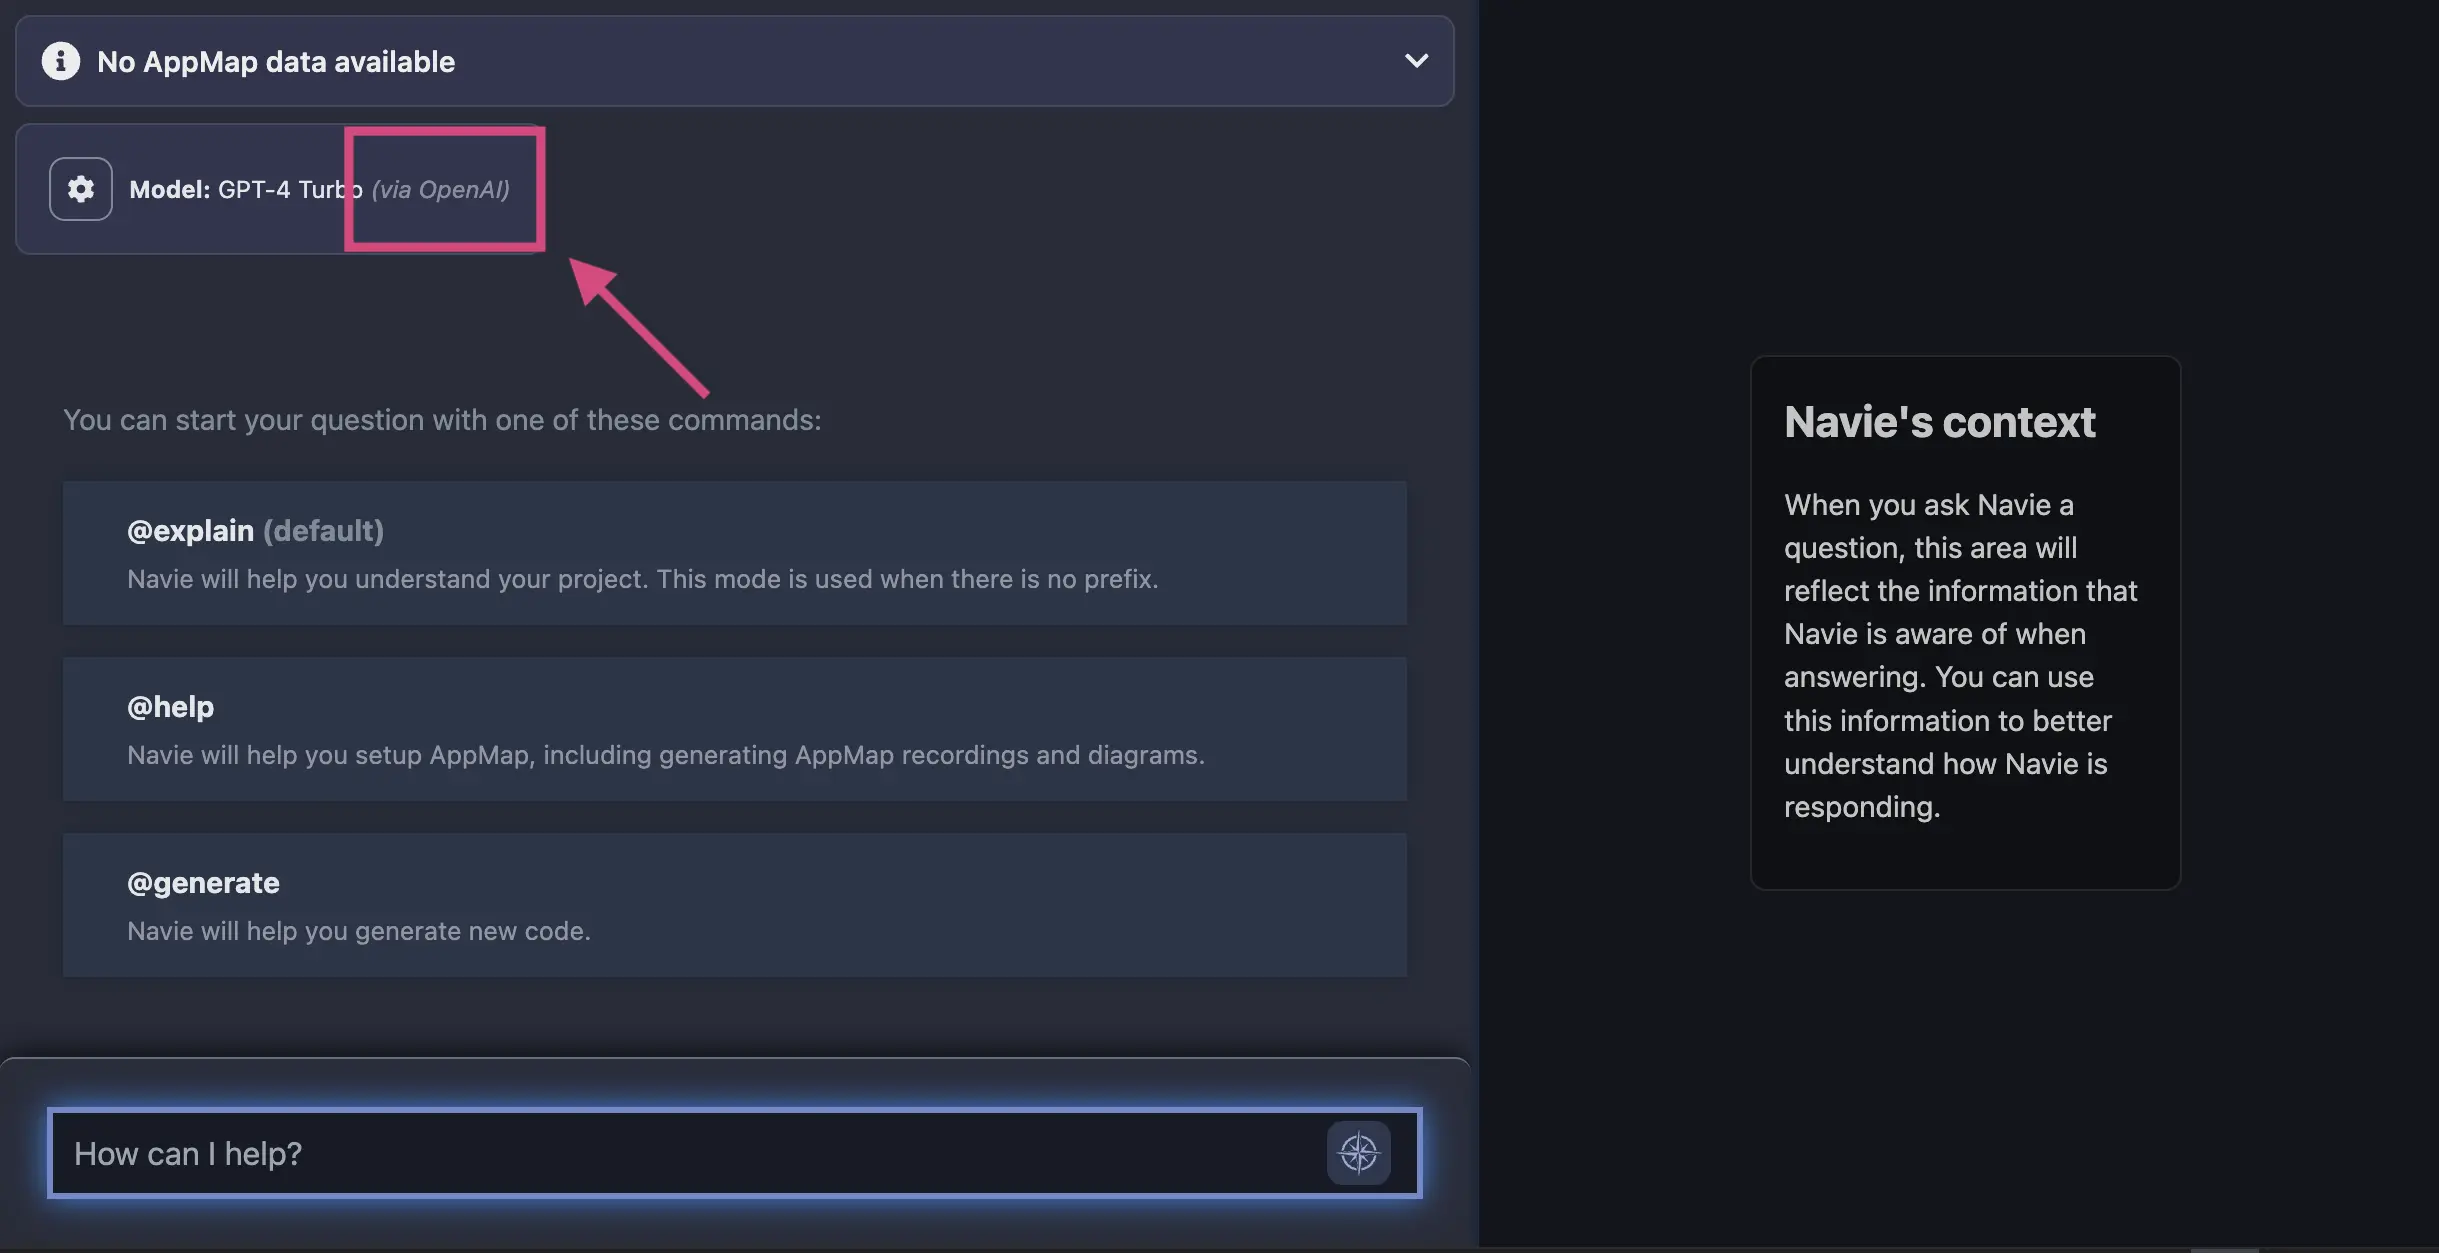
Modify which OpenAI Model to use
AppMap generally uses the latest OpenAI models as the default, but if you want to use an alternative model like
gpt-3.5or a preview model likegpt-4-vision-previewyou can modify theAPPMAP_NAVIE_MODELenvironment variable after configuring your own OpenAI API key to use other OpenAI models.After setting your
APPMAP_NAVIE_MODELwith your chosen model reload/restart your code editor and then confirm it’s configuration by opening a new Navie chat window. In this example I’ve configured my model to begpt-4owith my personal OpenAI API Key.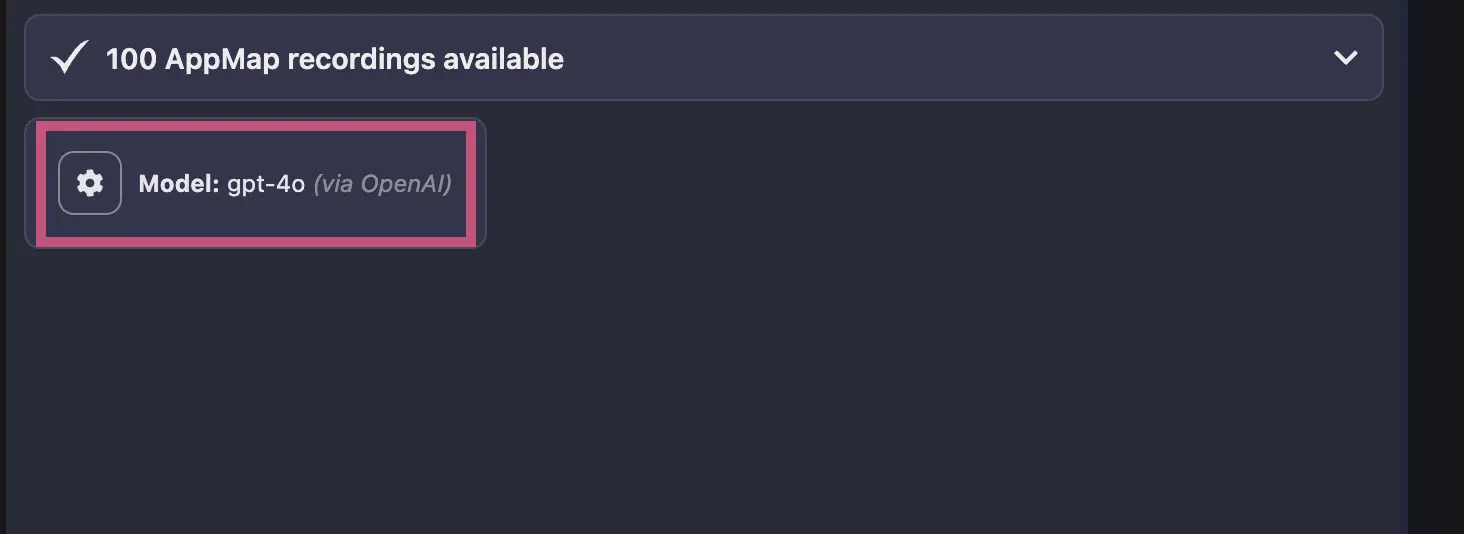
Anthropic (Claude)
Version A
AppMap supports the Anthropic suite of large language models such as Claude Sonnet or Claude Opus.
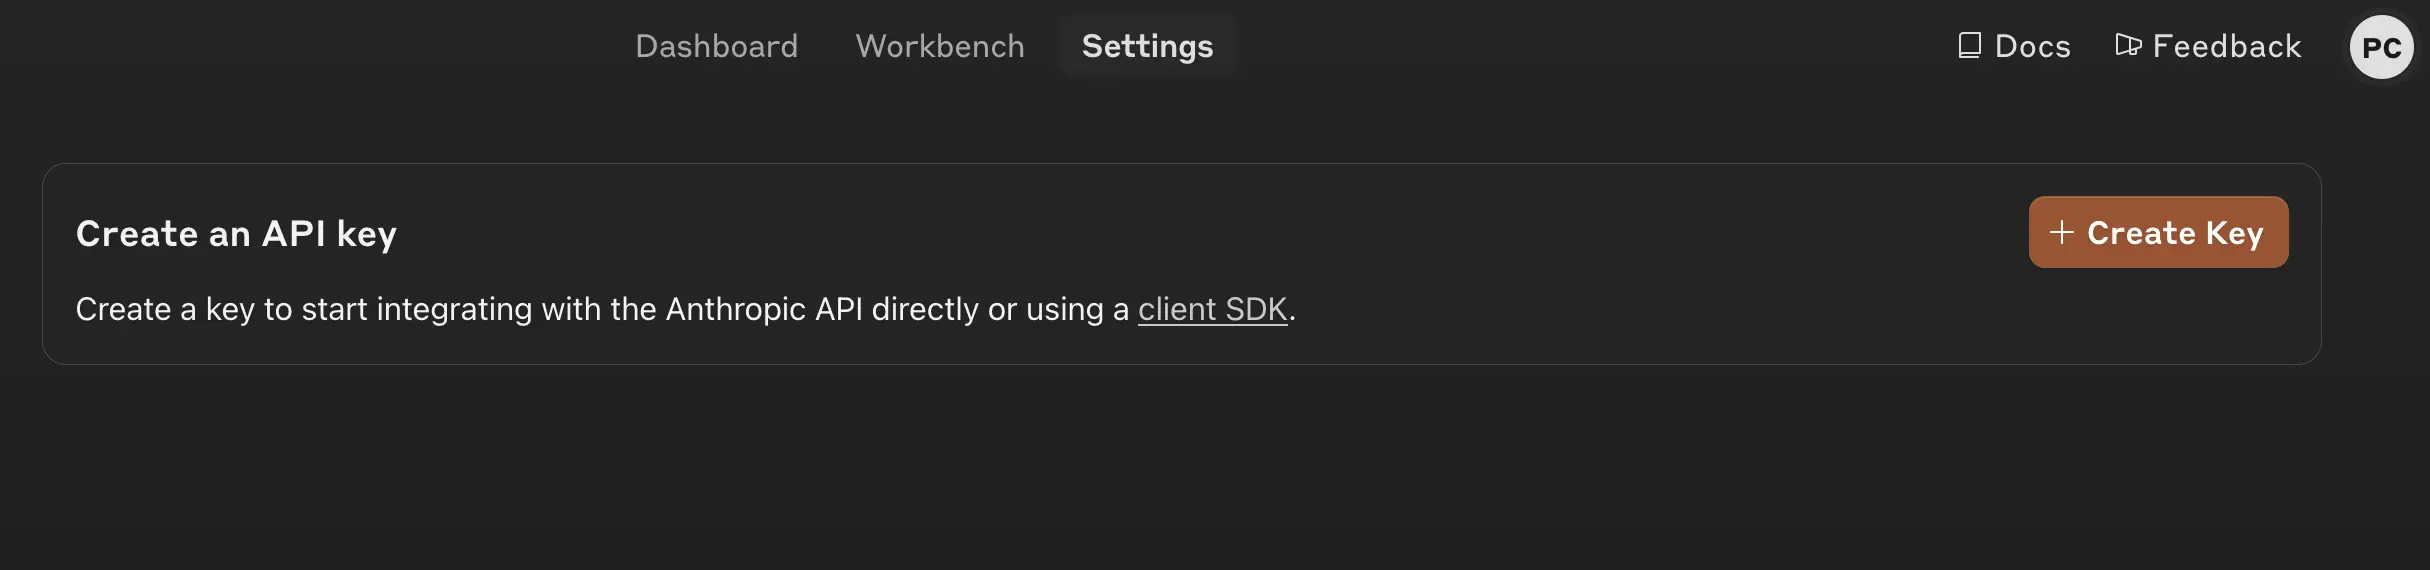
To use AppMap Navie with Anthropic LLMs you need to generate an API key for your account.
Login to your Anthropic dashboard, and choose the option to “Get API Keys”
Click the box to “Create Key”
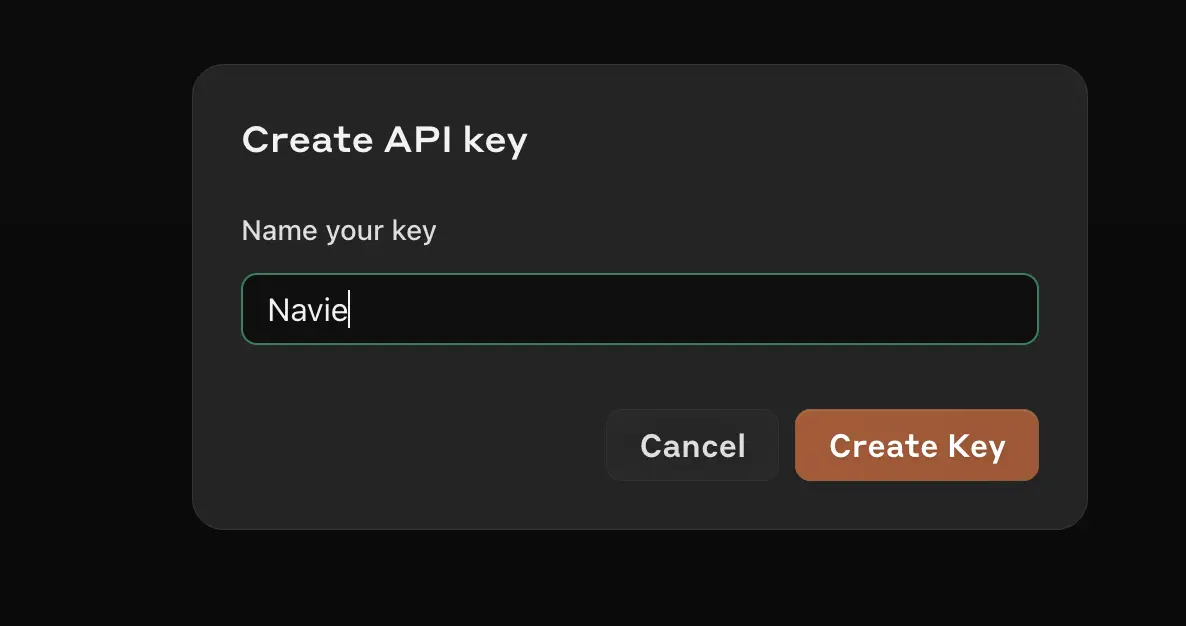
In the next box, give your key an easy to recognize name.
In your VS Code or JetBrains editor, configure the following environment variables.
ANTHROPIC_API_KEY=sk-ant-api03-12...
APPMAP_NAVIE_MODEL=claude-3-5-sonnet-20240620
When setting the
APPMAP_NAVIE_MODELrefer to the Anthropic documentation for the latest available models to chose from.Version B
AppMap supports the Anthropic suite of large language models such as Claude Sonnet or Claude Opus.
To use AppMap Navie with Anthropic LLMs you need to generate an API key for your account.
Login to your Anthropic dashboard, and choose the option to “Get API Keys”
Click the box to “Create Key”
In the next box, give your key an easy to recognize name.
In your VS Code or JetBrains editor, configure the following environment variables:
ANTHROPIC_API_KEYsk-ant-api03-8SgtgQrGB0vTSsB_DeeIZHvDrfmrgAPPMAP_NAVIE_MODELclaude-3-5-sonnet-20240620When setting the
APPMAP_NAVIE_MODELrefer to the Anthropic documentation for the latest available models to chose from.Video Demo
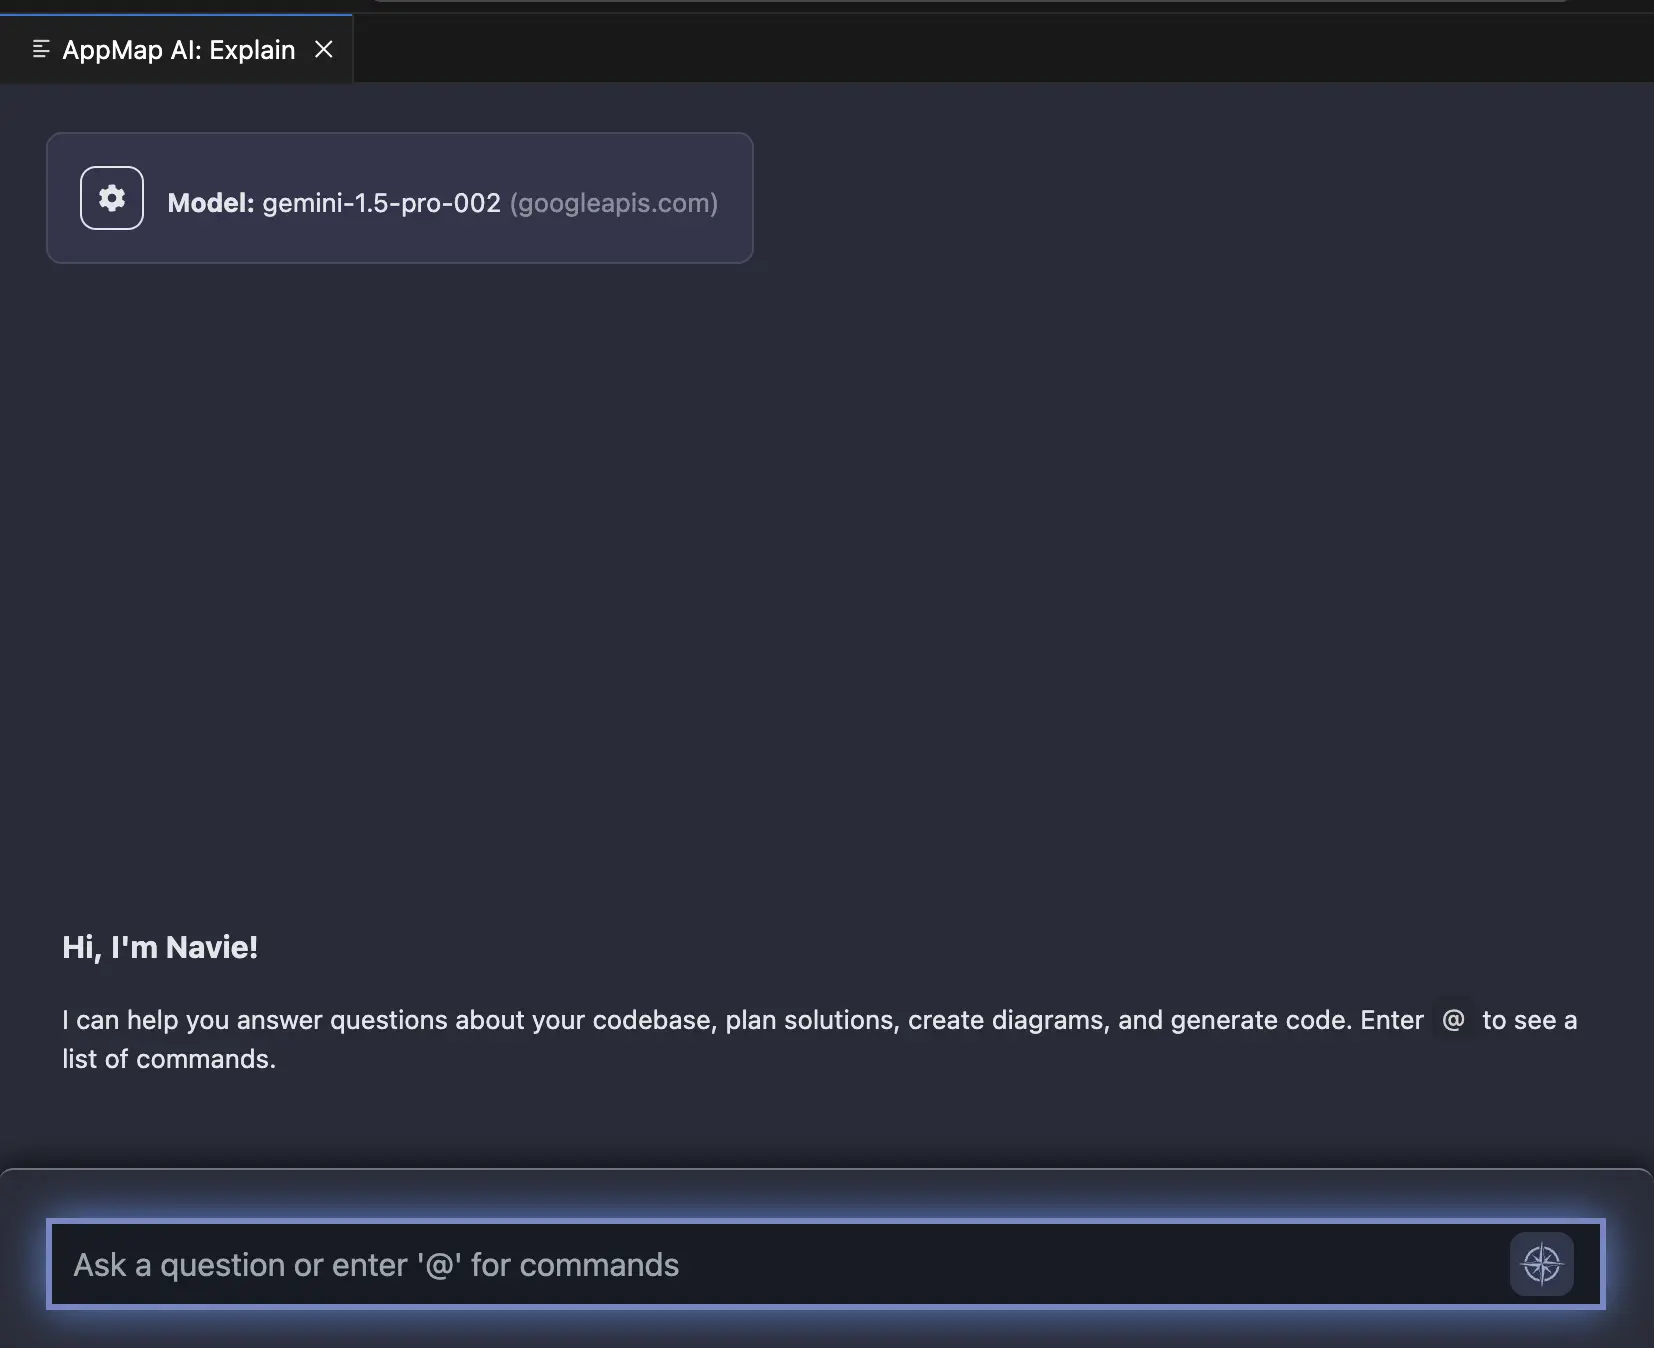
Google Gemini
After configuring your Google Cloud authentication keys and ensuring you have access to the Google Gemini services on your Google Cloud account, configure the following environment variables in your VS Code editor.
GOOGLE_WEB_CREDENTIALS[contents of downloaded JSON]APPMAP_NAVIE_MODELgemini-1.5-pro-002APPMAP_NAVIE_COMPLETION_BACKENDvertex-ai
You can confirm your model and API endpoint after making this change in the Navie chat window, which will display the currently configured language model backend.
Azure OpenAI
Assuming you created a
navieGPT-4 deployment oncontoso.openai.azure.comOpenAI instance:AZURE_OPENAI_API_KEYe50edc22e83f01802893d654c4268c4fAZURE_OPENAI_API_VERSION2024-02-01AZURE_OPENAI_API_INSTANCE_NAMEcontosoAZURE_OPENAI_API_DEPLOYMENT_NAMEnavieAnyScale Endpoints
AnyScale Endpoints allows querying a selection of open-source LLMs. After you create an account you can use it by setting:
OPENAI_API_KEYesecret_myxfwgl1iinbz9q5hkexemk8f4xhcou8OPENAI_BASE_URLhttps://api.endpoints.anyscale.com/v1APPMAP_NAVIE_MODELmistralai/Mixtral-8x7B-Instruct-v0.1Consult AnyScale documentation for model names. Note we recommend using Mixtral models with Navie.
Anyscale Demo with VS Code
Anyscale Demo with JetBrains
Fireworks AI
You can use Fireworks AI and their serverless or on-demand models as a compatible backend for AppMap Navie AI.
After creating an account on Fireworks AI you can configure your Navie environment settings:
OPENAI_API_KEYWBYq2mKlK8I16ha21k233k2EwzGAJy3e0CLmtNZadJ6byfpu7cOPENAI_BASE_URLhttps://api.fireworks.ai/inference/v1APPMAP_NAVIE_MODELaccounts/fireworks/models/mixtral-8x22b-instructConsult the Fireworks AI documentation for a full list of the available models they currently support.
Video Demo
Ollama
You can use Ollama to run Navie with local models; after you’ve successfully ran a model with
ollama runcommand, you can configure Navie to use it:OPENAI_API_KEYdummyOPENAI_BASE_URLhttp://127.0.0.1:11434/v1APPMAP_NAVIE_MODELmixtralNote: Even though it’s running locally a dummy placeholder API key is still required.
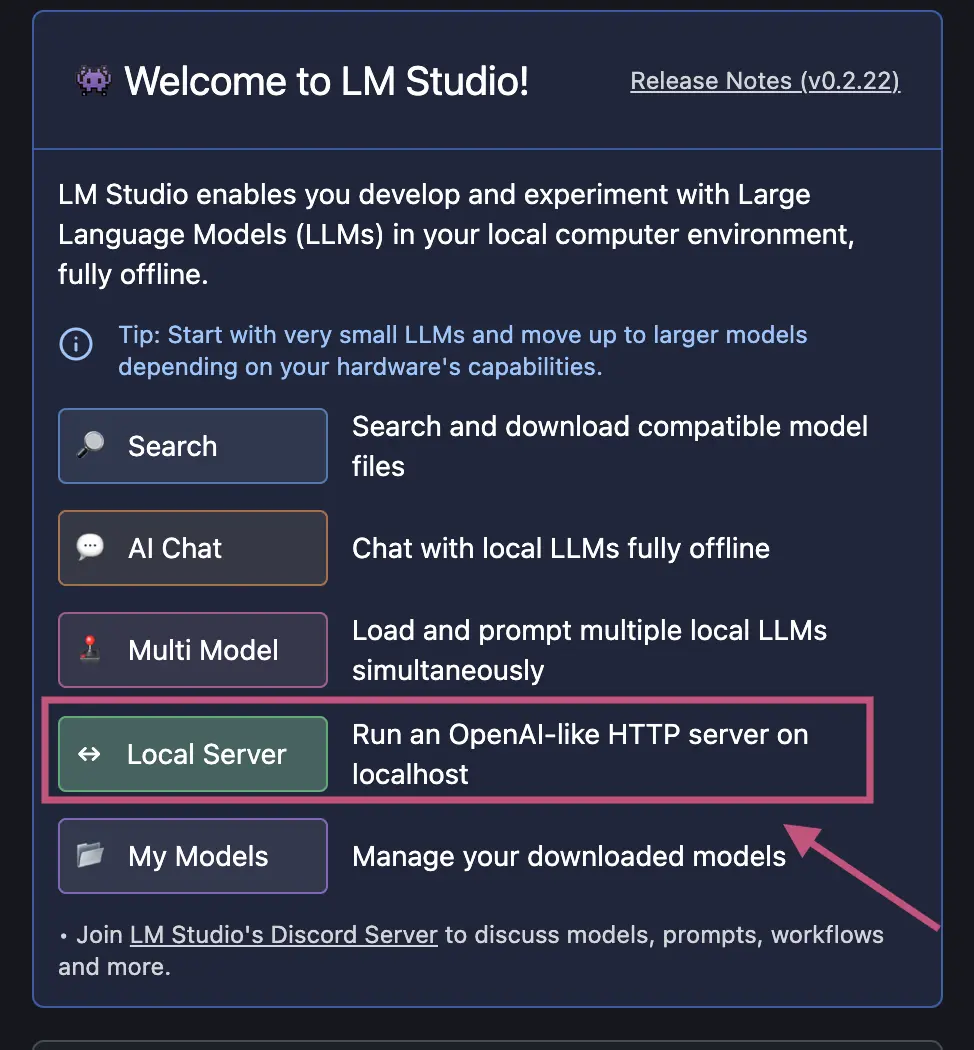
LM Studio
You can use LM Studio to run Navie with local models.
After downloading a model to run, select the option to run a local server.
In the next window, select which model you want to load into the local inference server.
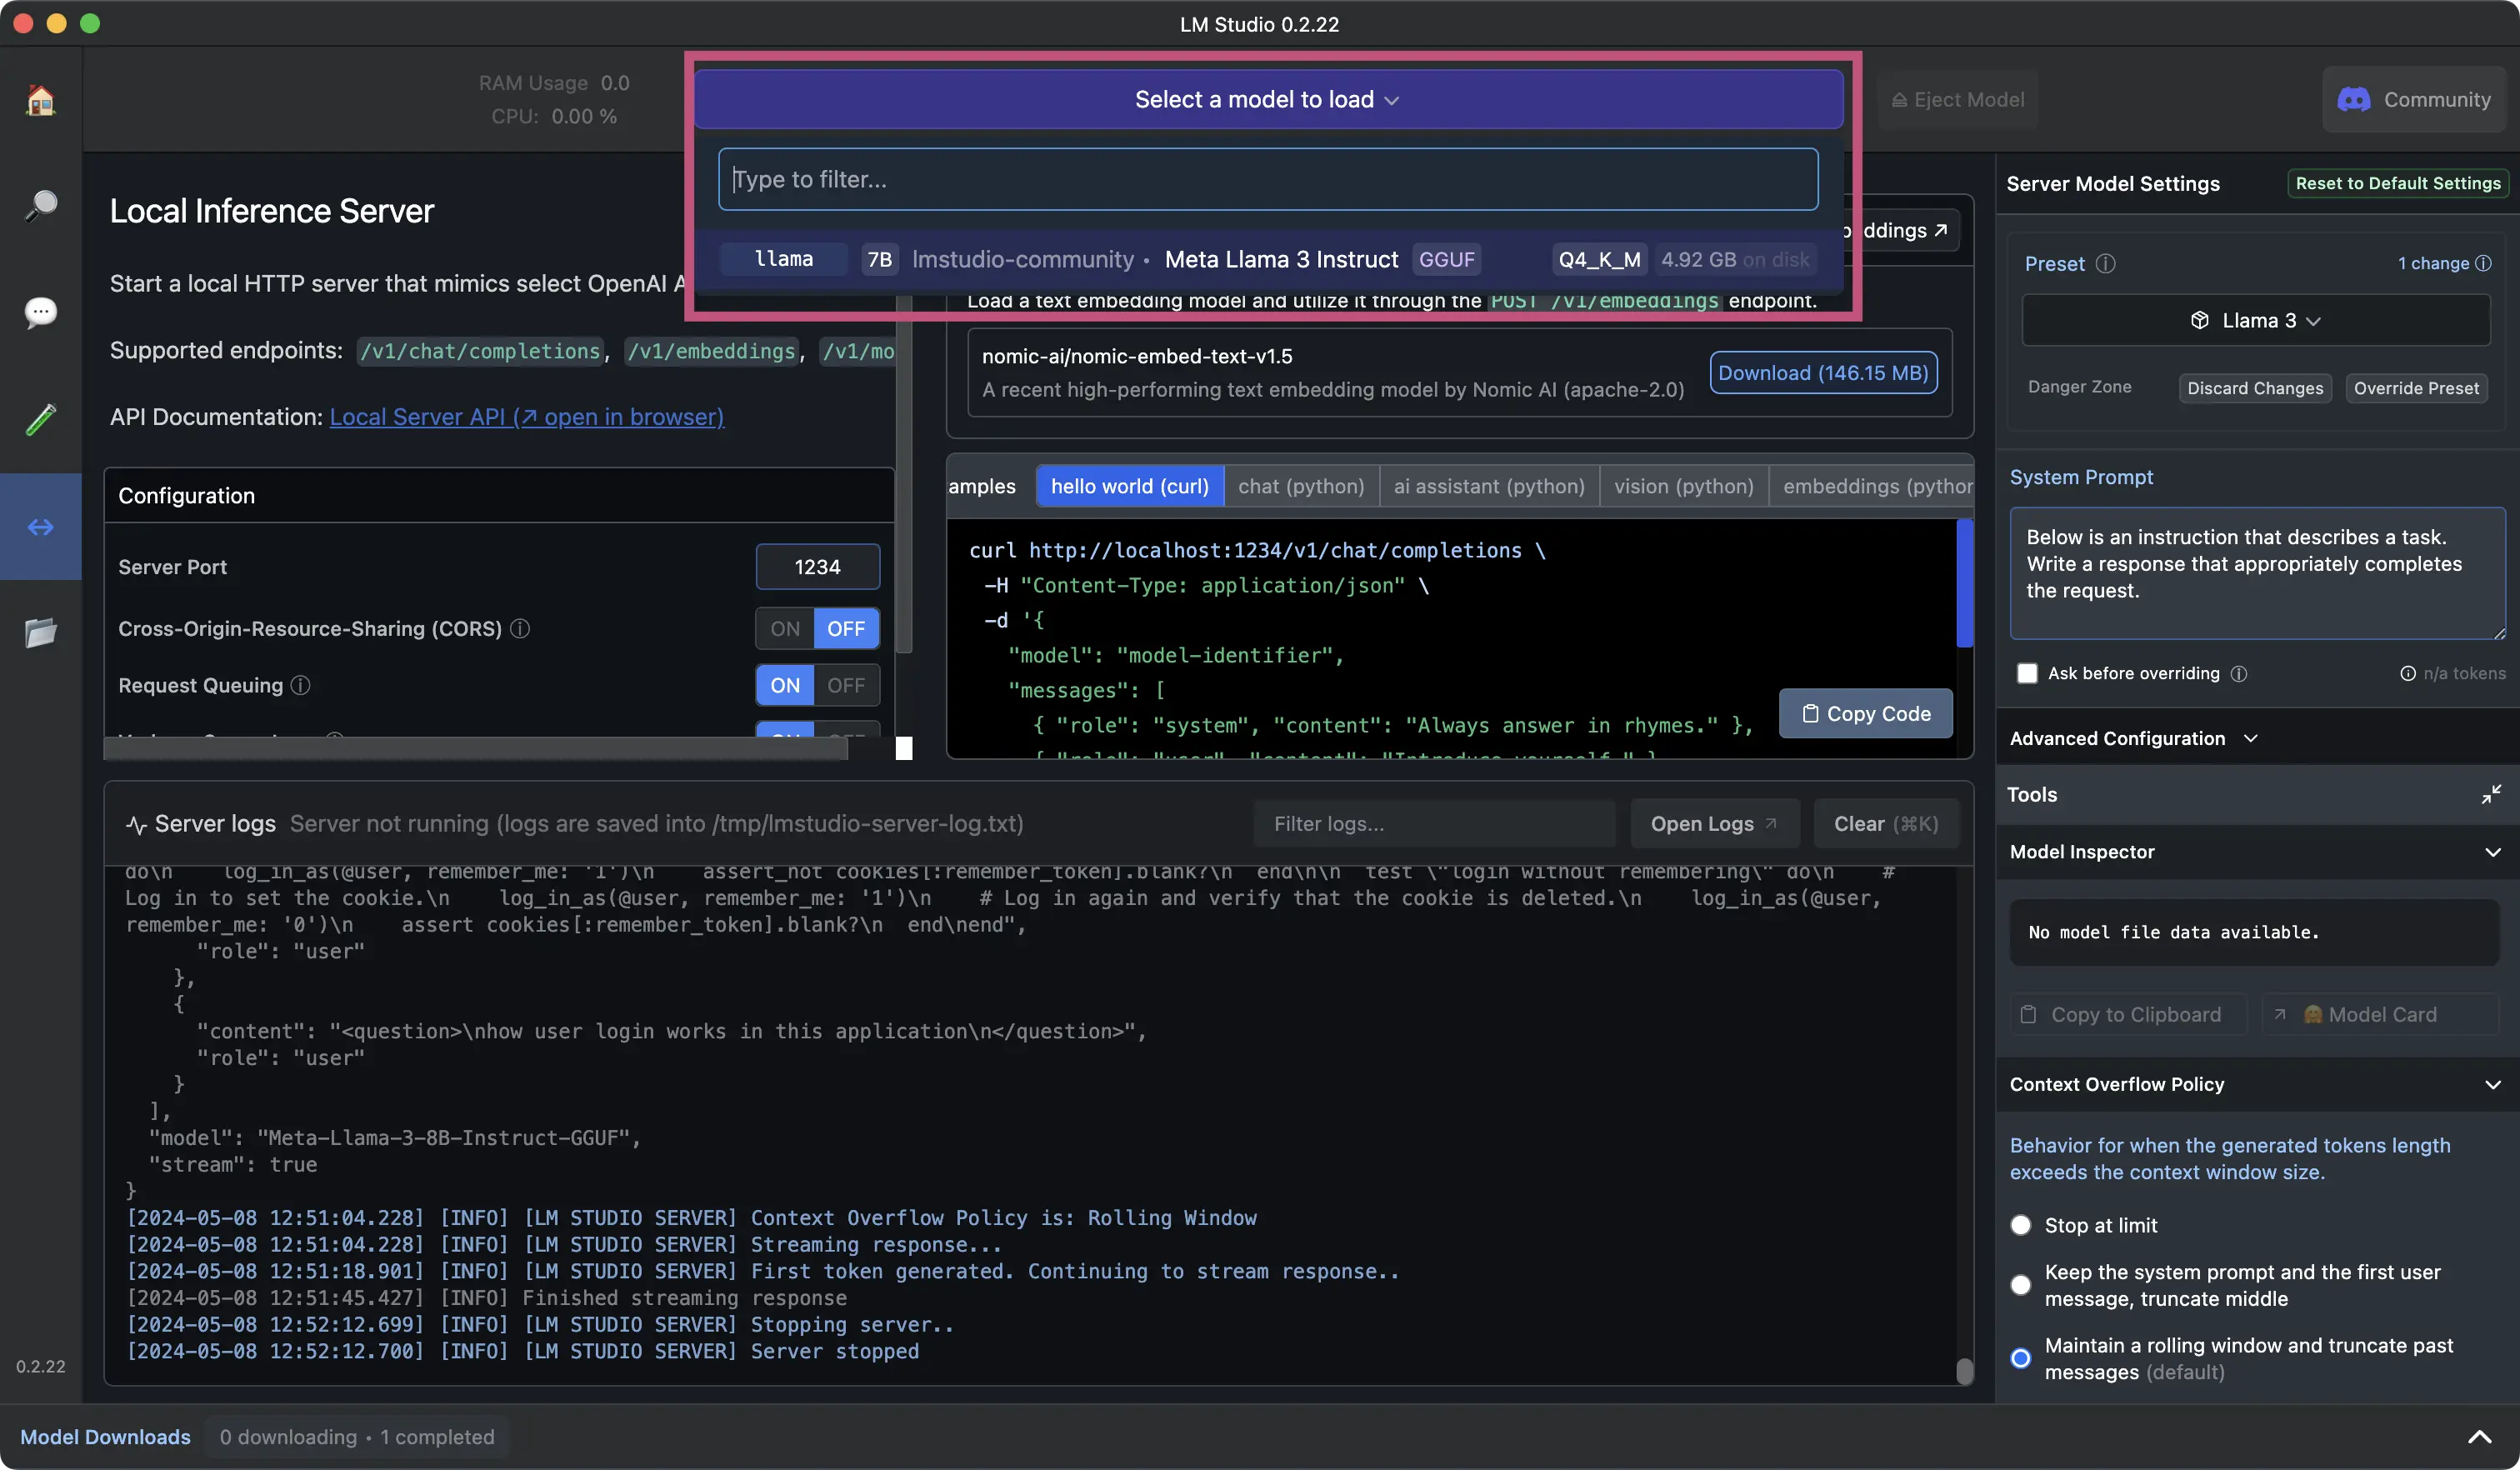
After loading your model, you can confirm it’s successfully running in the logs.
NOTE: Save the URL it’s running under to use for
OPENAI_BASE_URLenvironment variable.For example:
http://localhost:1234/v1
In the
Model Inspectorcopy the name of the model and use this for theAPPMAP_NAVIE_MODELenvironment variable.For example:
Meta-Llama-3-8B-Instruct-imatrix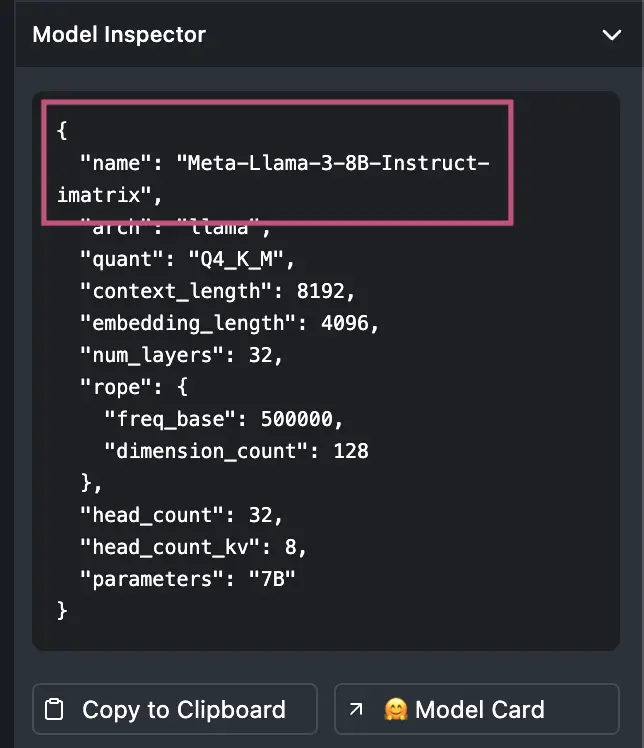
Continue to configure your local environment with the following environment variables based on your LM Studio configuration. Refer to the documentation above for steps specific to your code editor.
OPENAI_API_KEYdummyOPENAI_BASE_URLhttp://localhost:1234/v1APPMAP_NAVIE_MODELMeta-Llama-3-8B-Instruct-imatrixNote: Even though it’s running locally a dummy placeholder API key is still required.
Thank you for your feedback!
