-
Docs
-
AppMap for JetBrains
- Settings
- AppMap tool window
- “Start with AppMap” for Java
- Remote recording
- AppMap Plugin actions
- Generate OpenAPI Definitions
- Troubleshooting
- GitHub Repository
Settings
LLM Key Settings
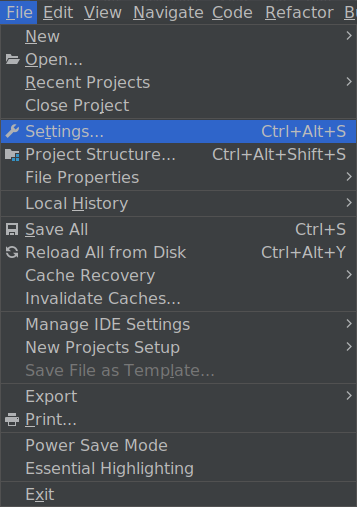
In JetBrains, go to settings.
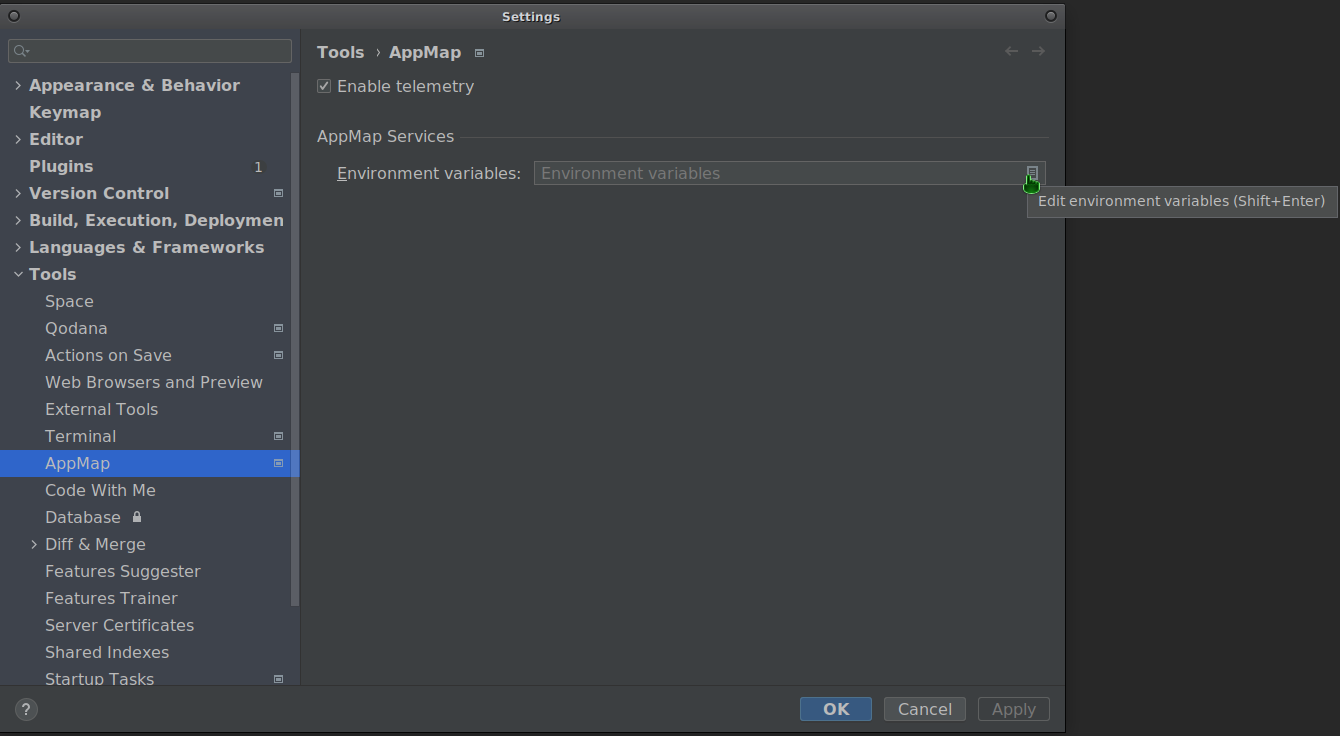
Go to Tools → AppMap.
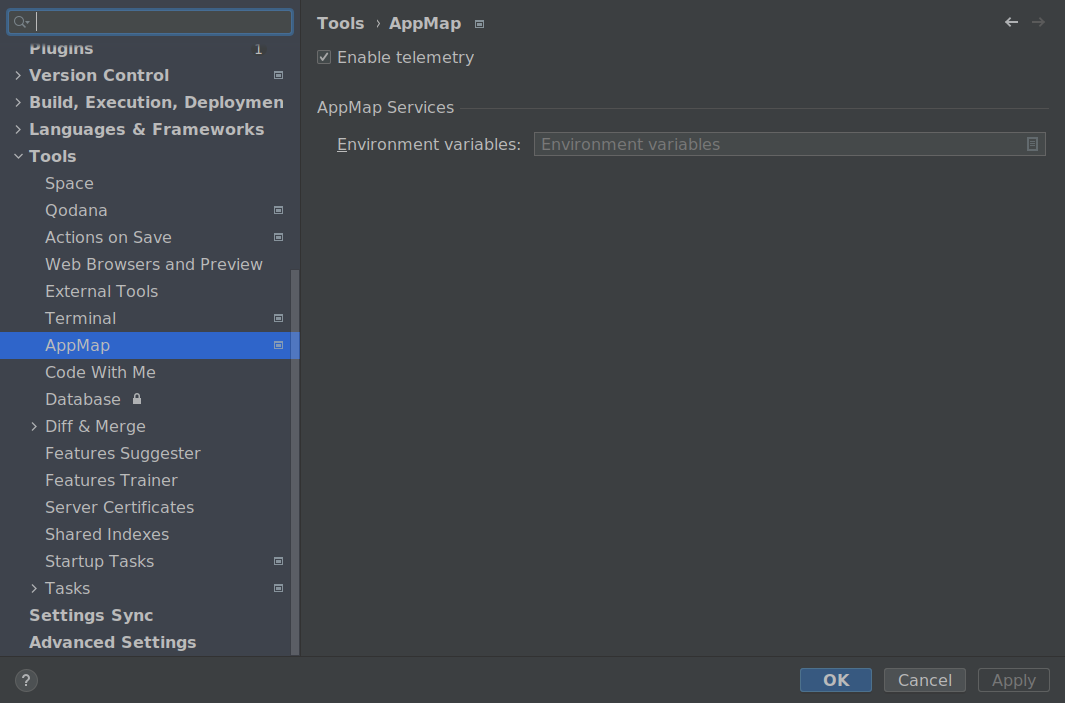
Enter the environment editor.
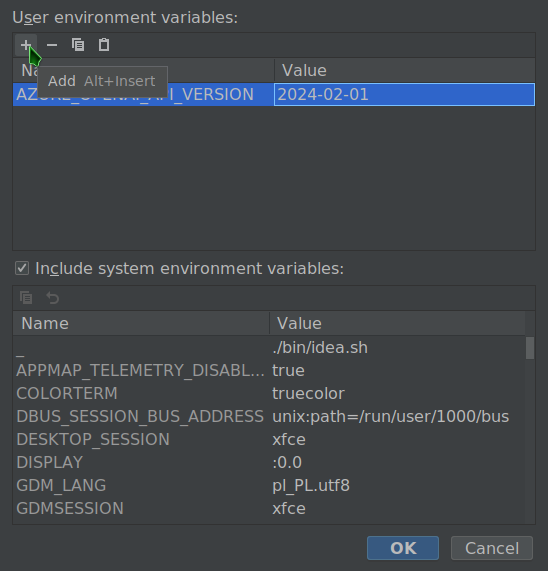
Use the editor to define the relevant environment variables according to the LLM Configuration instructions.
Reload your IDE for the changes to take effect.
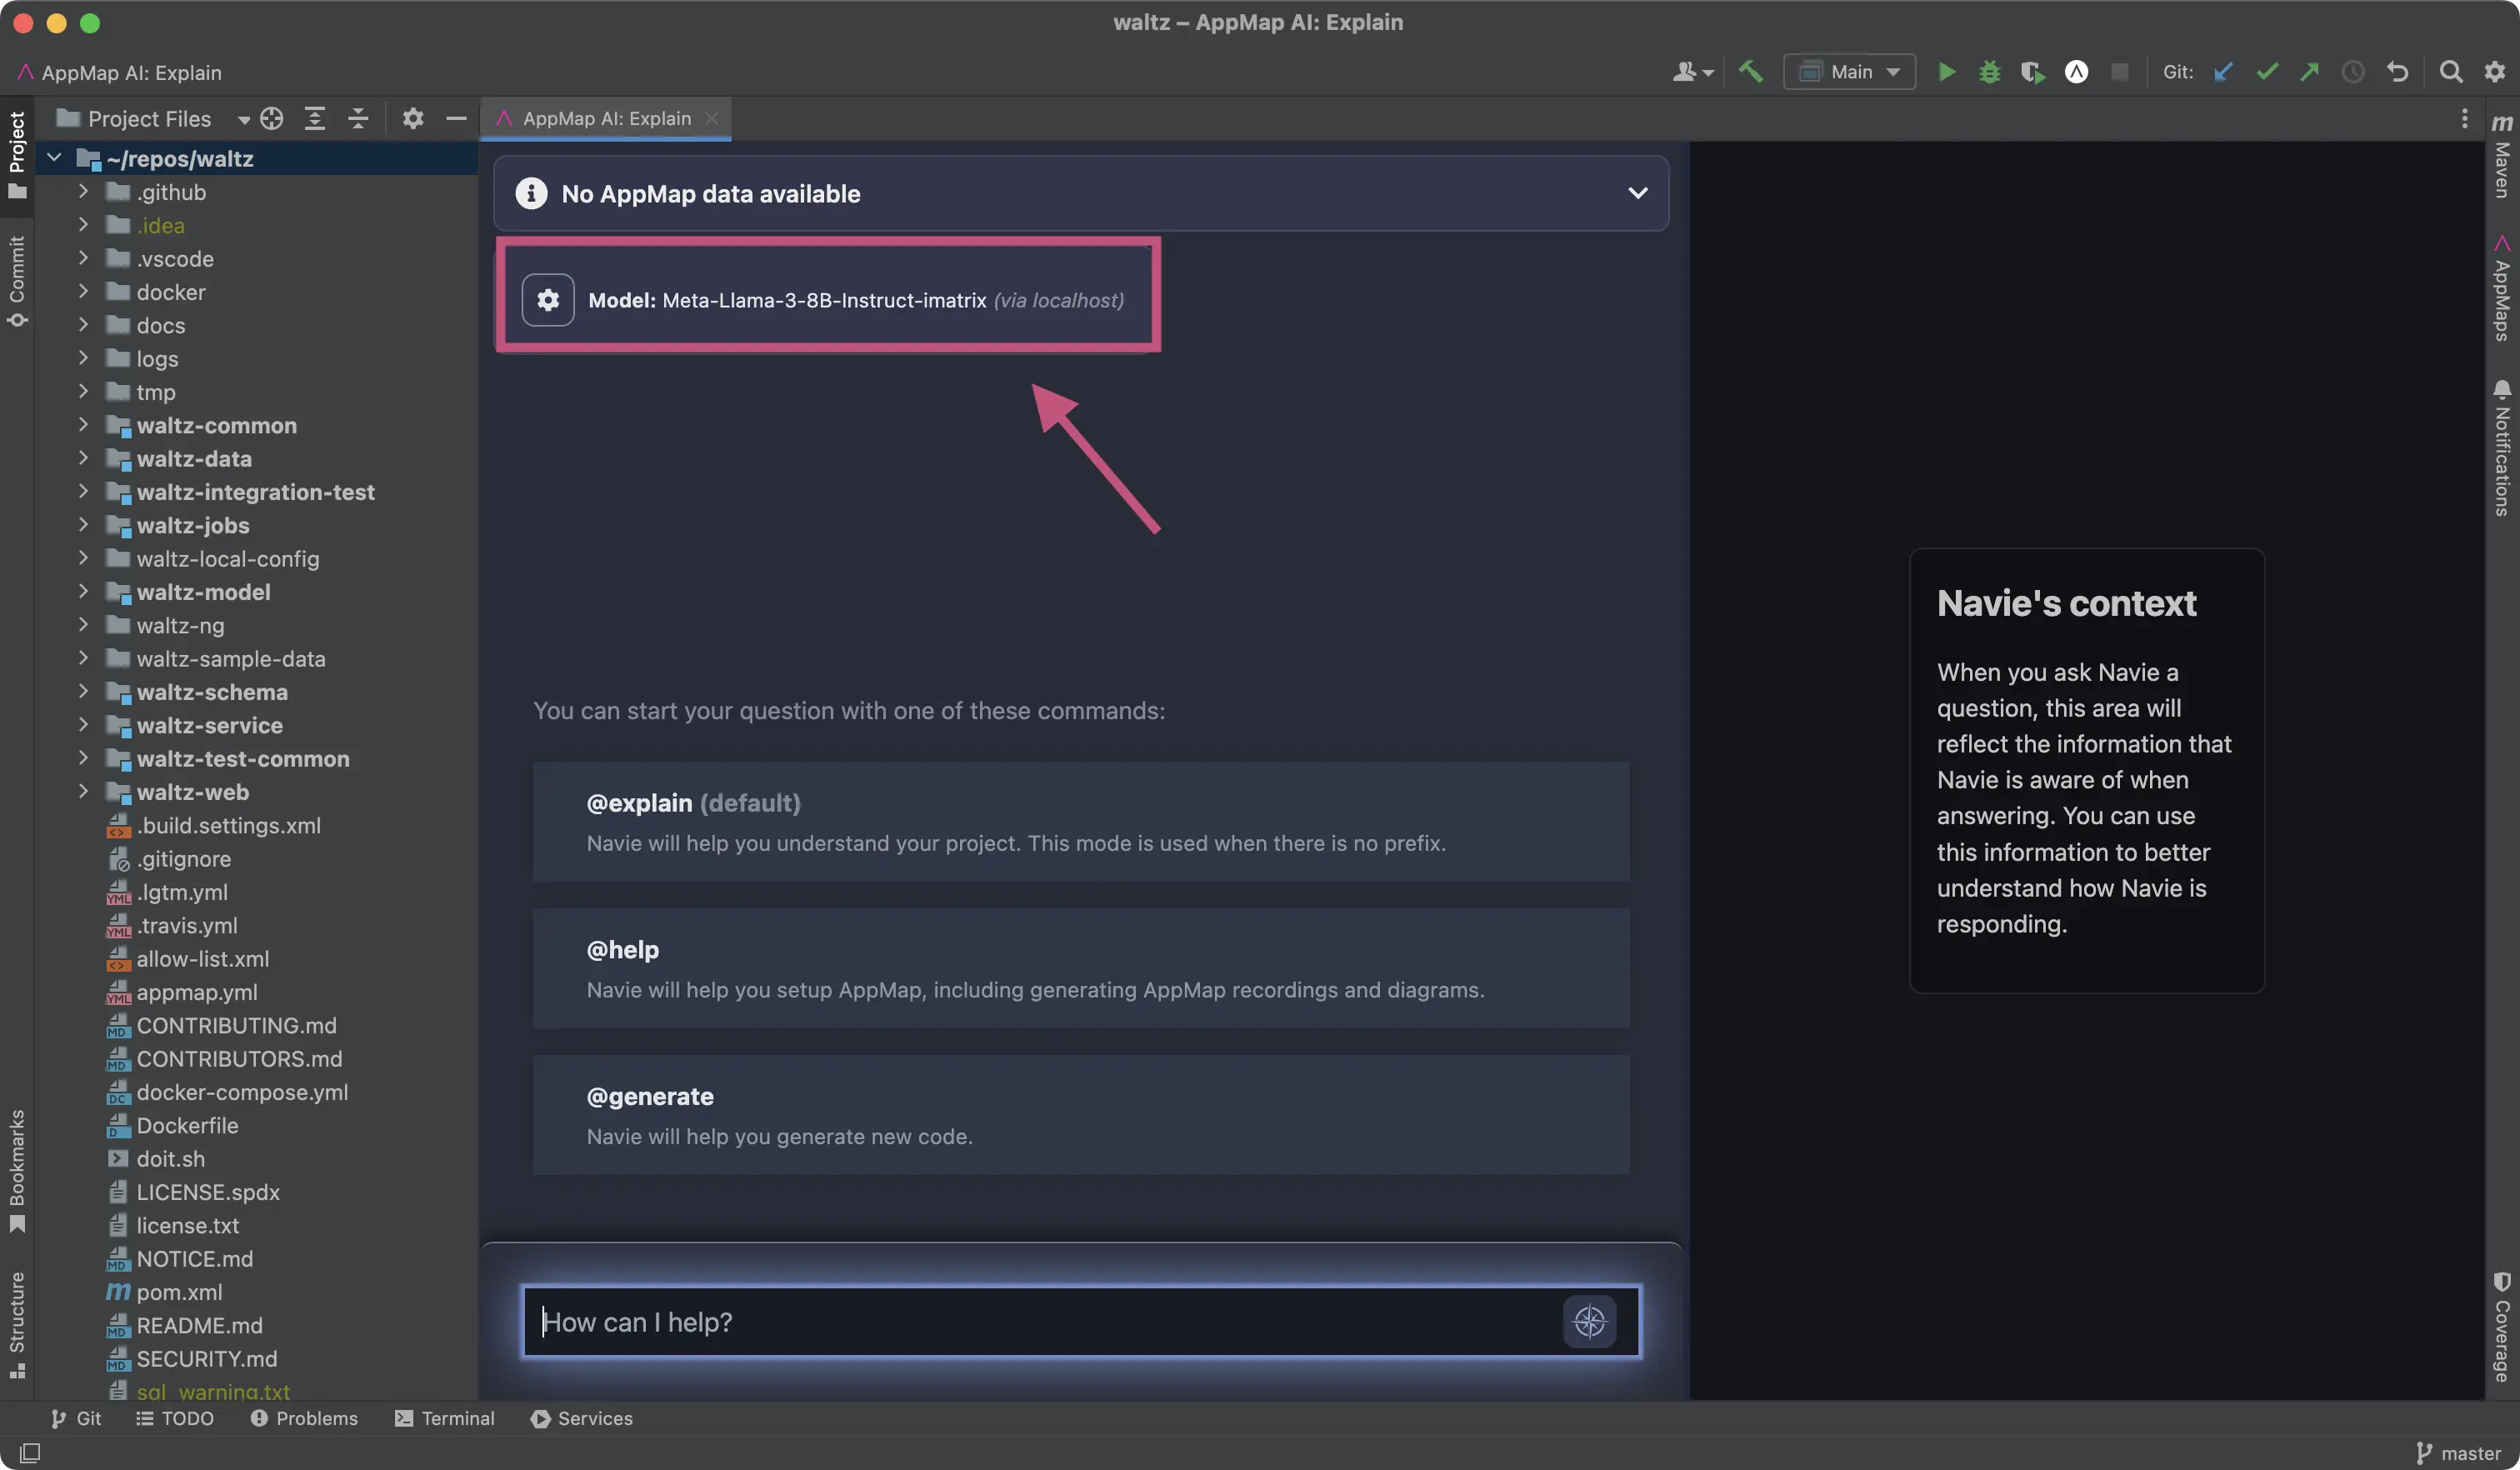
After reloading you can confirm the model is configured correctly in the Navie Chat window.
AppMap tool window
The AppMap tool window shows all AppMap Diagrams in your open projects. You can open it from the top level menu (
View -> Tools Windows -> AppMaps), with an AppMap action or by clicking on its tab in the UI.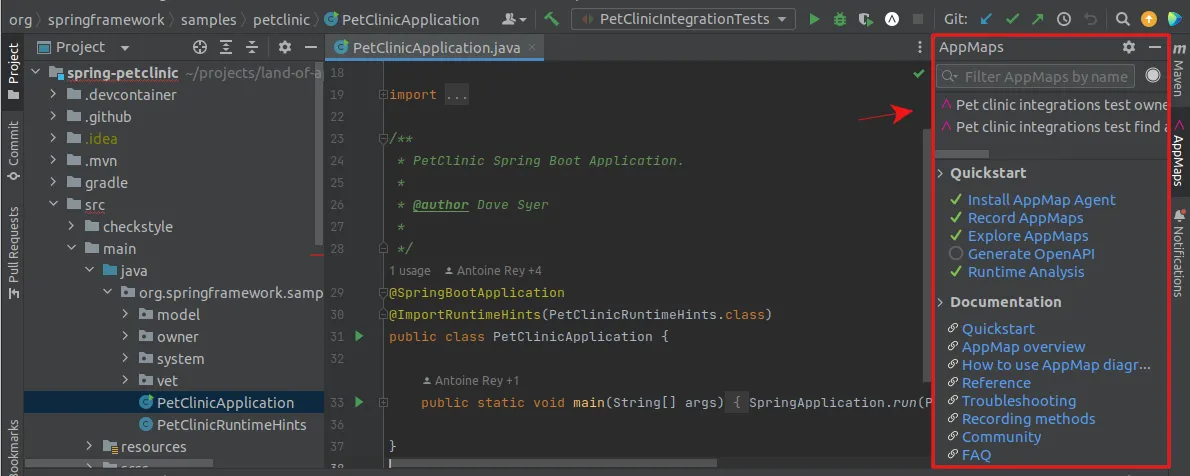
AppMap tool window actions:
- Alphabetical listing of all AppMap Diagrams in the project, sorted by name.
- Double-click on any AppMap to open it.
- Search for an AppMap by its name.
- Start/stop remote recordings.
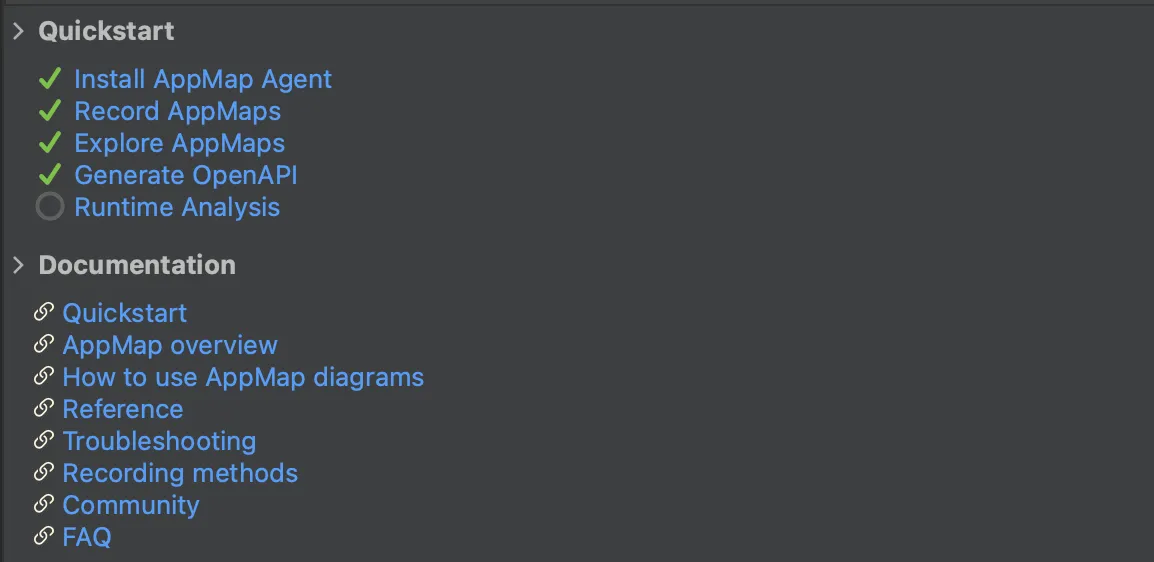
- View the Quickstart guide.
“Start with AppMap” for Java
This section only applies to Java applications.Installing the AppMap JetBrains plugin adds custom buttons and menu options to the JetBrains editor interface. These can be used to run your Java application code with AppMap automatically configured, saving you from manually changing your Maven or Gradle settings. This is the recommended approach for all Java users using JetBrains editors like IntelliJ.
For example, if you right click on your main class file you’ll see a new menu item under “More Run/Debug” to
Start with AppMap. Selecting this option will start your application with the AppMap libraries enabled. From here, you can interact with your application to generate request recordings or use remote recording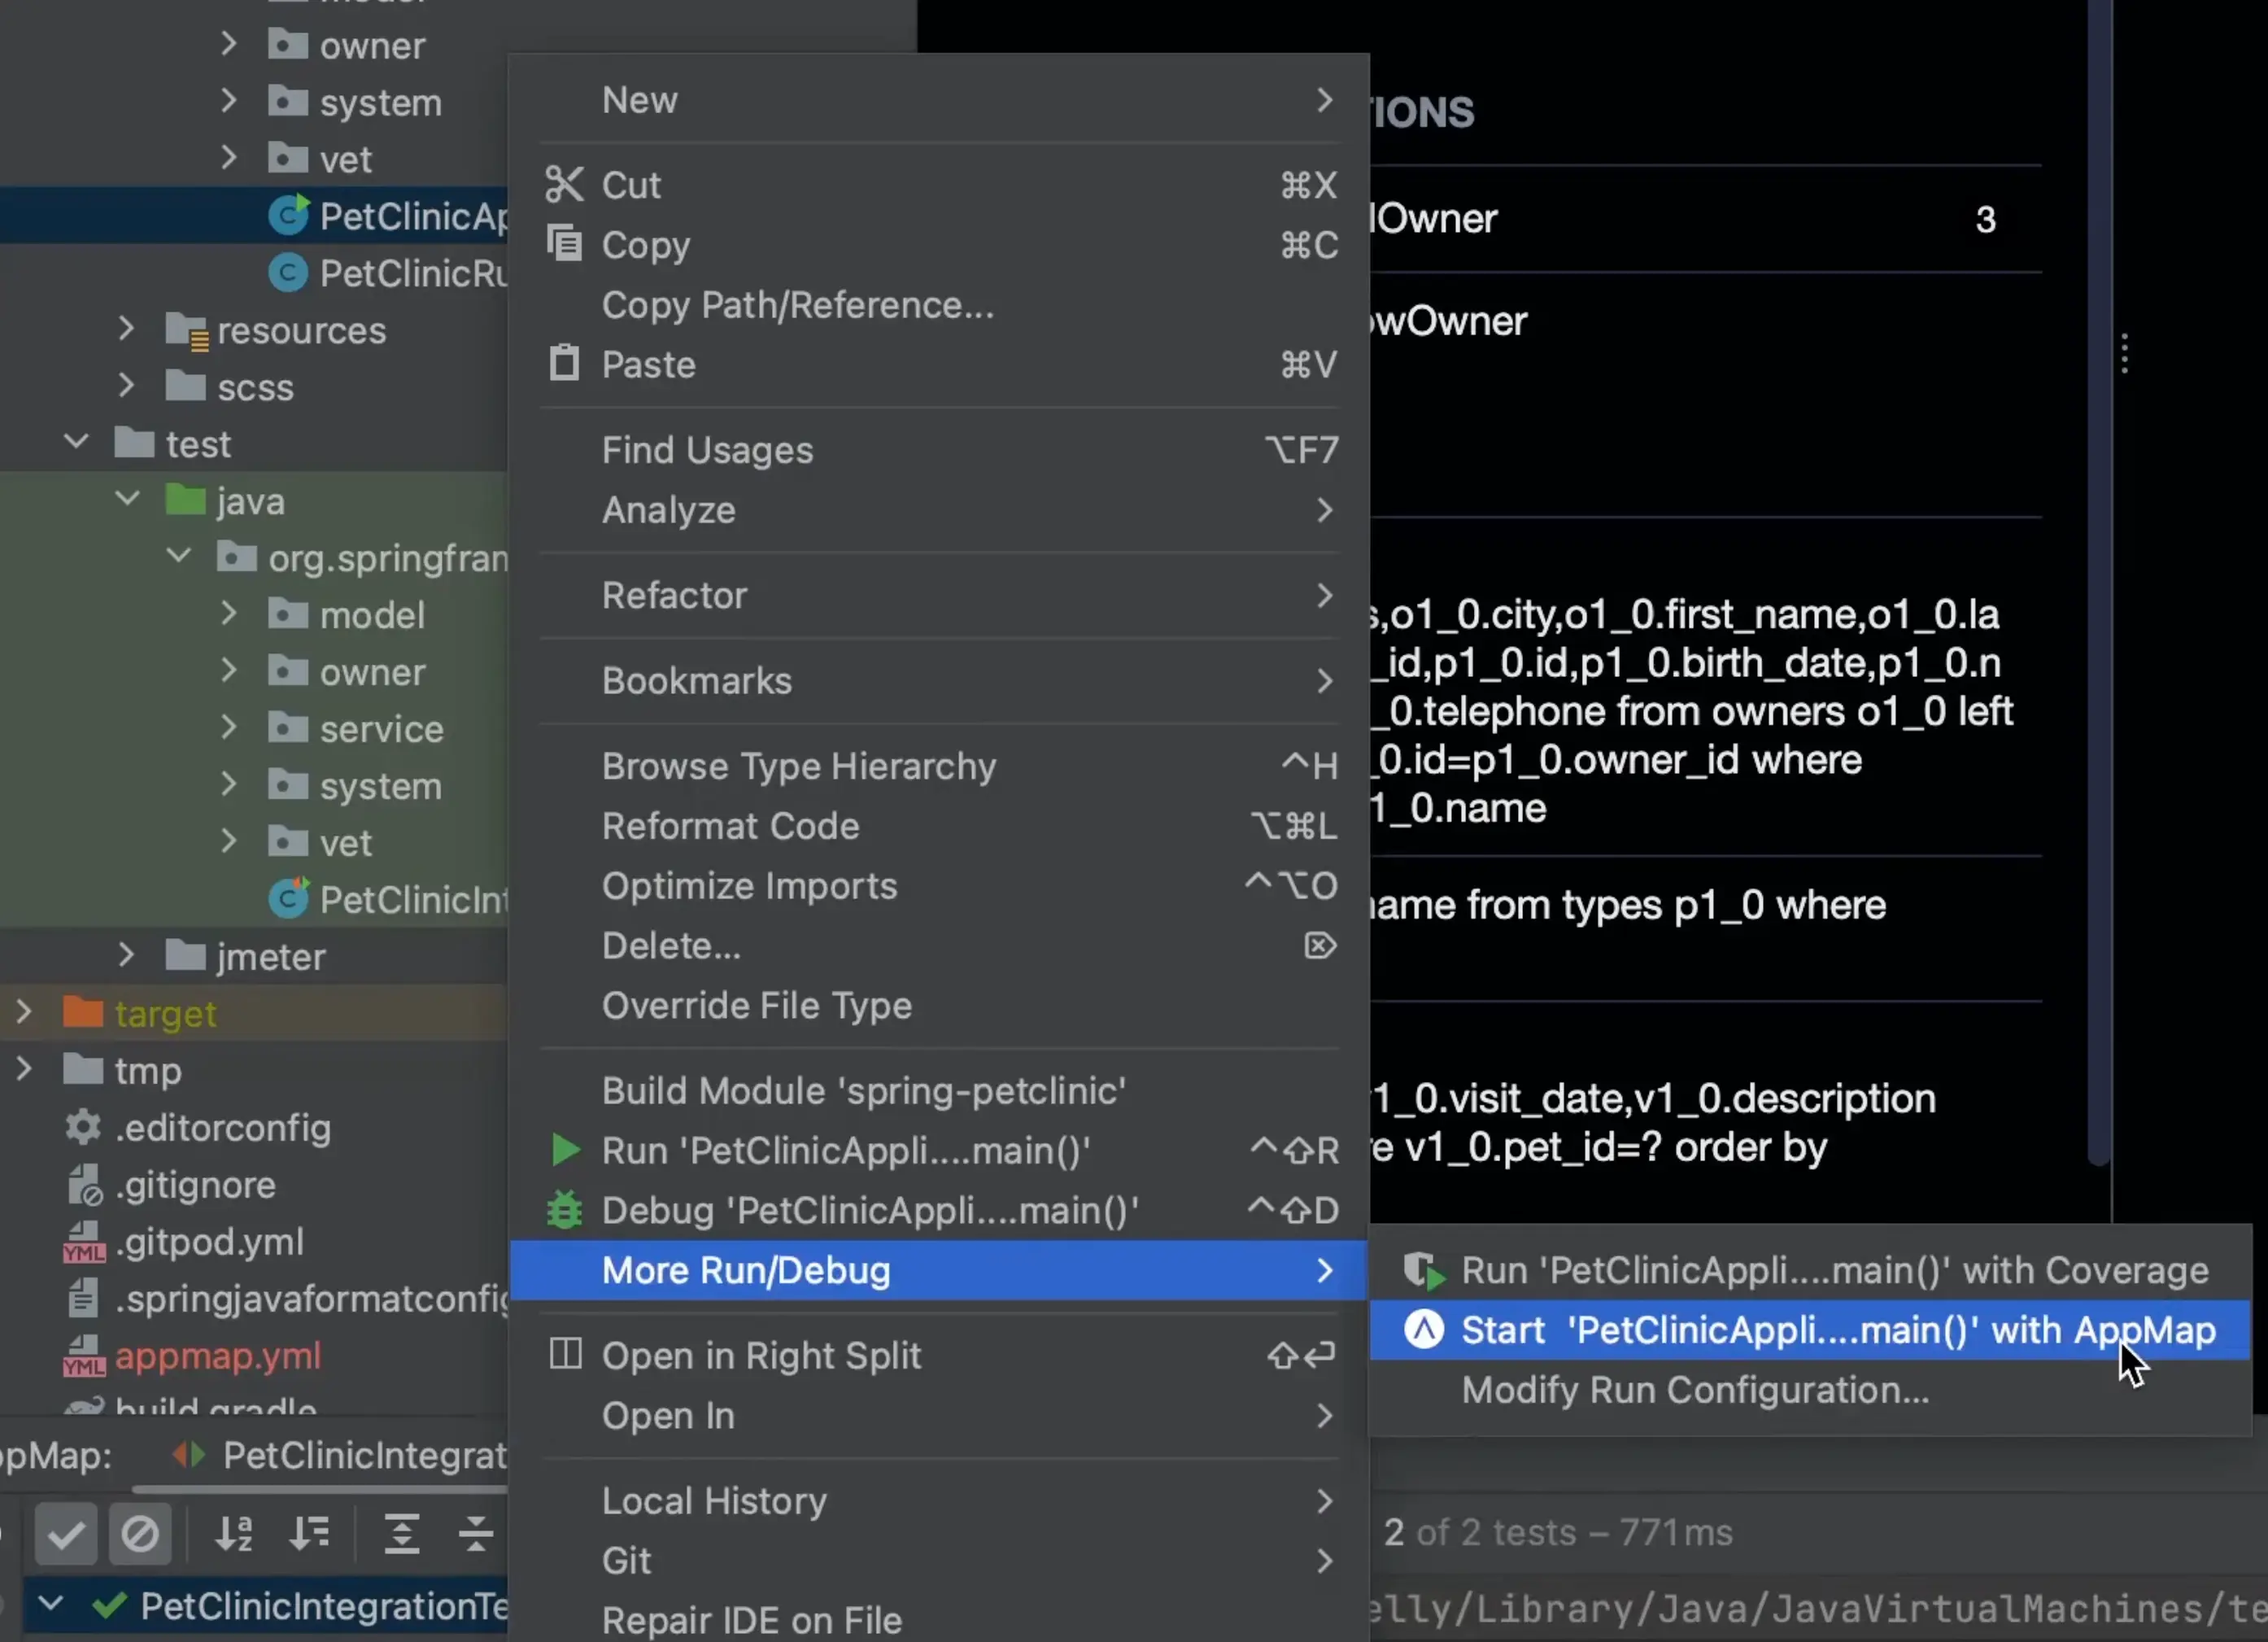
You can also use this custom button to run a specific test or group of tests with the
Start with AppMapoption. Similar to above, right click on a single test or a group of tests and use the custom button under “More Run/Debug” toStart with AppMap.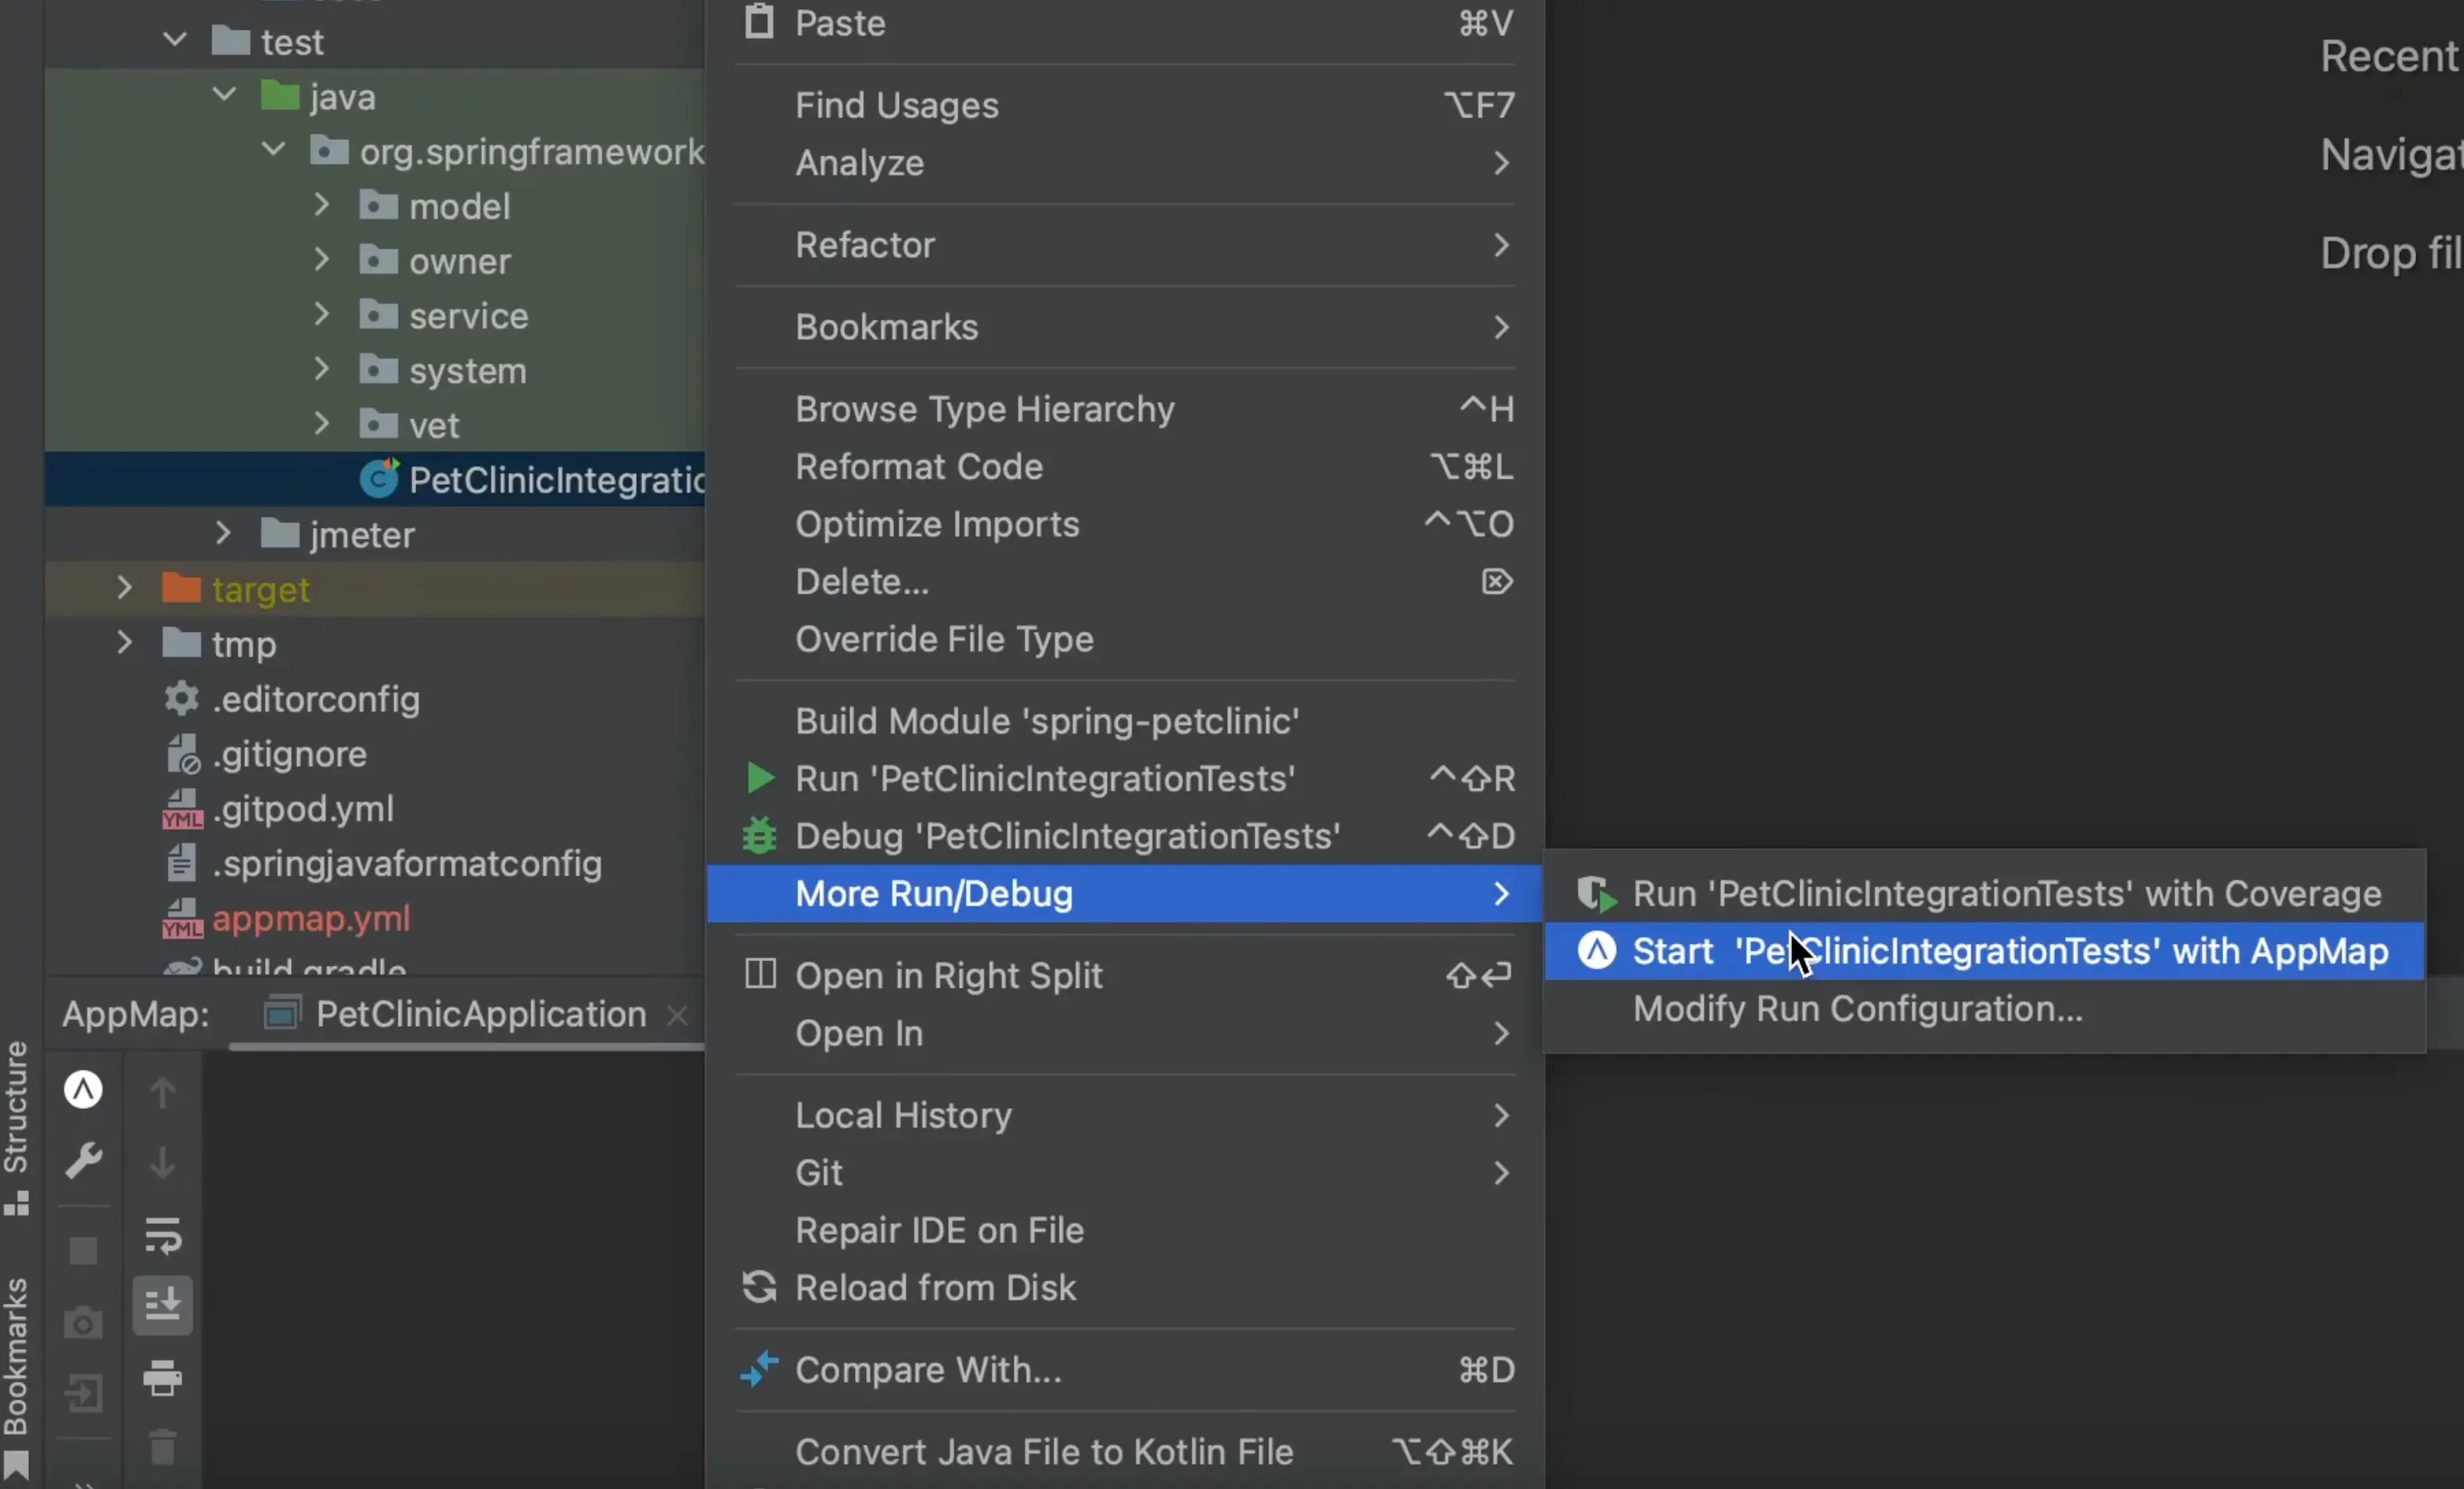
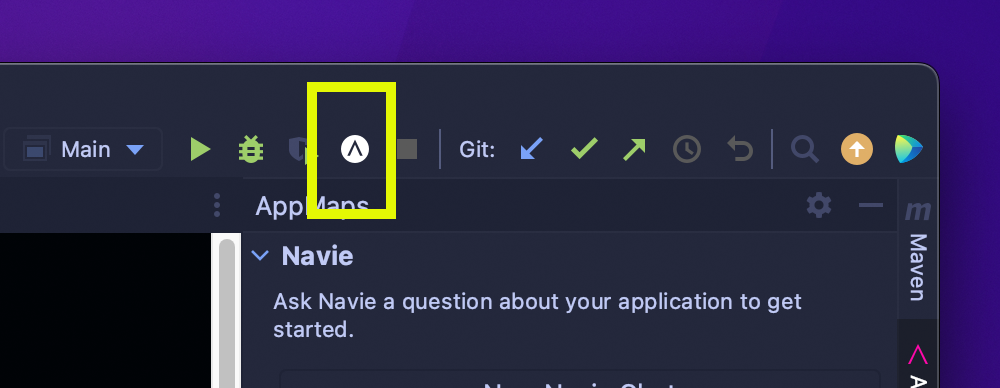
“Start with AppMap” button
Use the “Start with AppMap” button to start your run configurations with AppMap enabled.
For JetBrains versions 2024.1 and earlier the “Start with AppMap” button is in the main toolbar.
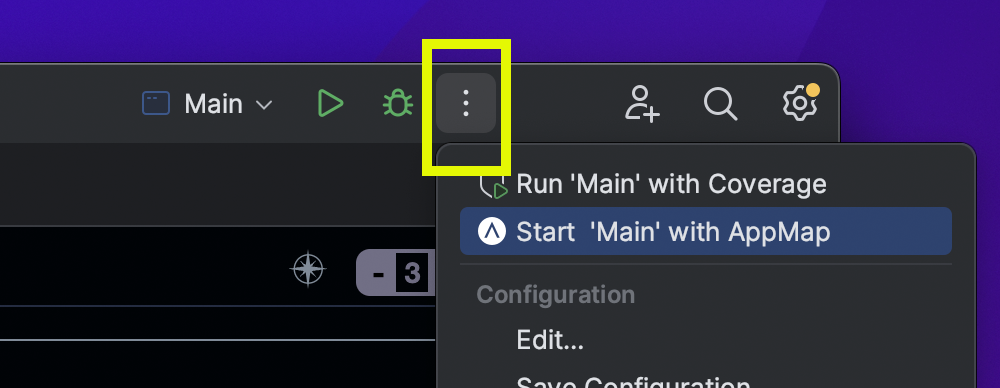
For JetBrains versions 2024.2 and later the “Start with AppMap” button is located in a dropdown menu, accessible by clicking on the vertical dots.
Demo video: Recording AppMap Data from a Java application
Create AppMap Data from JUnit test runs
- Install the JetBrains plugin if you haven’t already.
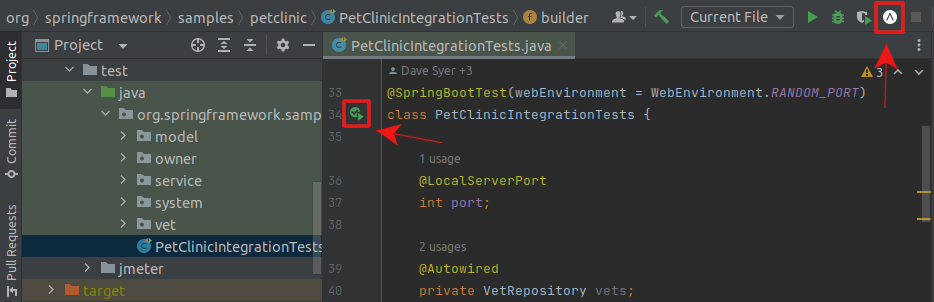
- Open your test file in the editor. Each method marked with JUnit’s
@Testannotation will produce an AppMap. - Run the test(s) with AppMap by clicking the icon next to the test class and then selecting “Start with AppMap”, or by clicking the AppMap run configuration button:
Disable specific JUnit tests
To disable recording for a particular JUnit test (for example, a performance test), list the class or methods under
excludein the project’sappmap.ymlconfiguration file.Running a Java application with AppMap
When you run a Java application with the AppMap agent, remote recording will be enabled. (Note: For this to work, your application must include a web server).
- Install the JetBrains plugin if you haven’t already.
- Open your application file in the editor.
- Run your application with AppMap by clicking the icon next to the main class you wish to run and then selecting “Start with AppMap”, or by clicking the AppMap run configuration button:

- With the application running, follow the remote recording instructions below to (starting at step 3) create AppMap Data.
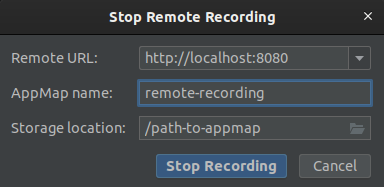
Remote recording
You can make a remote recording from within the JetBrains IDE.
Security Warning: Remote recording should only be enabled in non-production environments. Enabling it in other environments is a security risk as the recording endpoints may be accessible to anyone who can reach the application server. You can ensure that remote recording is not enabled by ensuring that the
appmapJava agent is not loaded by the JVM.- Install the JetBrains plugin if you haven’t already.
- Start your application with remote recording enabled. For Java, run your Java application with AppMap. For other languages, consult the agent reference for details.
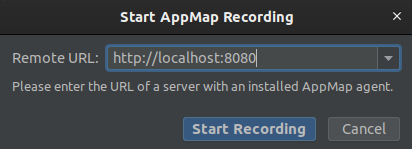
- To start a recording, click the remote recording button, or use the command Start AppMap recording.

- Enter the URL where your application is running.
- Interact with your app through its UI or API. Then click the button to stop the recording, or use the command Stop AppMap recording.

- You’ll be prompted to save the AppMap to a file, and it will be opened.
For more details about remote recording, see:
Requests recording
You can configure AppMap to record HTTP requests and responses in your Java application. This is useful for understanding how your application interacts with external services.
- Install the JetBrains plugin if you haven’t already.
- Start your application with the
appmapJava agent enabled. For Java, run your Java application with AppMap. For other languages, consult the agent reference for details. - Interact with your application through its UI or API.
- AppMap will automatically record HTTP requests and responses. The recorded requests will be saved as AppMap data files in the project AppMap directory (
tmp/appmapby default).
For more details about requests recording, see:
AppMap Plugin actions
To open the list of AppMap plugin actions, press
CTRL+SHIFT+Aon Windows and Linux, orCOMMAND+SHIFT+Aon macOS, and typeAppMap. You can also find these actions atTools > AppMapof the main menu.The command names should be self-explanatory.
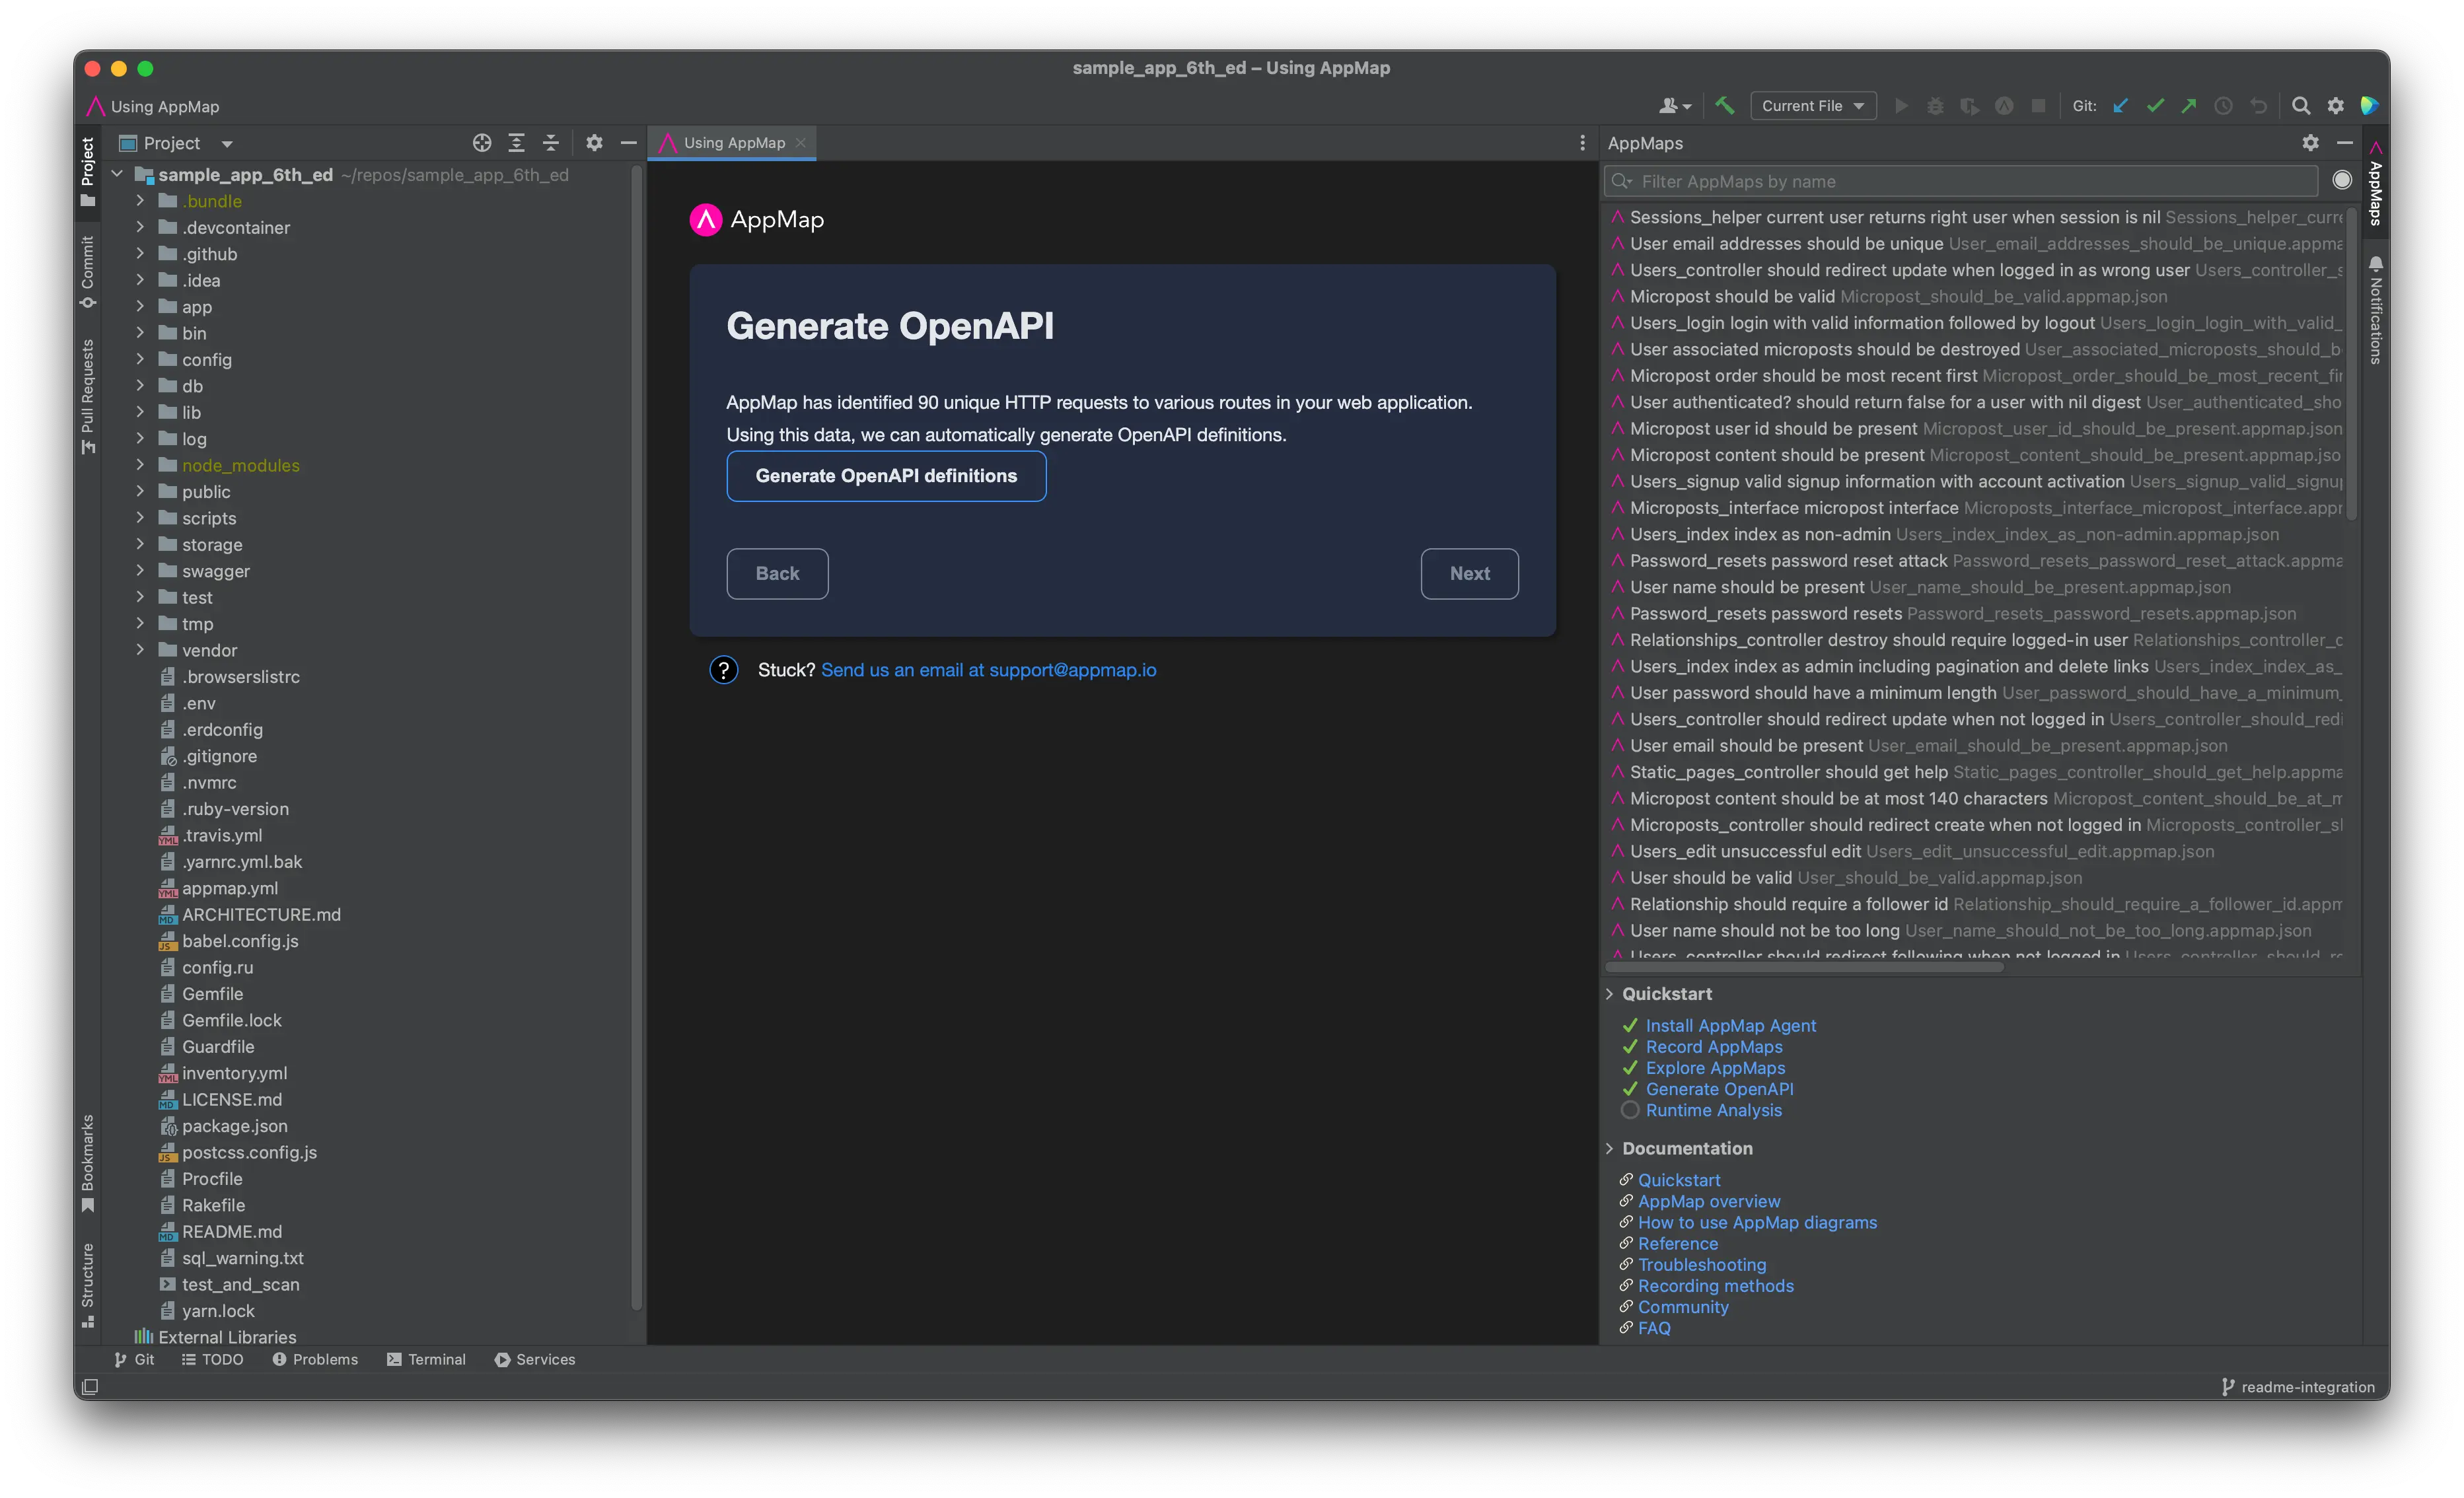
Generate OpenAPI Definitions
After recording AppMap Data for your project, select “Generate OpenAPI” from the AppMap instructions quick start in the lower right hand column.
Selecting the “Generate OpenAPI Definitions” button will open a new file with your OpenAPI definition document to save locally, share with your team or use with 3rd party API management tools like Postman
Troubleshooting
Enable Debug Logging
You can enable debug logging of the AppMap plugin in your JetBrains code editor by first opening
Help>Diagnostic Tools>Debug Log Settings.
In the
Custom Debug Log Configurationenterapplandto enable DEBUG level logging for the AppMap plugin.
Next, open
Help>Show Log...will open the IDE log file.
Downloading Plugin Logs
AppMap technical support may ask you for your IDE logs to diagnose issues with the plugin’s behavior. If so, go to the
Helpmenu in your editor and selectCollect Logs and Diagnostic Data. This will create a.zipfile on your local machine and open a file explorer window to it. You can then safely send that file to AppMap within your technical support ticket conversation.GitHub Repository
https://github.com/getappmap/appmap-intellij-plugin
Thank you for your feedback!
