To access the latest features keep your code editor plug-in up to date.
-
Docs
-
Reference
- AppMap for Visual Studio Code
- AppMap for JetBrains
- AppMap Agent for Ruby
- AppMap Agent for Python
- AppMap Agent for Java
- AppMap Agent for Node.js
- AppMap for Java - Maven Plugin
- AppMap for Java - Gradle Plugin
- Command line interface (CLI)
- Remote recording API
- Analysis Labels
- Analysis Rules
- License Key Installation
- Subscription Management
- AppMap Offline Install for Secure Environments
- Uninstalling AppMap
Advanced AppMap Data Management- Using AppMap Diagrams
- Navigating Code Objects
- Exporting AppMap Diagrams
- Handling Large AppMap Diagrams
- Reading SQL in AppMap Diagrams
- Refining AppMap Data
- Generating OpenAPI Definitions
- Using AppMap Analysis
- Reverse Engineering
- Record AppMap Data in Kubernetes
Integrations- Community
Choose Your LLM
When you ask Navie a question, your code editor will connect to a configured LLM provider. If you have GitHub Copilot installed and activated, Navie will connect to the Copilot LLM by default. Otherwise, Navie will connect to an AppMap-hosted OpenAI proxy by default.
You can also bring your own LLM API key, or use a local model.
- Using GitHub Copilot Language Models
- Bring Your Own OpenAI API Key (BYOK)
- Bring Your Own Anthropic (Claude) API Key (BYOK)
- Bring Your Own Model (BYOM)
- Examples
Using GitHub Copilot Language Models
With modern versions of VSCode and JetBrains IDEs, and with an active GitHub Copilot subscription, you can use the Copilot LLM as the LLM backend for Navie. This allows you to leverage the powerful runtime powered Navie AI Architect with your existing Copilot subscription. This is the recommended, and default, option for users in corporate environments where Copilot is approved and available.
Requirements (VSCode)
The following items are required to use the GitHub Copilot Language Model with Navie in VSCode:
- VS Code Version
1.91or greater - AppMap Extension version
v0.123.0or greater - GitHub Copilot extension installed and activated
NOTE: If you have configured yourOPENAI_API_KEYor other environment variables these will override any settings chosen from within the code editor extension. Unset these environment variables before changing your LLM or API key in your code editorRequirements (JetBrains)
The following items are required to use the GitHub Copilot Language Model with Navie in JetBrains IDEs:
- JetBrains IDE version
2023.1or greater - AppMap Plugin version
v0.76.0or greater - GitHub Copilot plugin installed and activated
NOTE: If you have configured yourOPENAI_API_KEYor other environment variables these will override any settings chosen from within the code editor extension. Unset these environment variables before changing your LLM or API key in your code editorChoosing the GitHib Copilot LLM Provider
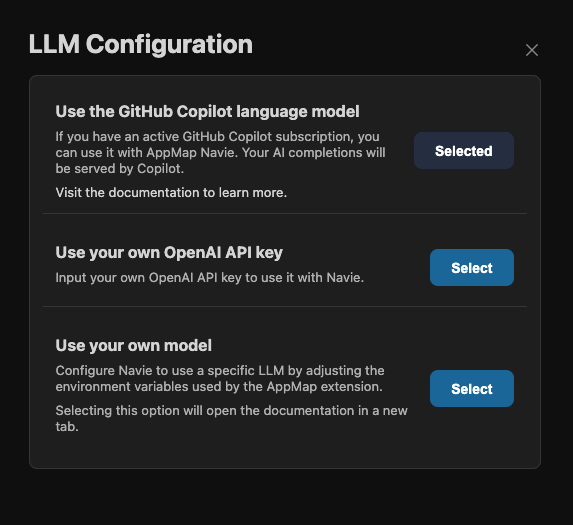
Open Navie, then use the gear icon or the “change the lanugage model provider” link to open the LLM configuration dialog.
Select “GitHub Copilot”, or any of the other options.
VSCode Settings
You can also choose the Copilot provider in VSCode using the Settings. Open the VS Code Settings, and search for
navie vscode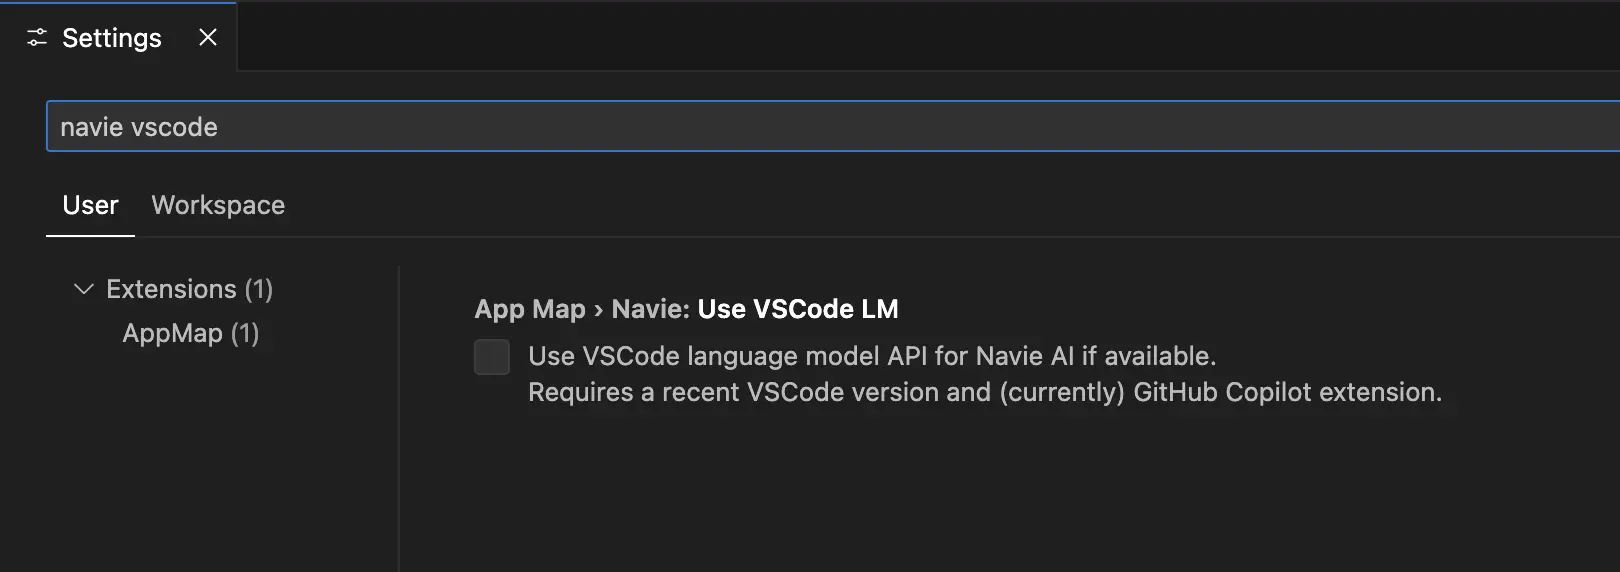
Click the box to use the
VS Code language model...After clicking the box to enable the VS Code LM, you’ll be instructed to reload your VS Code to enable these changes.
For more details about using the GitHub Copilot Language Model as a supported Navie backend, refer to the Navie reference guide
Video Demo
Bring Your Own OpenAI API Key (BYOK)
You can use your own LLM provider API key, and configure that within AppMap. This will ensure all Navie requests will be interacting with your LLM provider of choice.
Configuring Your OpenAI Key
In your code editor, open the Navie Chat window. If the model displays
(default), this means that Navie is configured to use the AppMap hosted OpenAI proxy. Click on the gear icon in the top of the Navie Chat window to change the model.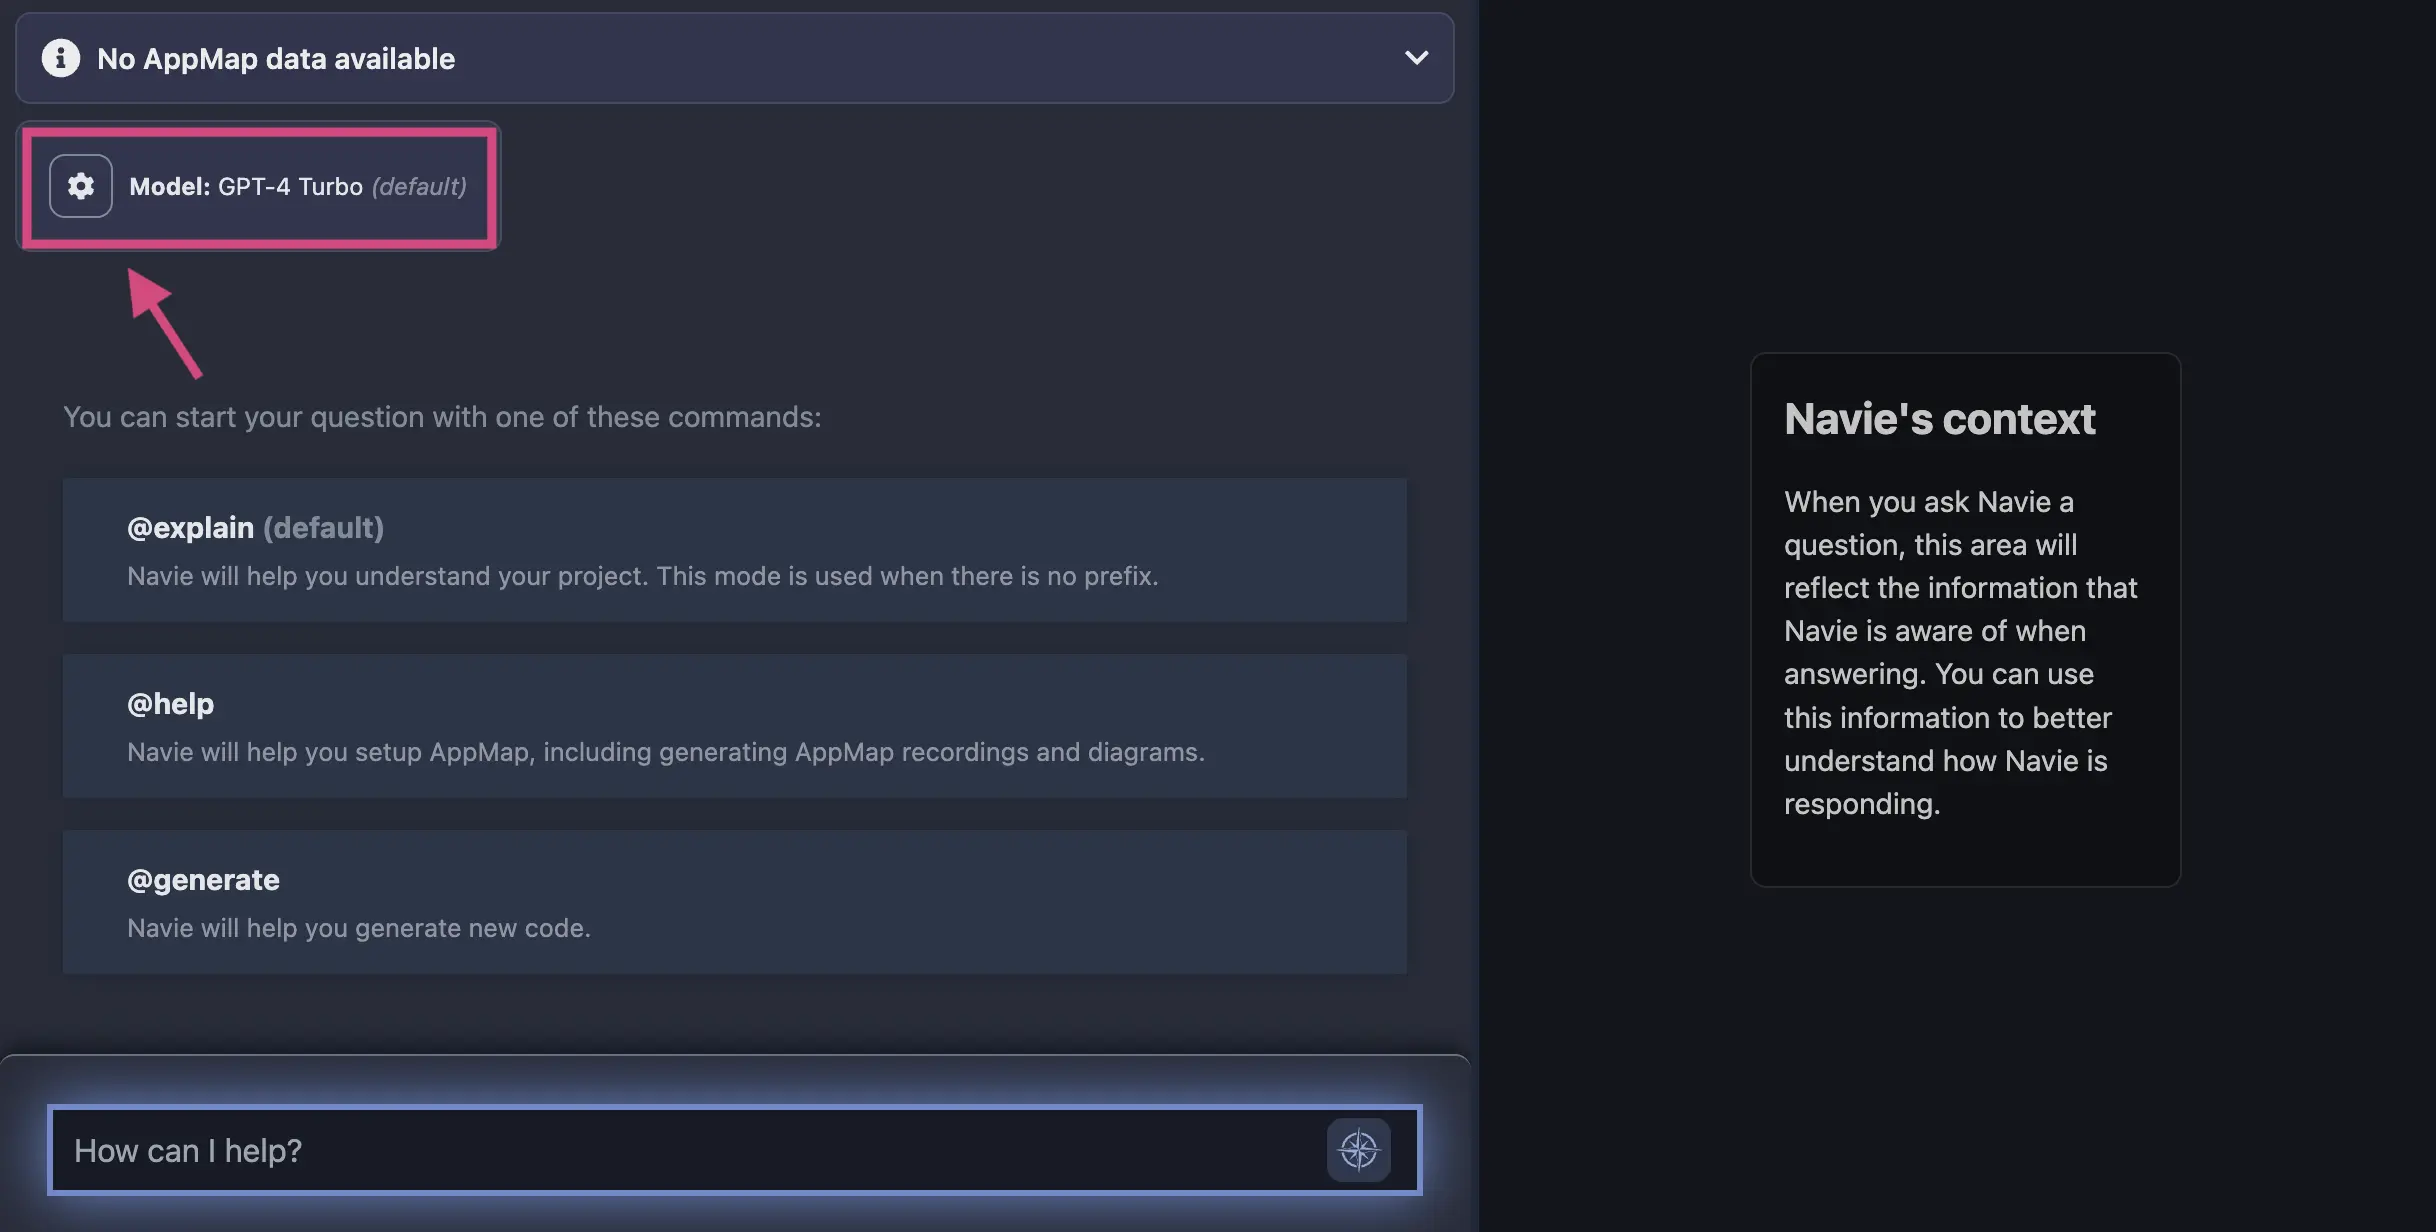
In the modal, select the option to
Use your own OpenAI API key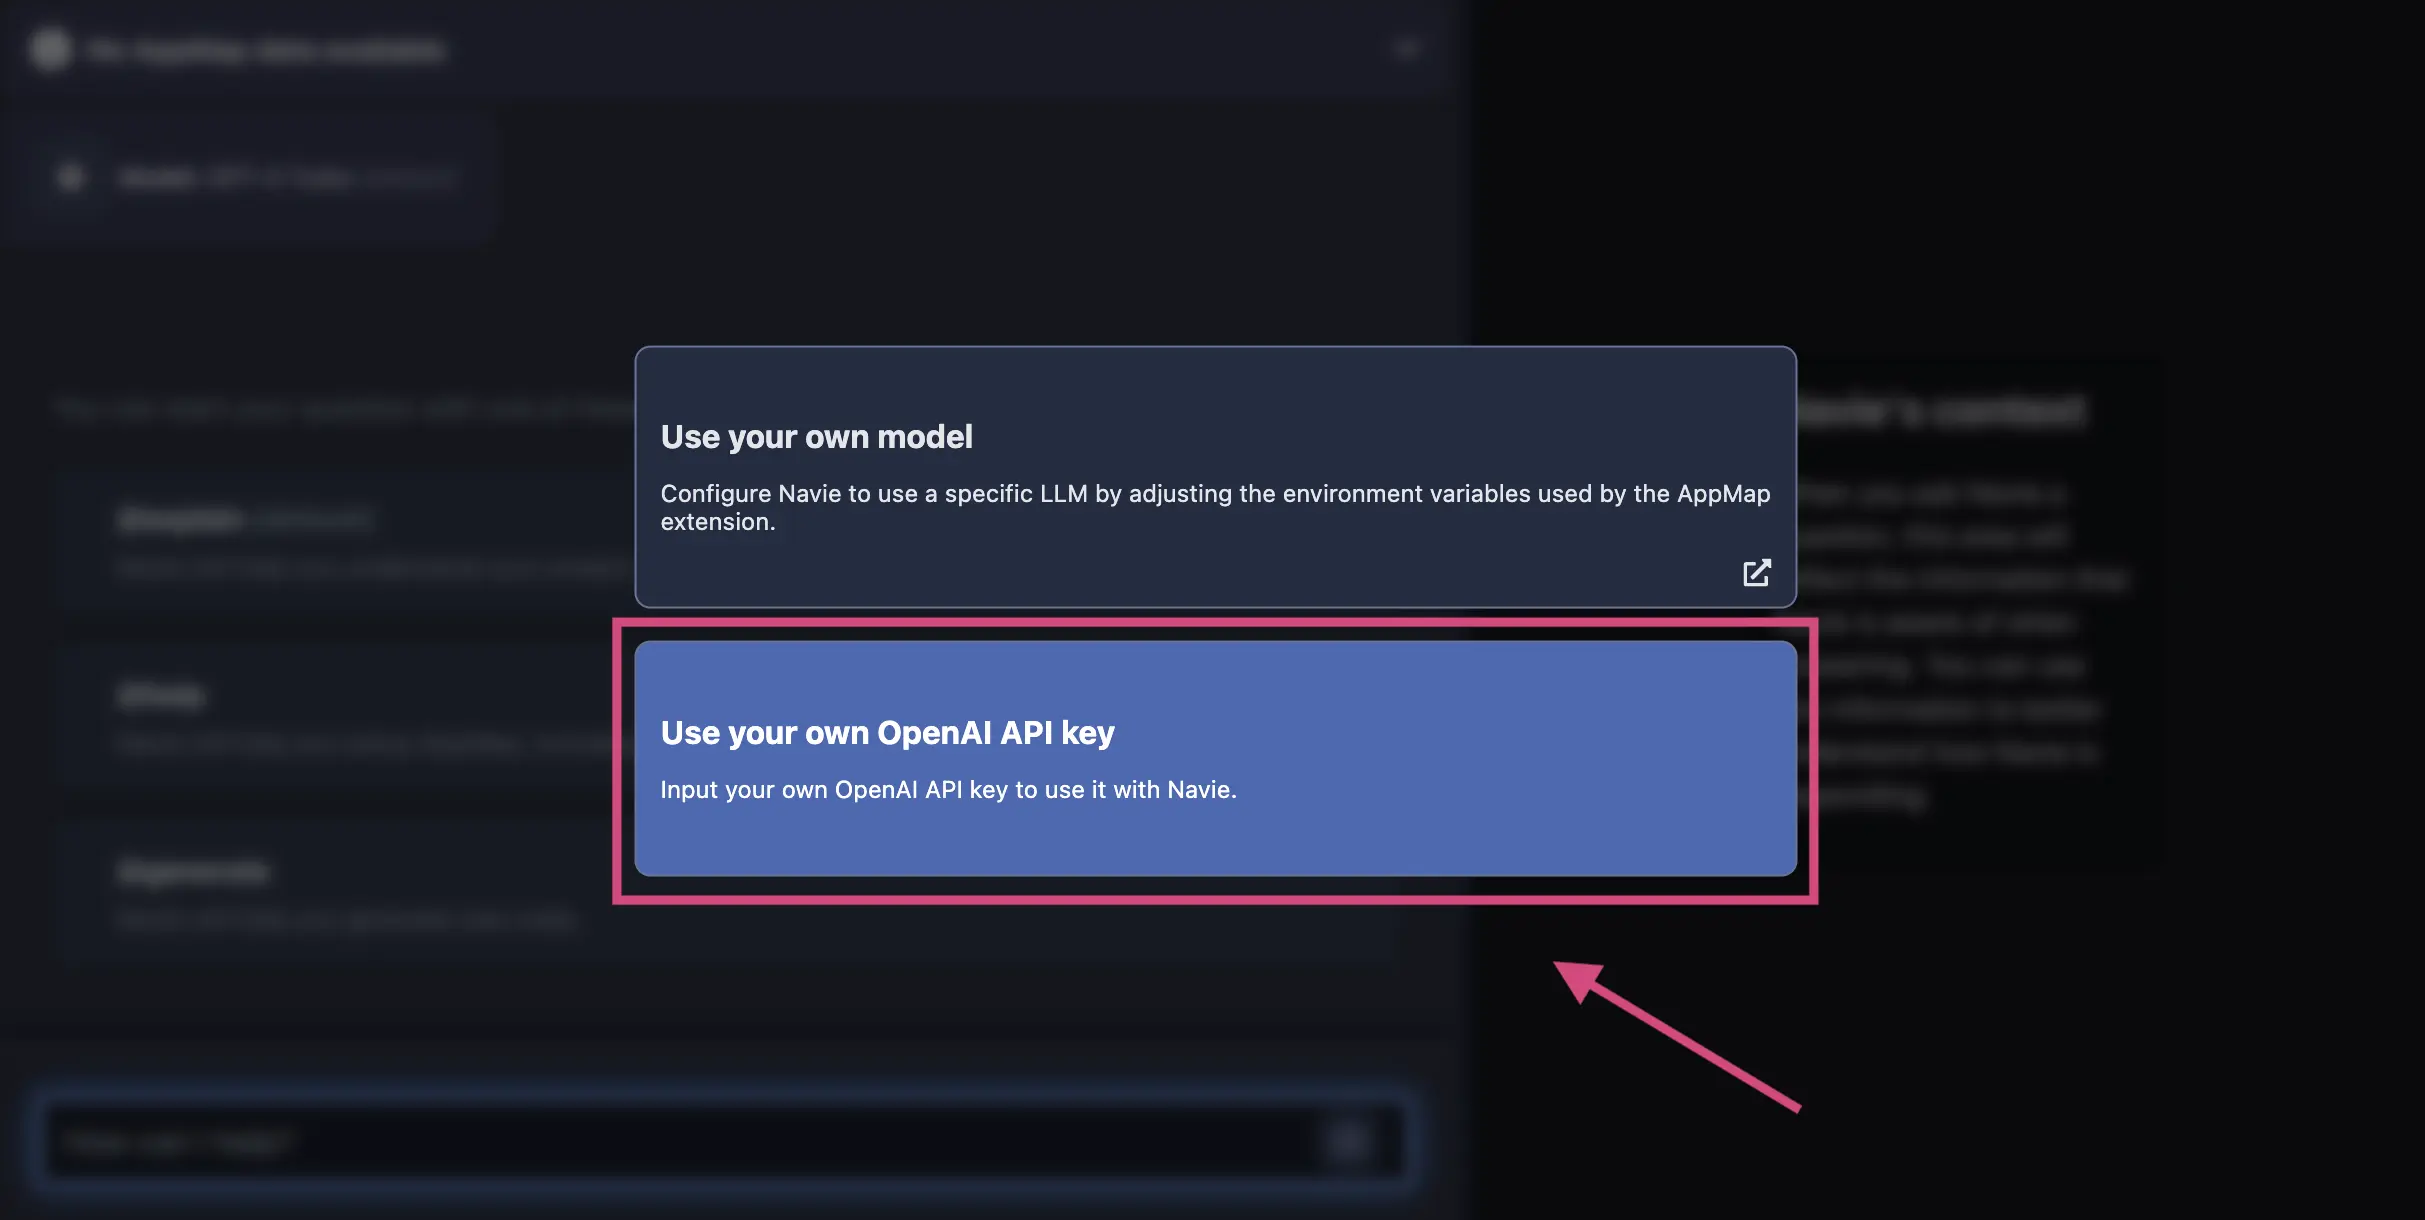
After you enter your OpenAI API Key in the menu option, hit
enterand your code editor will be prompted to reload.In VS Code:
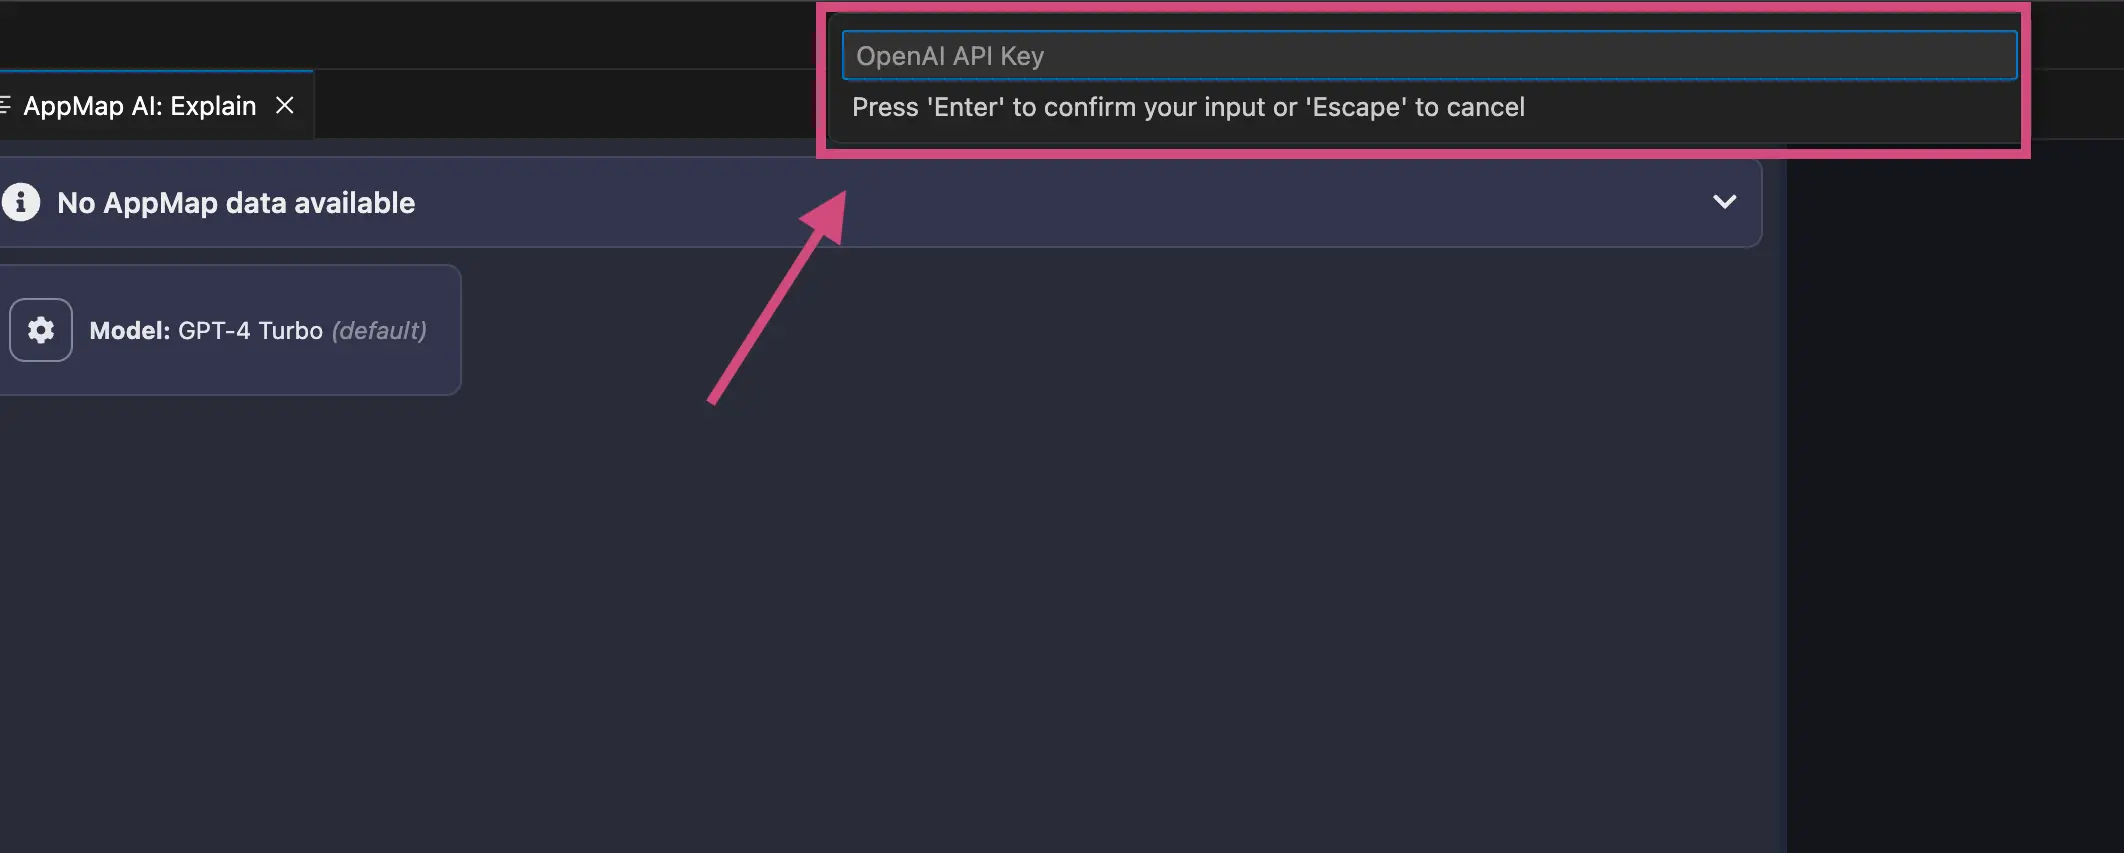
In JetBrains:
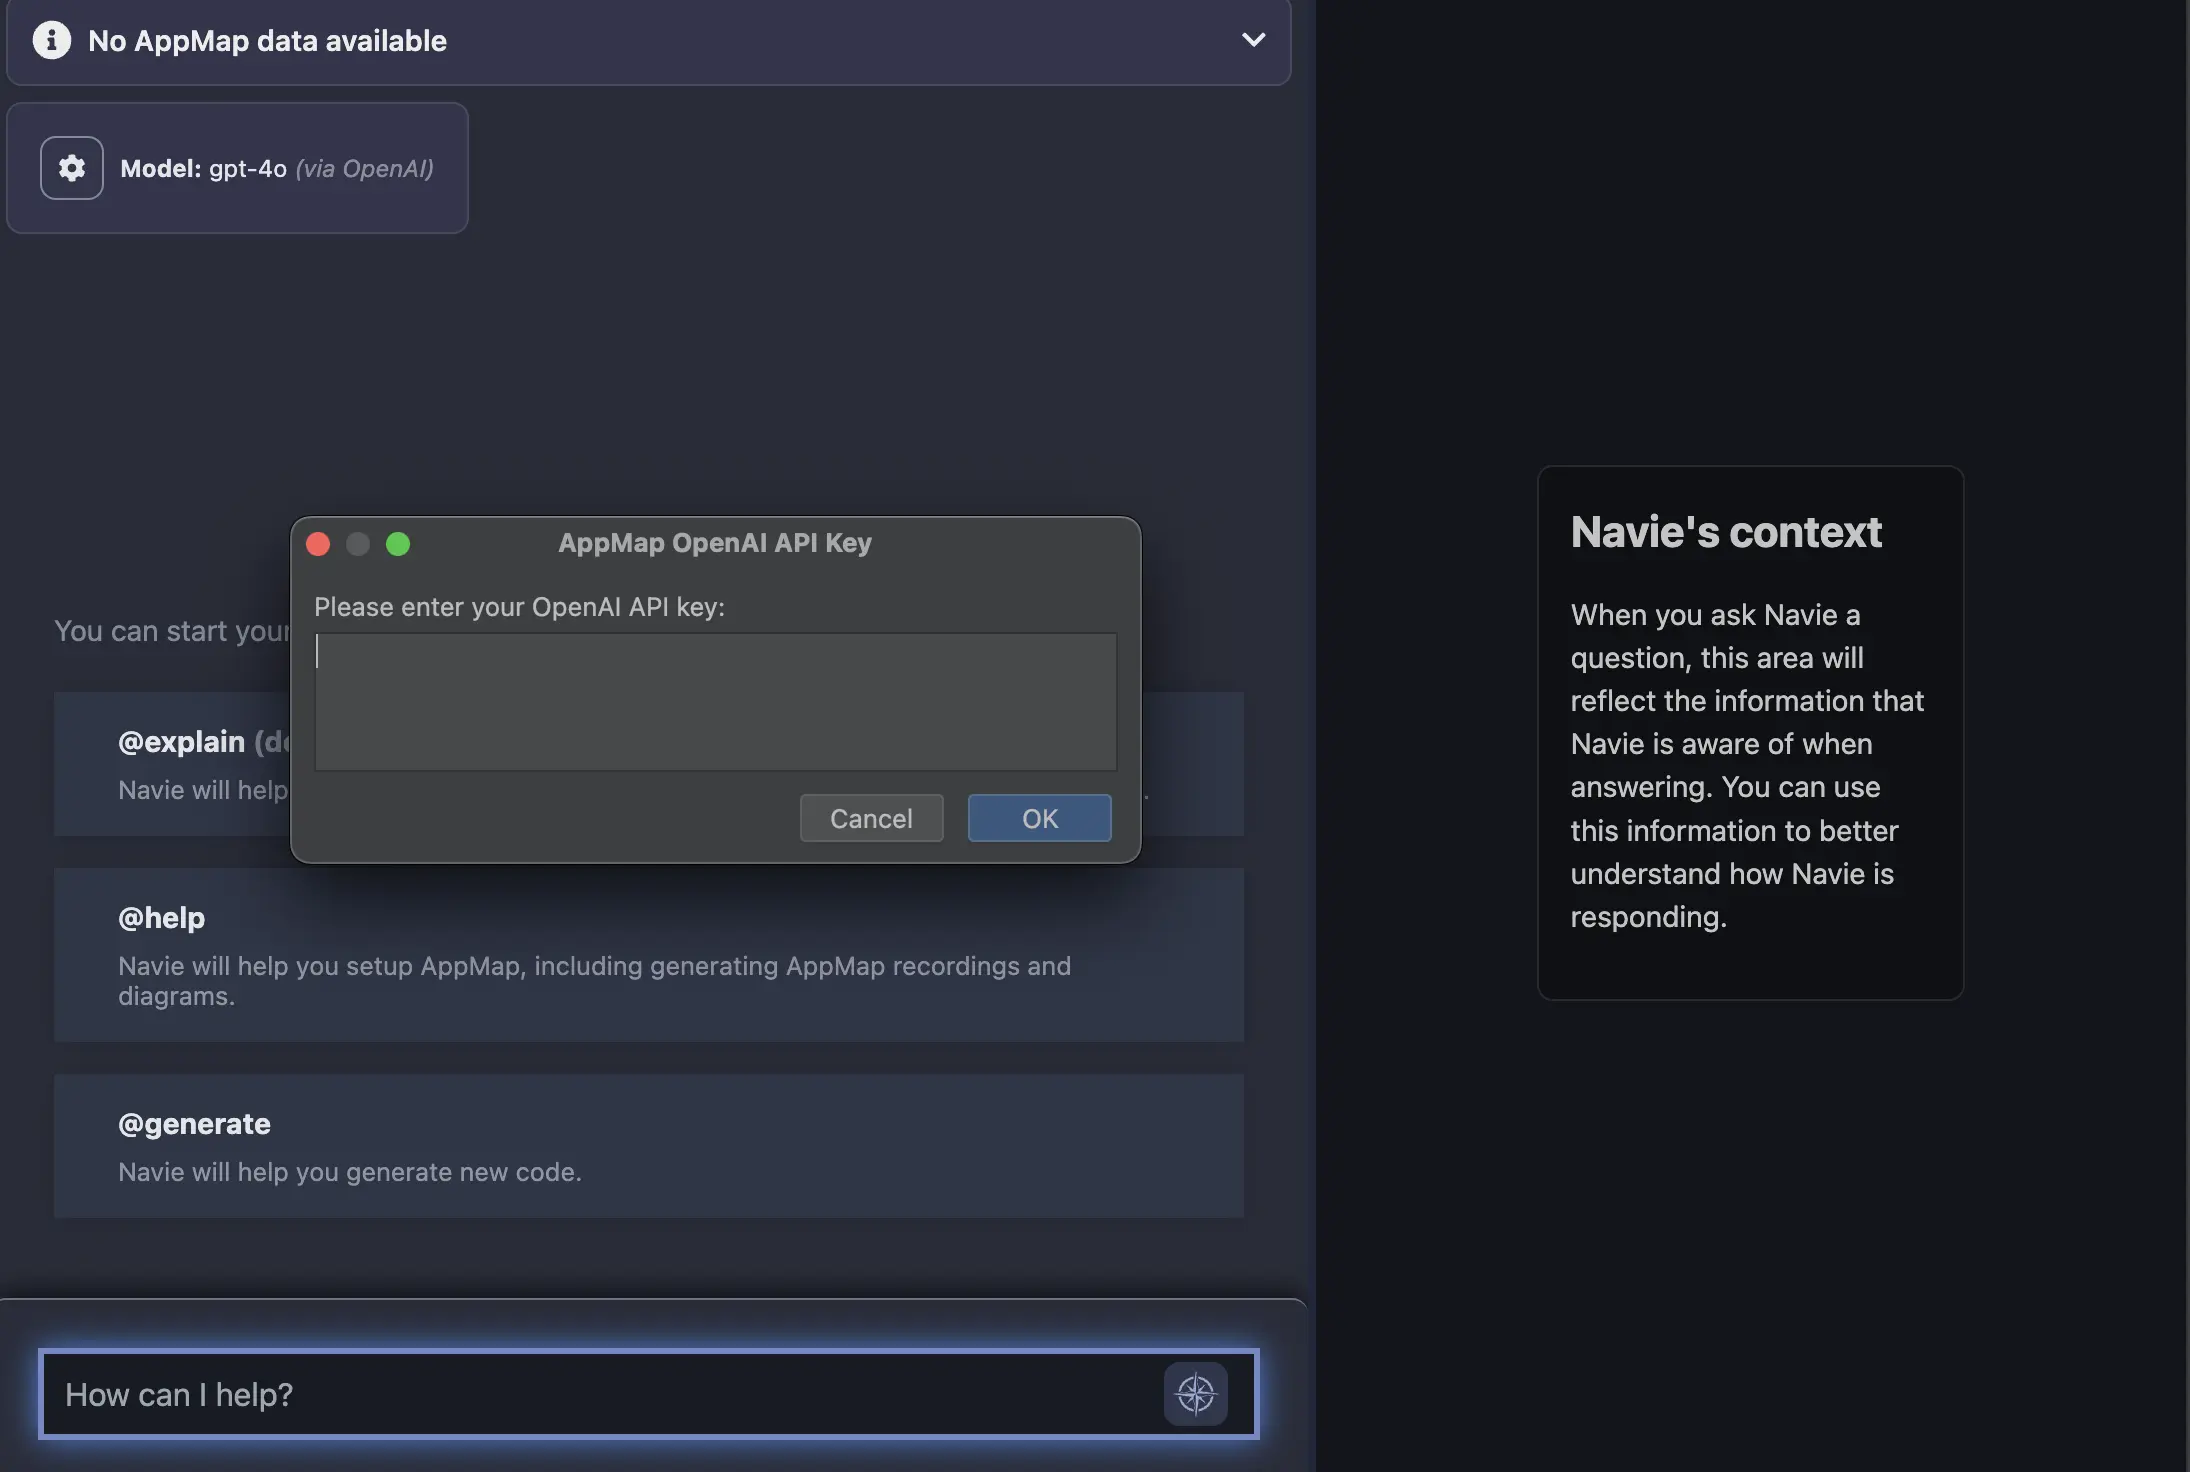
NOTE: You can also use the environment variable in the configuration section to store your API key as an environment variable instead of using the
gearicon in the Navie chat window.After your code editor reloads, you can confirm your requests are being routed to OpenAI directly in the Navie Chat window. It will list the model
OpenAIand the location, in this casevia OpenAI.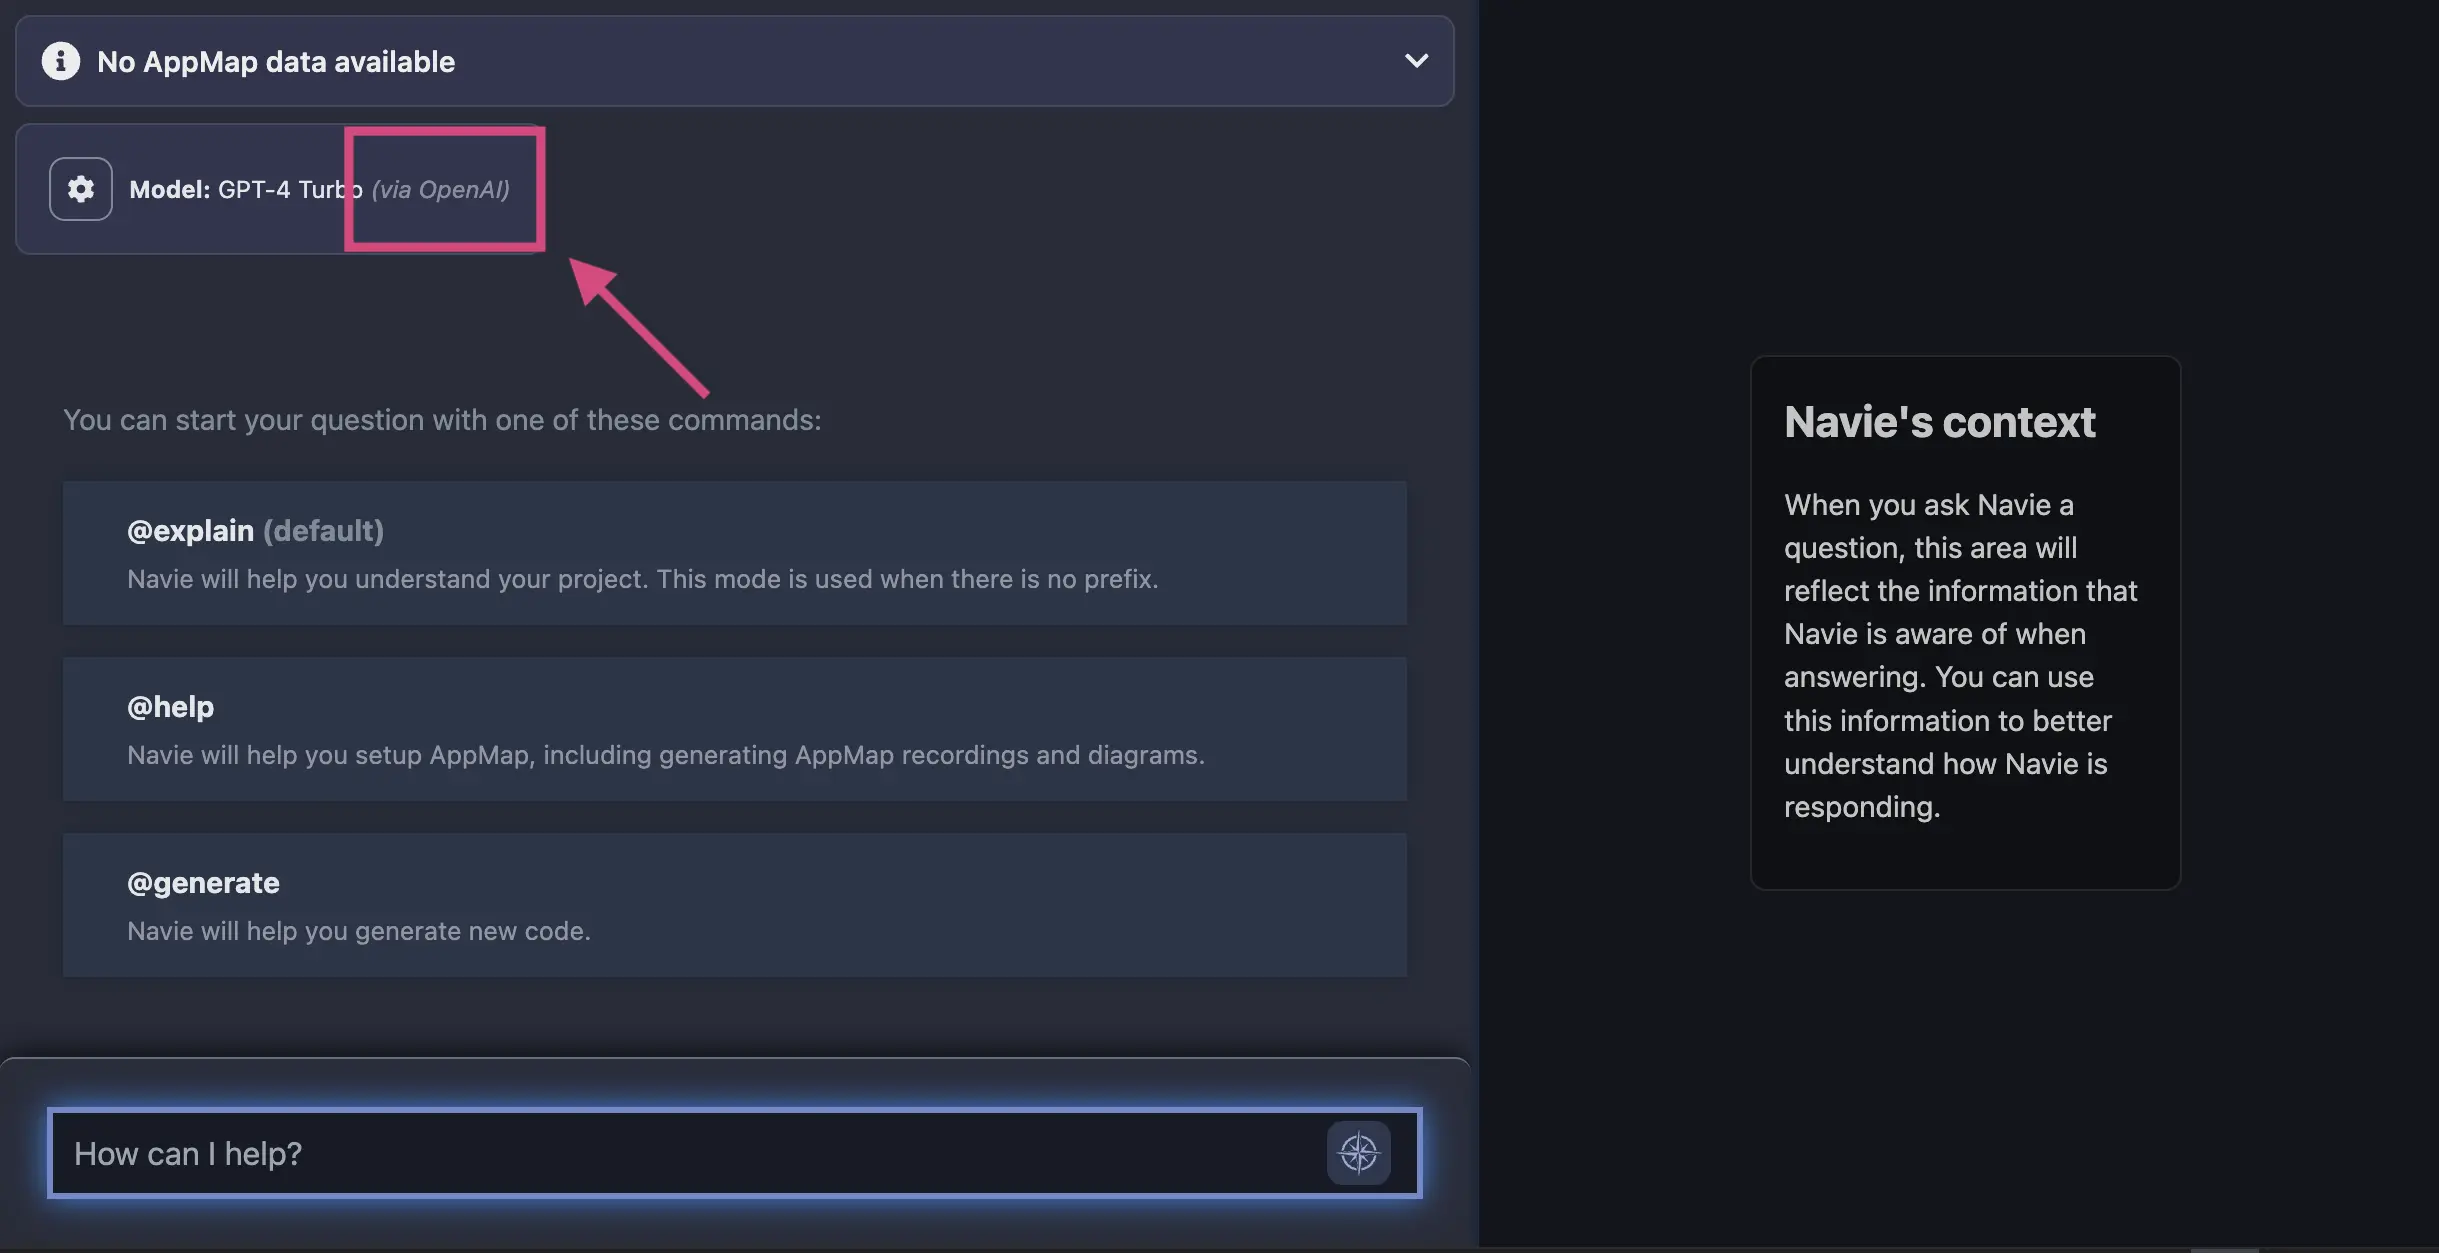
Modify which OpenAI Model to use
AppMap generally uses the latest OpenAI models as the default, but if you want to use an alternative model like
gpt-3.5or a preview model likegpt-4-vision-previewyou can modify theAPPMAP_NAVIE_MODELenvironment variable after configuring your own OpenAI API key to use other OpenAI models.After setting your
APPMAP_NAVIE_MODELwith your chosen model reload/restart your code editor and then confirm it’s configuration by opening a new Navie chat window. In this example I’ve configured my model to begpt-4owith my personal OpenAI API Key.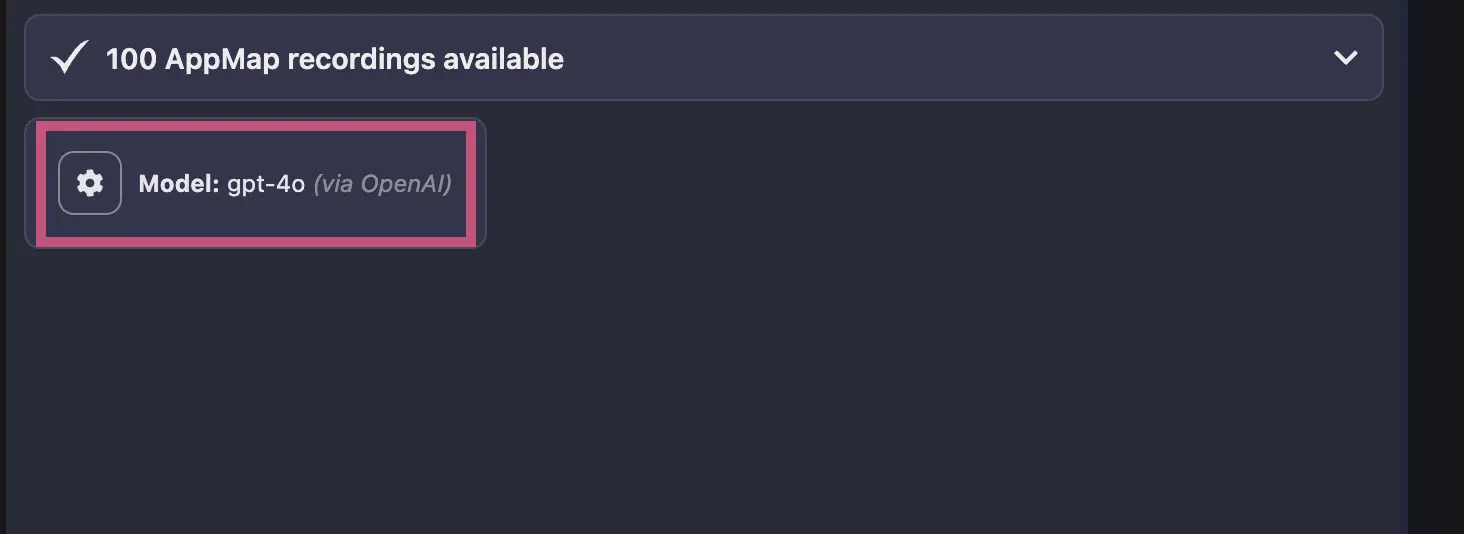
Reset Navie AI to use Default Navie Backend
At any time, you can unset your OpenAI API Key and revert usage back to using the AppMap hosted OpenAI proxy. Select the gear icon in the Navie Chat window and select
Use Navie Backendin the modal.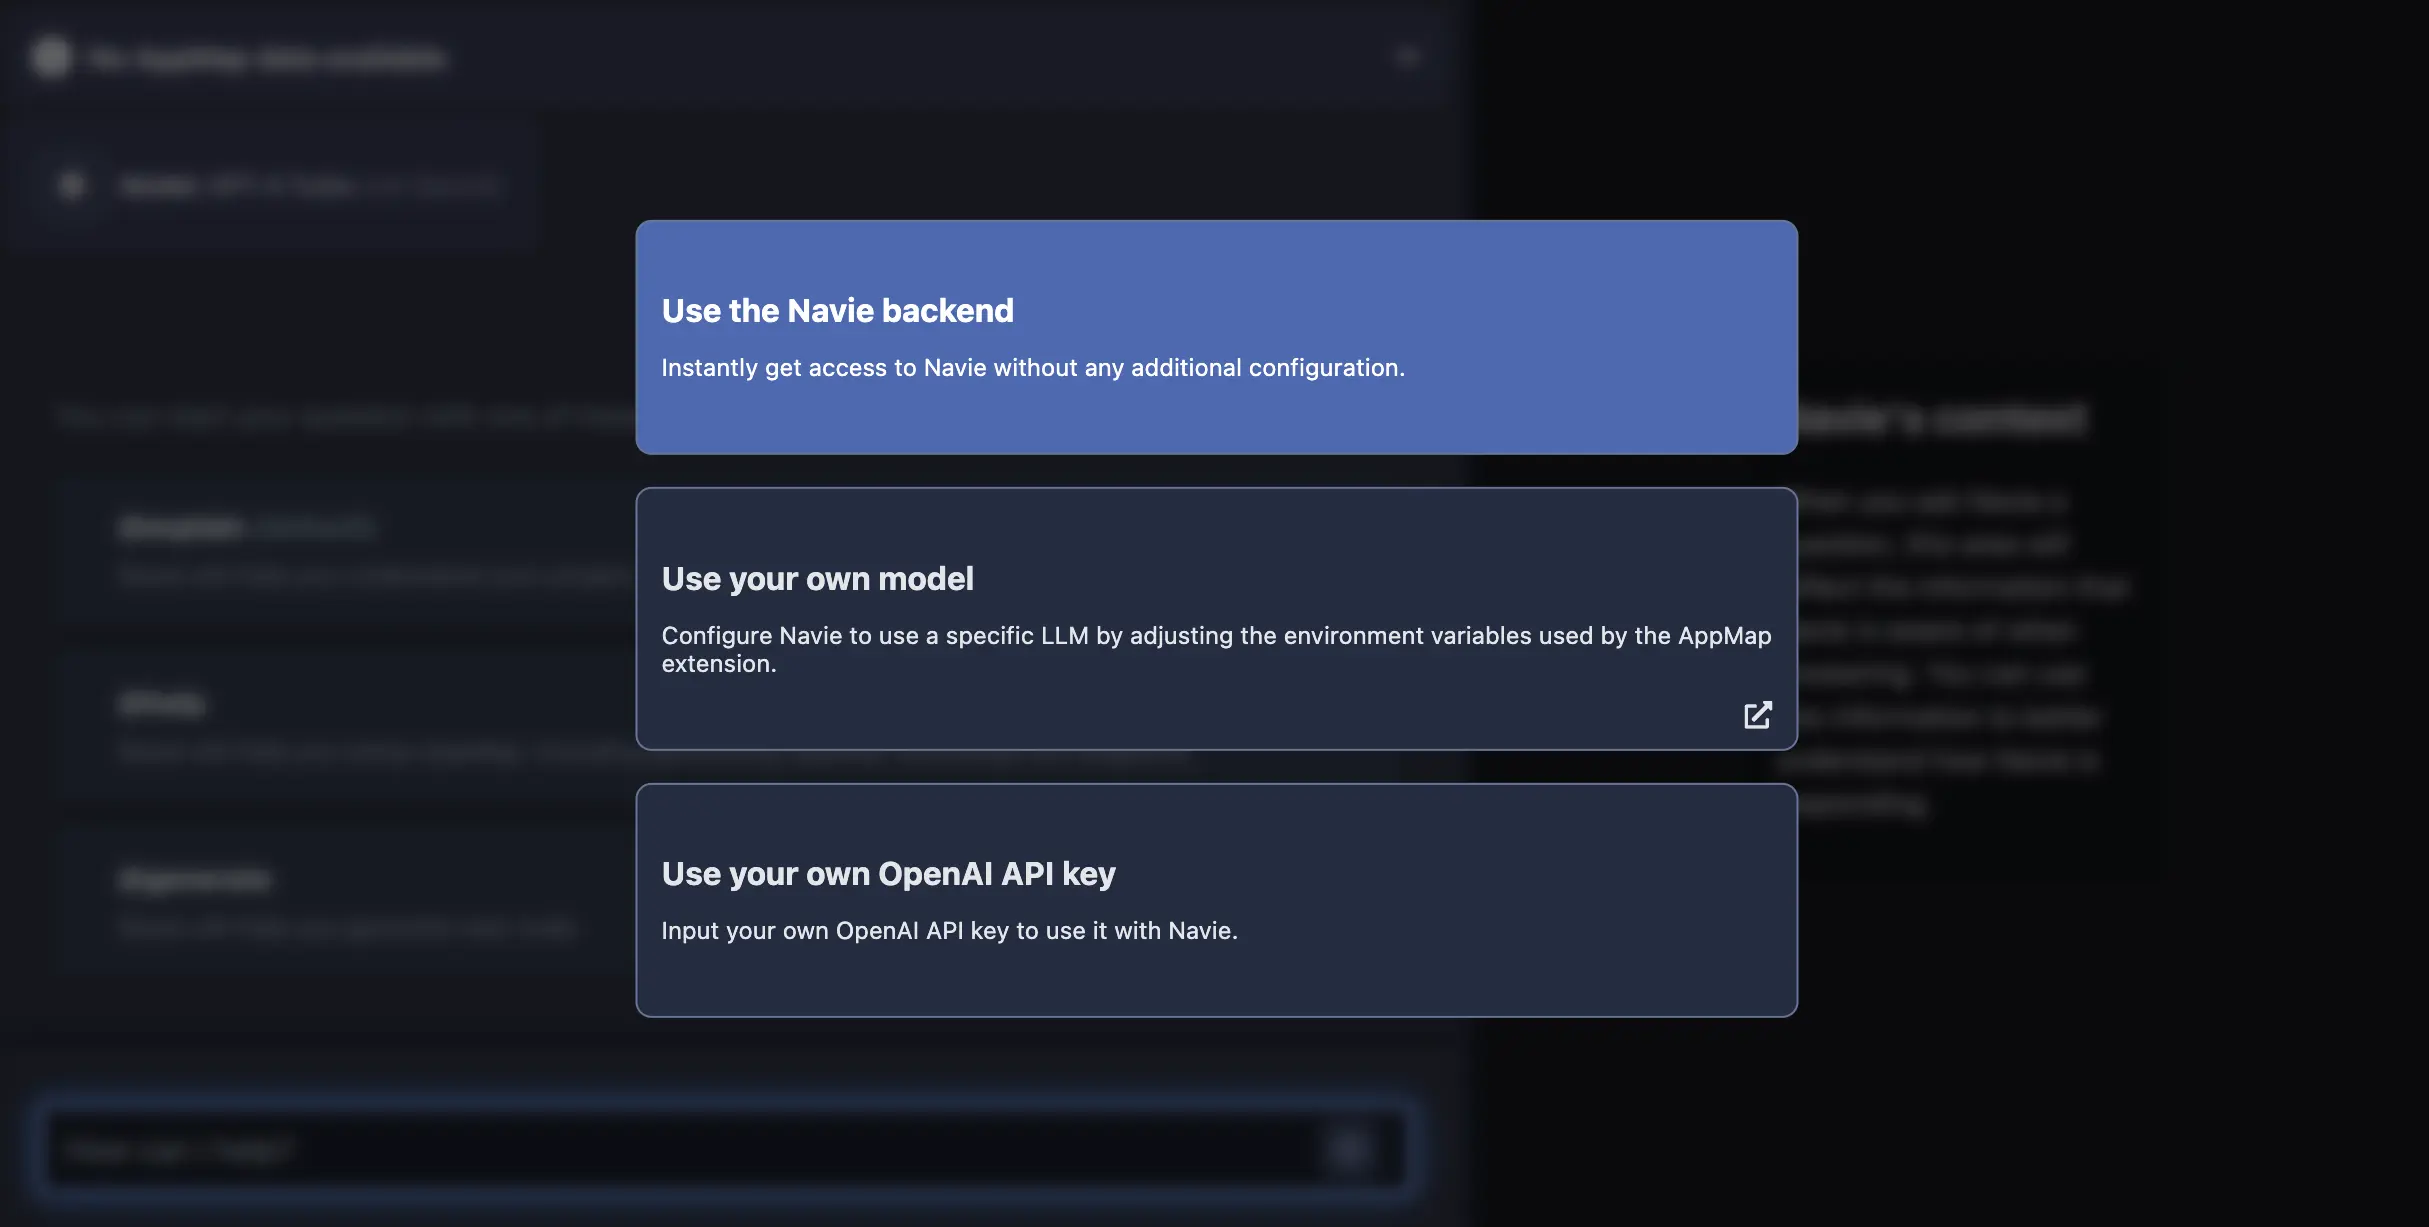
Bring Your Own Anthropic (Claude) API Key (BYOK)
AppMap supports the Anthropic suite of large language models such as Claude Sonnet or Claude Opus.
To use AppMap Navie with Anthropic LLMs you need to generate an API key for your account.
Login to your Anthropic dashboard, and choose the option to “Get API Keys”
Click the box to “Create Key”

In the next box, give your key an easy to recognize name.
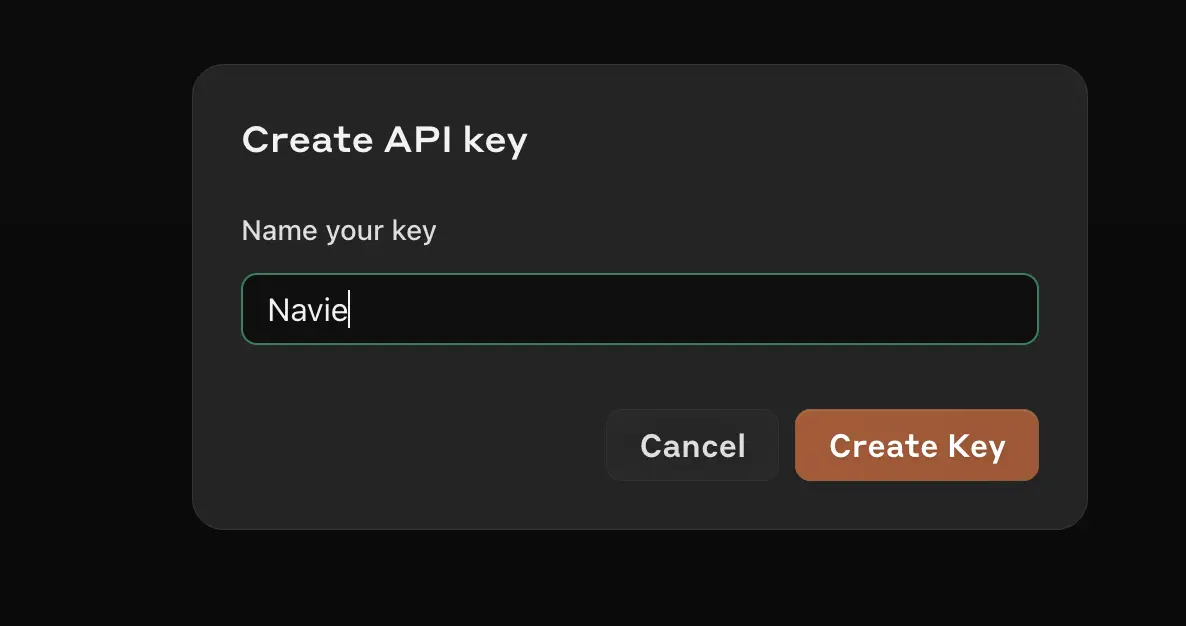
In your VS Code or JetBrains editor, configure the following environment variables. For more details on configuring these environment variables in your VS Code or JetBrains editor, refer to the AppMap BOYK documentation.
ANTHROPIC_API_KEY=sk-ant-api03-12...
APPMAP_NAVIE_MODEL=claude-3-5-sonnet-20240620
When setting the
APPMAP_NAVIE_MODELrefer to the Anthropic documentation for the latest available models to chose from.Bring Your Own Model (BYOM)
This feature is in early access. We recommend choosing a model that is trained on a large corpus of both human-written natural language and code.
Navie currently supports any OpenAI-compatible model running locally or remotely. When configured like this, as in the BYOK case, Navie won’t contact the AppMap hosted proxy and your conversations will stay private between you and the model provider.
Configuration
We only recommend setting the environment variables below for advanced users. These settings will override any settings configured with the "gear" icon in your code editor. Unset these environment variables before using the "gear" icon to configure your model.In order to configure Navie for your own LLM, certain environment variables need to be set for AppMap services.
You can use the following variables to direct Navie to use any LLM with an OpenAI-compatible API. If only the API key is set, Navie will connect to OpenAI.com by default.
-
OPENAI_API_KEY— API key to use with OpenAI API. -
OPENAI_BASE_URL— base URL for OpenAI API (defaults to the OpenAI.com endpoint). -
APPMAP_NAVIE_MODEL— name of the model to use (the default is GPT-4). -
APPMAP_NAVIE_TOKEN_LIMIT— maximum context size in tokens (default 8000).
For Azure OpenAI, you need to create a deployment and use these variables instead:
-
AZURE_OPENAI_API_KEY— API key to use with Azure OpenAI API. -
AZURE_OPENAI_API_VERSION— API version to use when communicating with Azure OpenAI, eg.2024-02-01 -
AZURE_OPENAI_API_INSTANCE_NAME— Azure OpenAI instance name (ie. the part of the URL beforeopenai.azure.com) -
AZURE_OPENAI_API_DEPLOYMENT_NAME— Azure OpenAI deployment name.
Configuring in JetBrains
Configuring in VS CodeConfiguring in JetBrains
In JetBrains, go to settings.
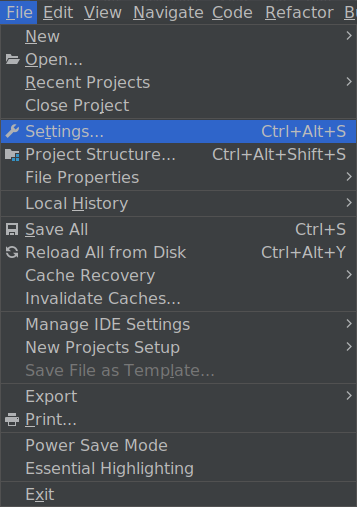
Go to Tools → AppMap.
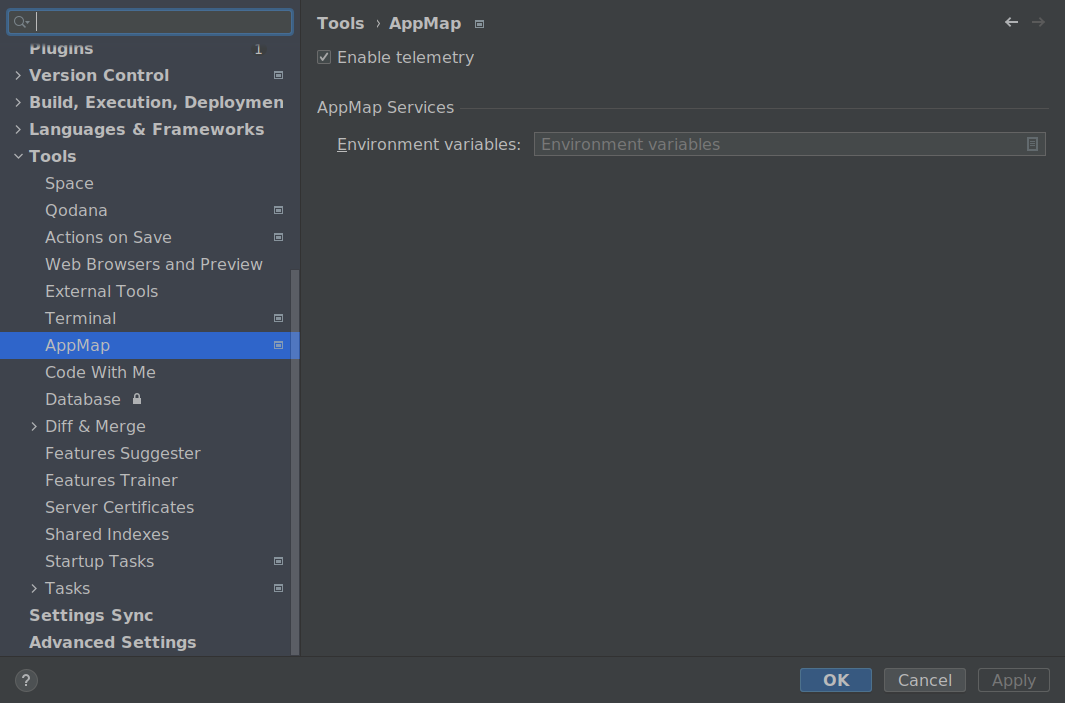
Enter the environment editor.
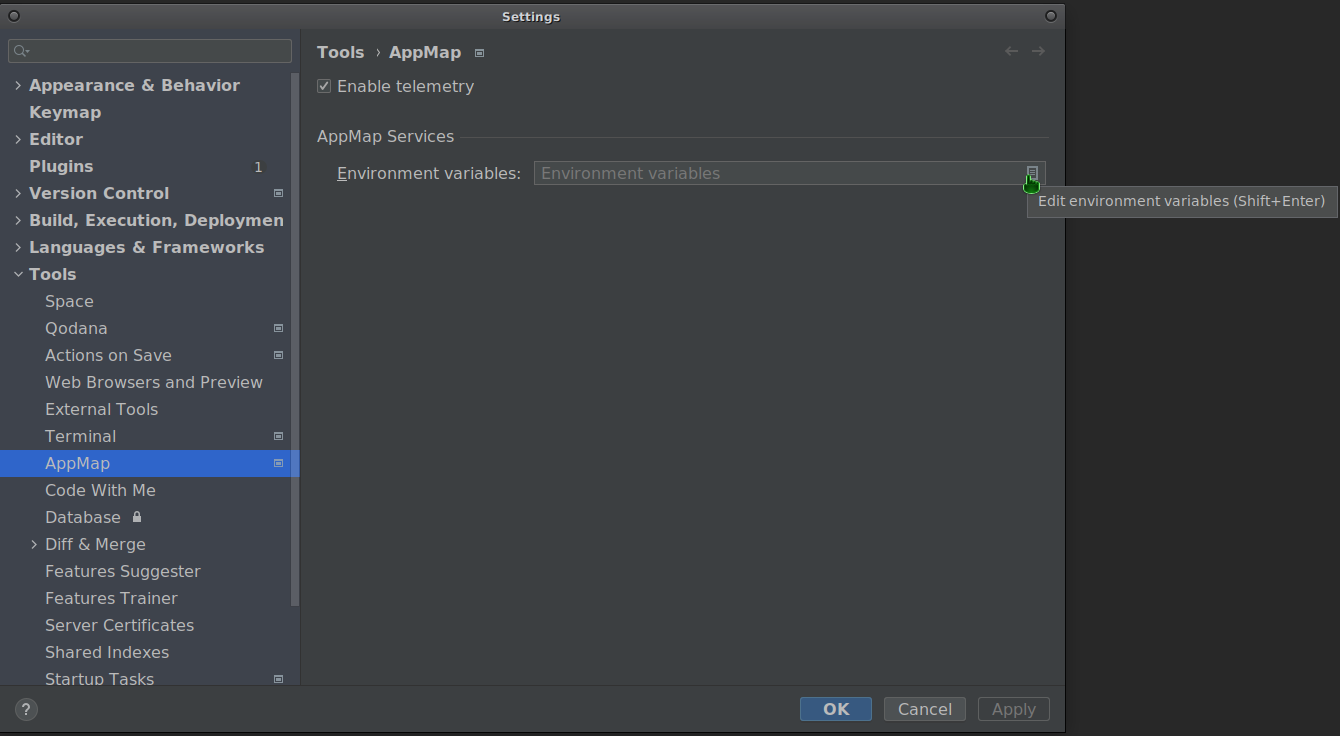
Use the editor to define the relevant environment variables according to the BYOM documentation.
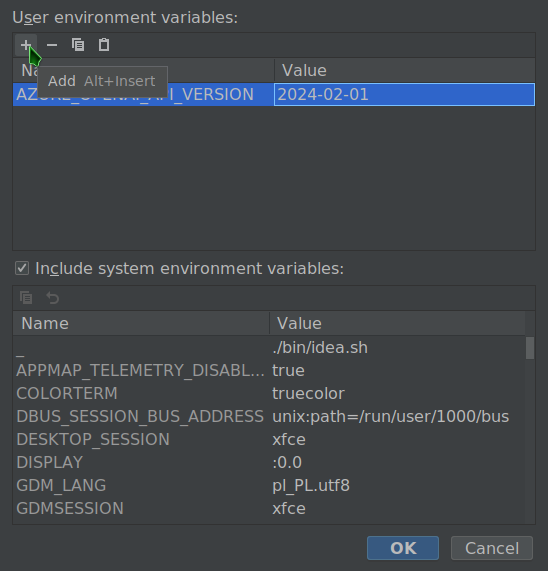
Reload your IDE for the changes to take effect.
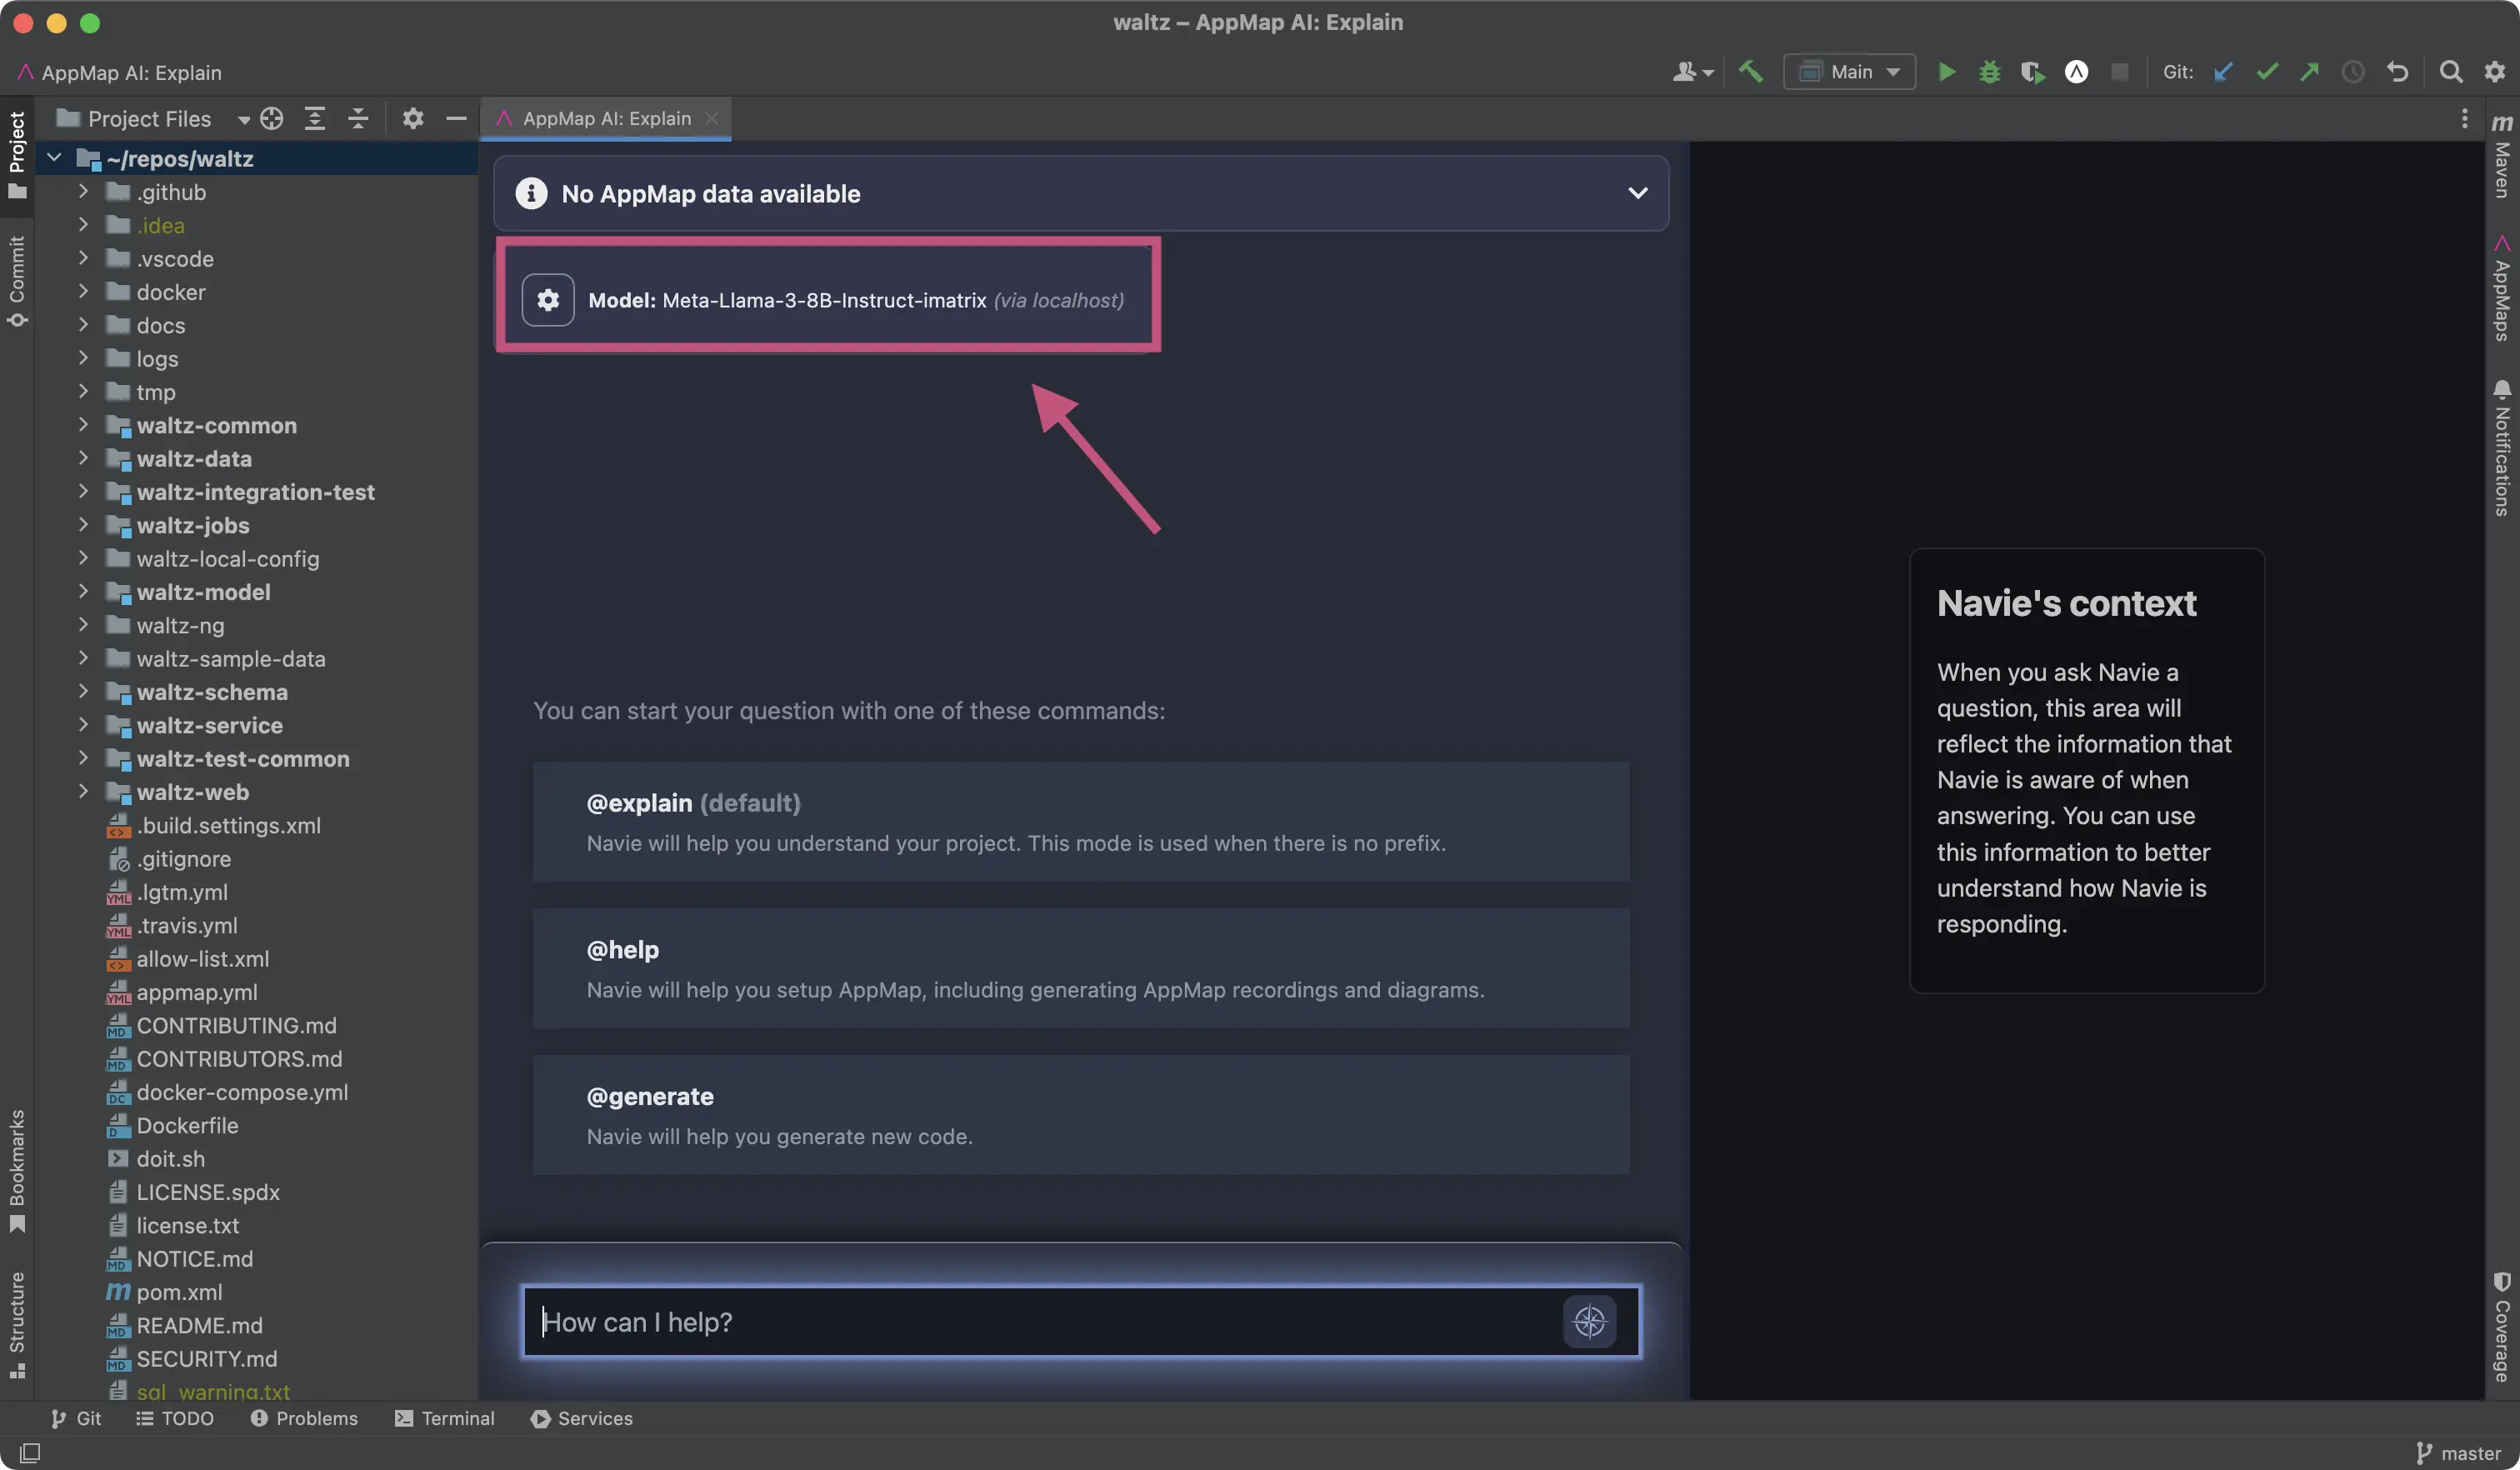
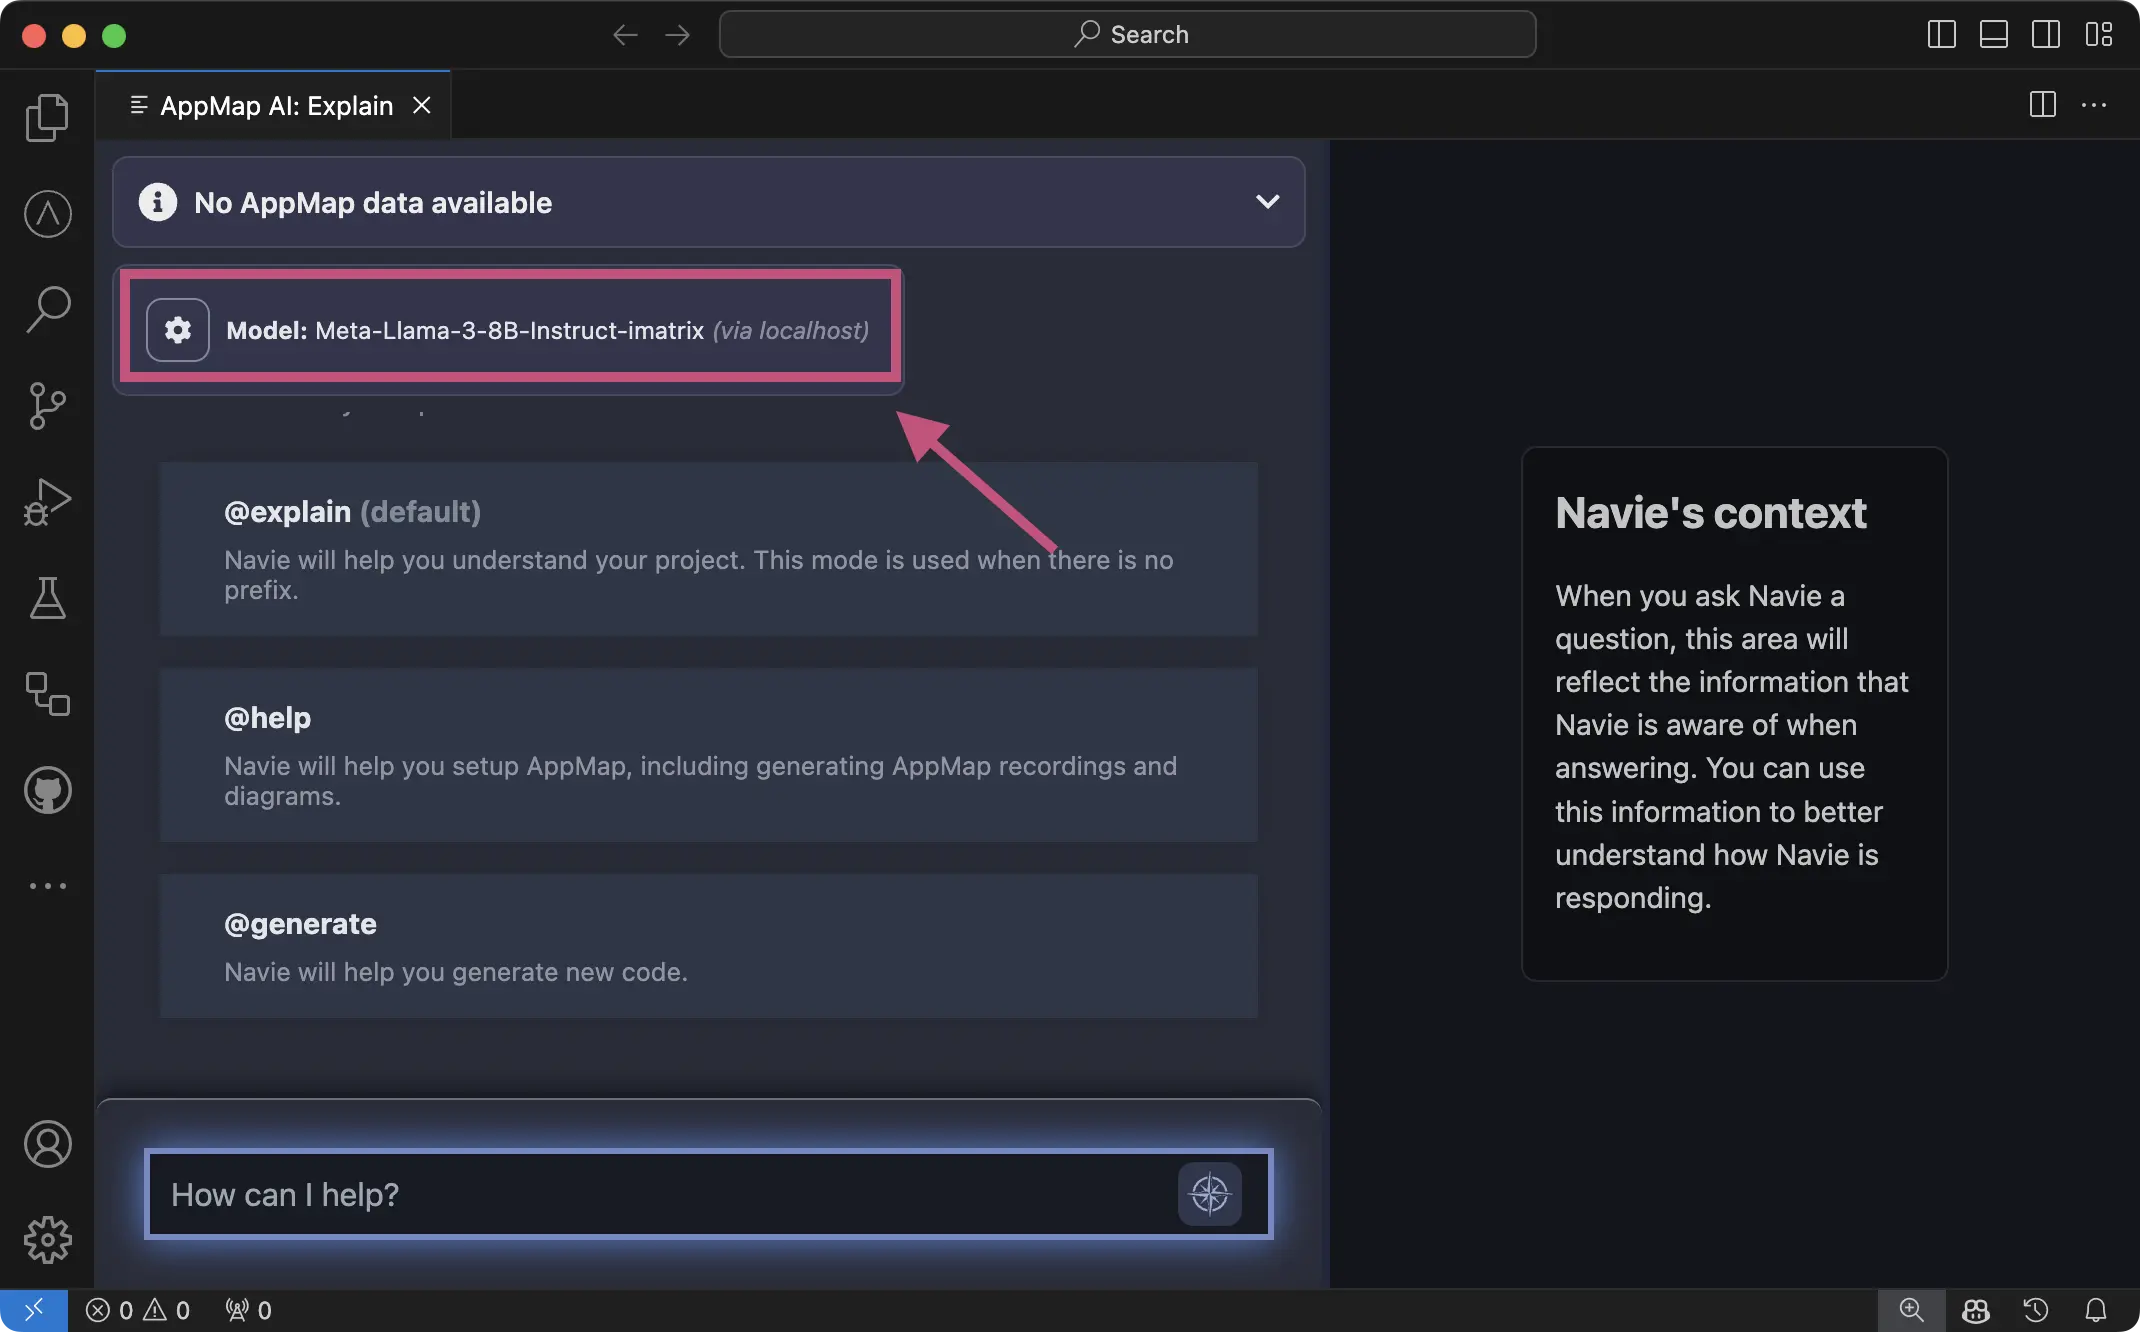
After reloading you can confirm the model is configured correctly in the Navie Chat window.
Configuring in VS Code
Editing AppMap services environment
In VS Code, go to settings.
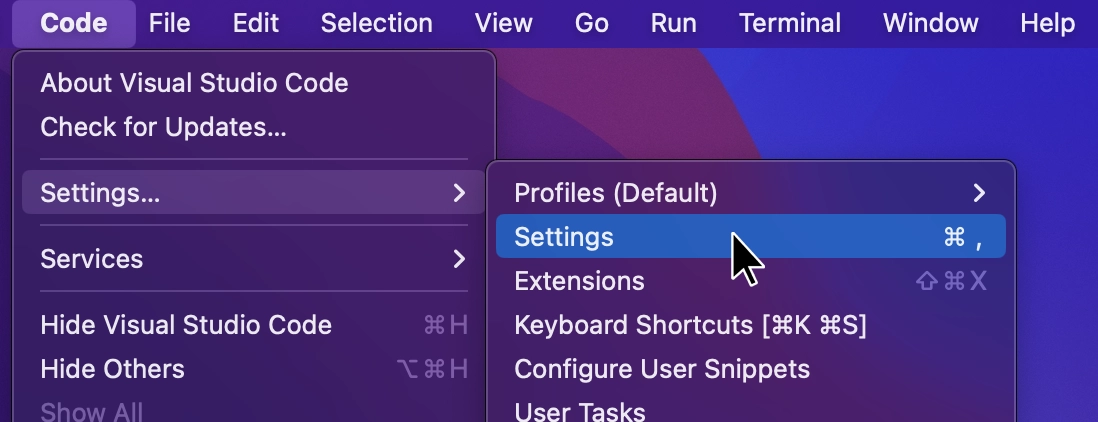
Search for “appmap environment” to reveal “AppMap: Command Line Environment” setting.
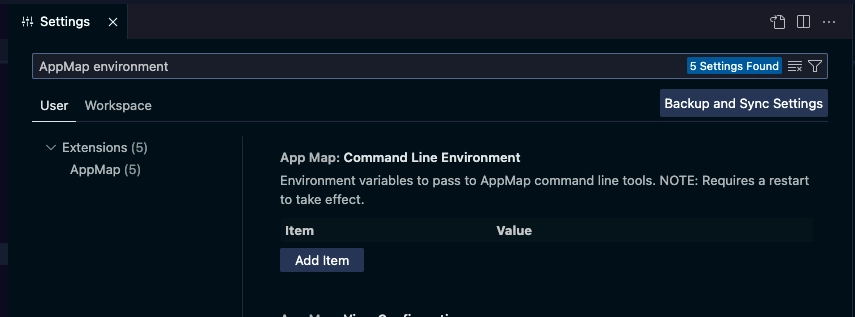
Use Add Item to define the relevant environment variables according to the BYOM documentation.

Reload your VS Code for the changes to take effect.
After reloading you can confirm the model is configured correctly in the Navie Chat window.
Examples
Refer to the Navie Reference Guide for detailed examples of using Navie with your own LLM backend.
Thank you for your feedback!
